For week 2, our project involved learning to operate the FabLab's Shaper handheld CNC router to create a personalized desktop organizer from a 12.5in x 8.5in block of birch. I designed my organizer using a free CAD software called Fusion 360. After designing and getting machine training from my professor, I went to work!
I started drafting with the traditional pad and paper to sketch out ideas for my initial design. I say "initial" because, after hearing how long large pocket cuts take, I had to change my design. This initial plan included
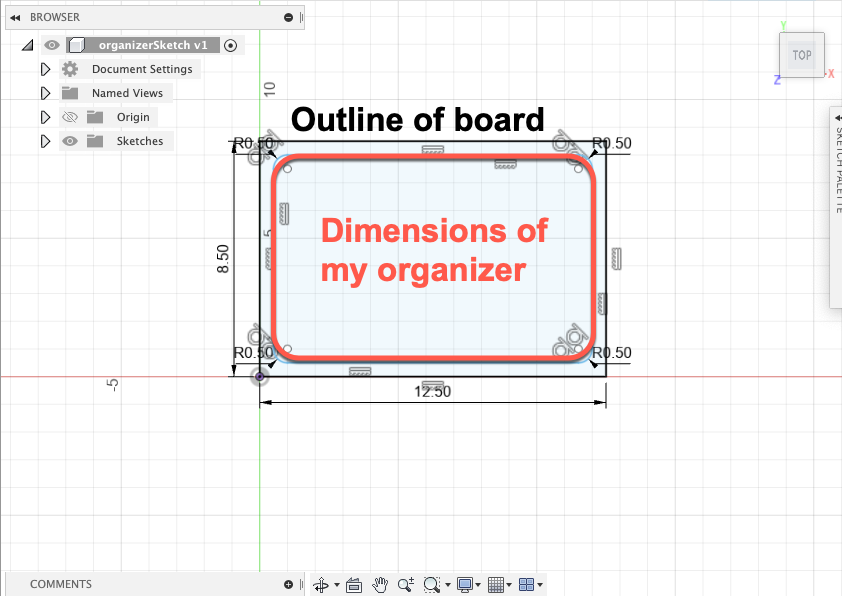
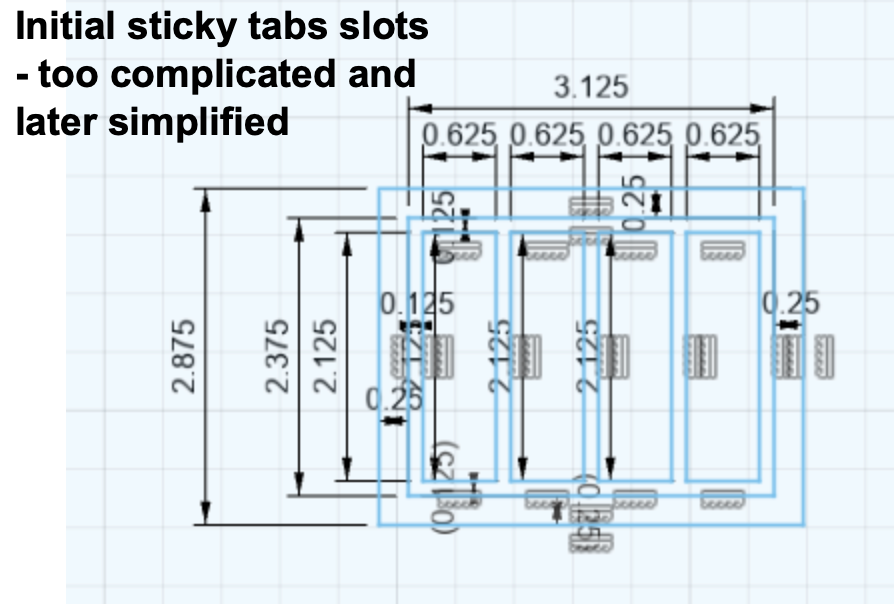
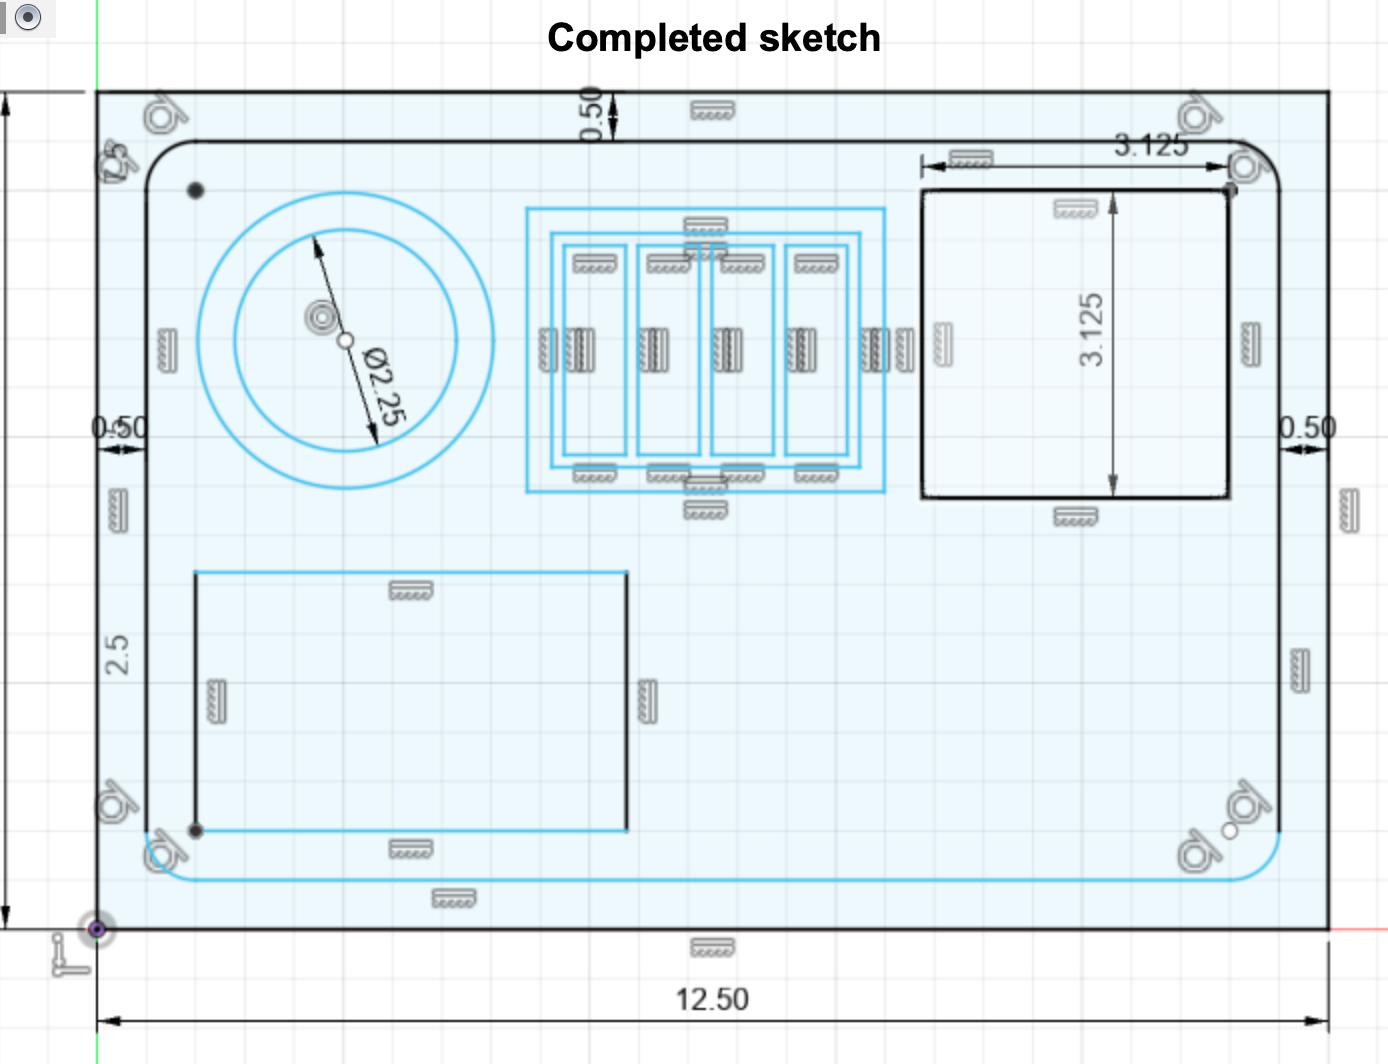
a slot for my sticky note pad, my mouse, 4 sticky note tabs, and a required 3-inch circle. After taking some measurements of my objects,
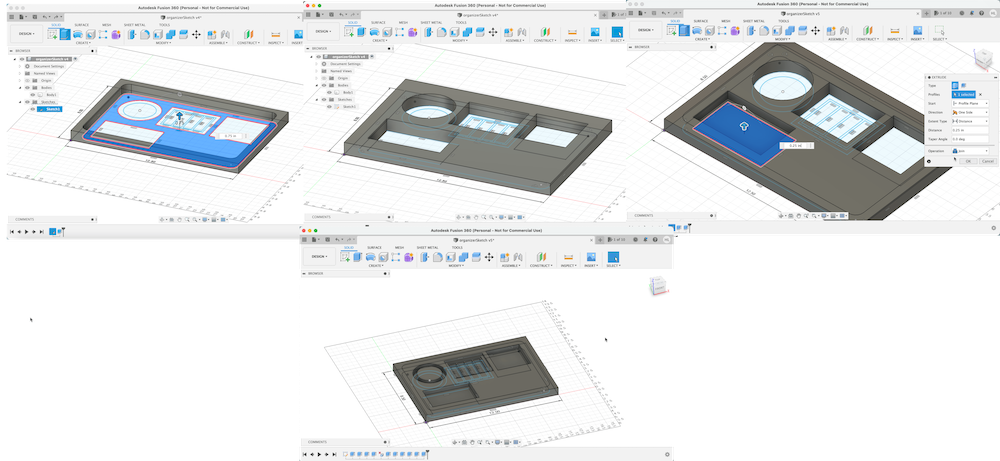
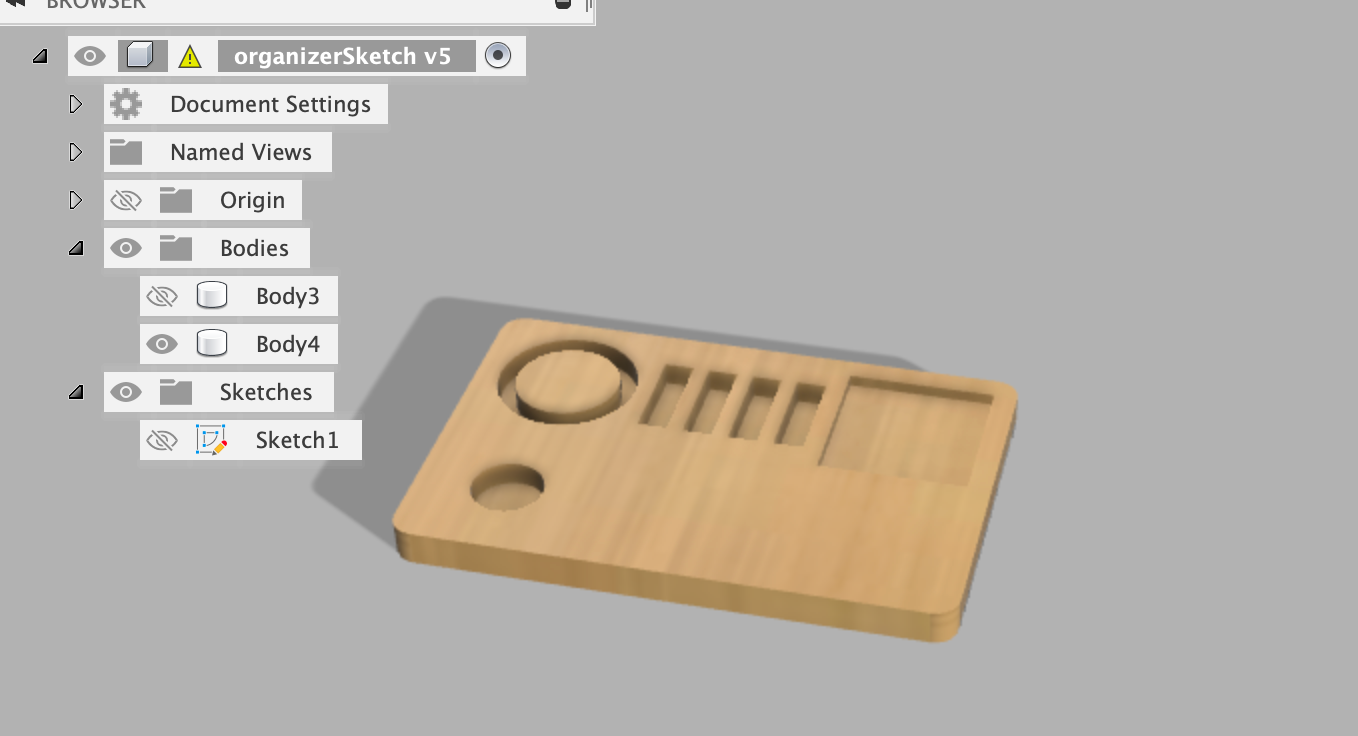
I began a sketch in Fusion 360. I added dimensions based on my measurements and spent a lot of time ensuring that the objects would actually fit in their designated spot.
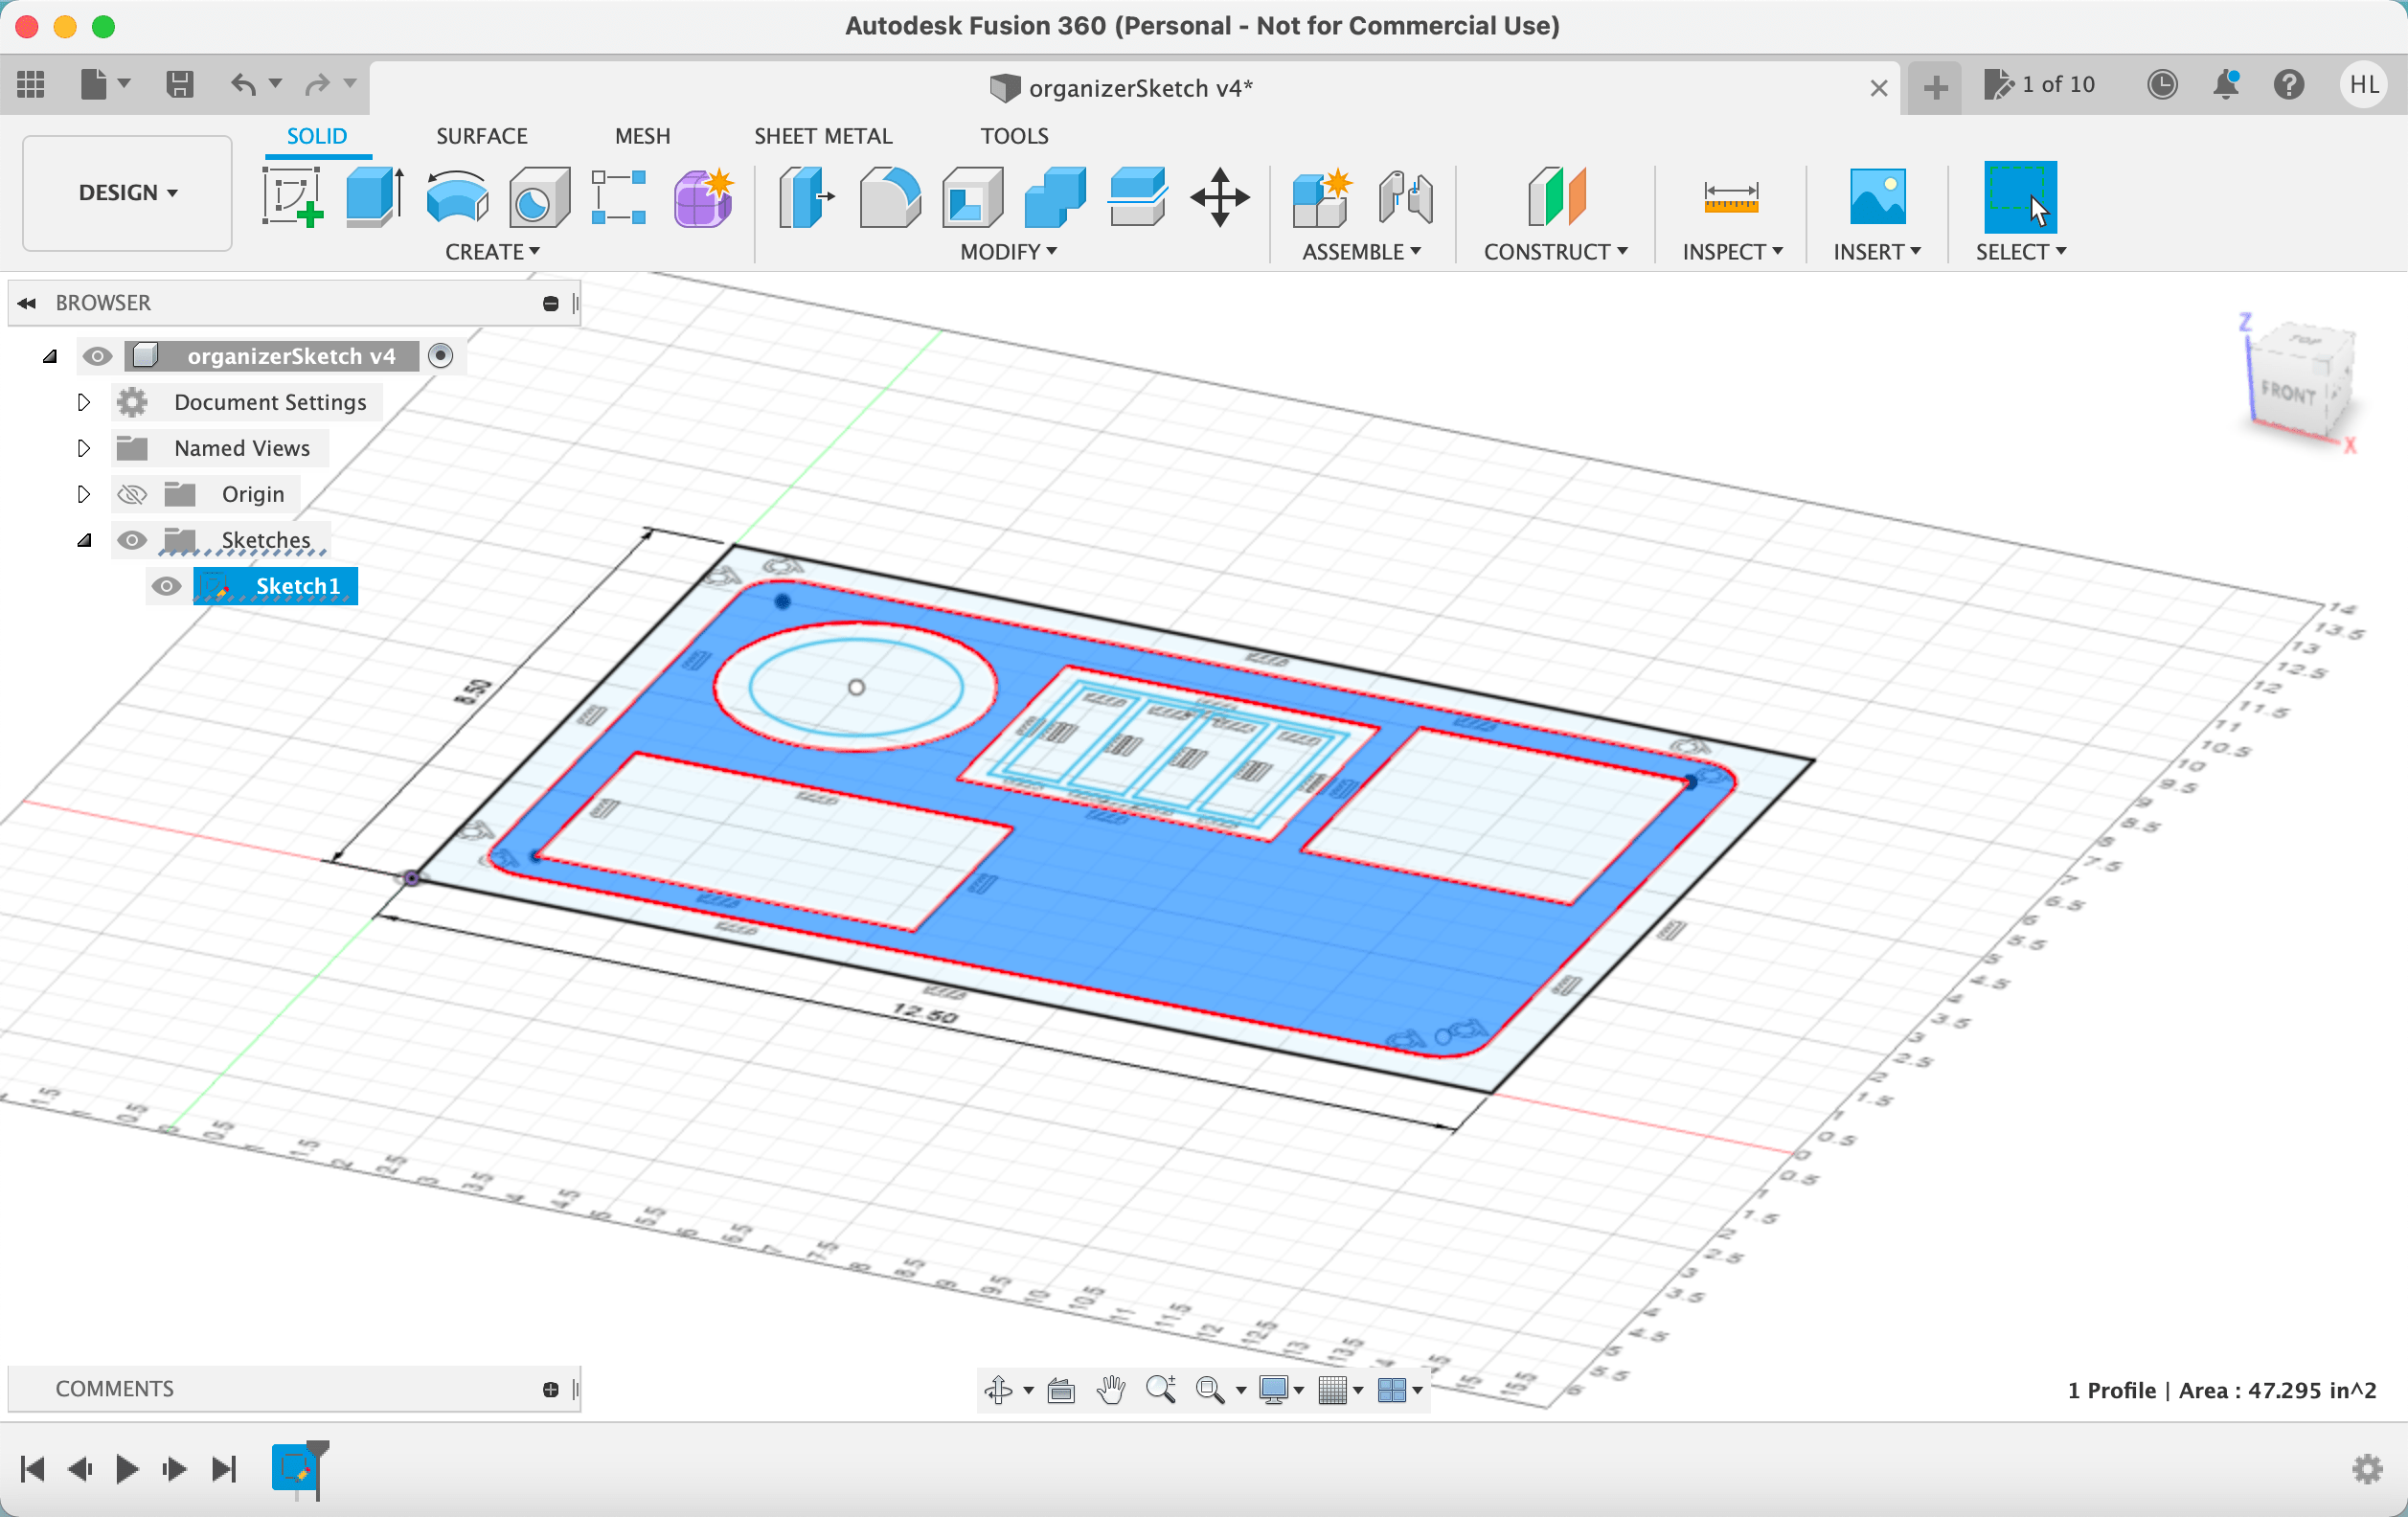
Next, I "extruded" the design, giving it three-dimensions and specifying the depth of each pocket.
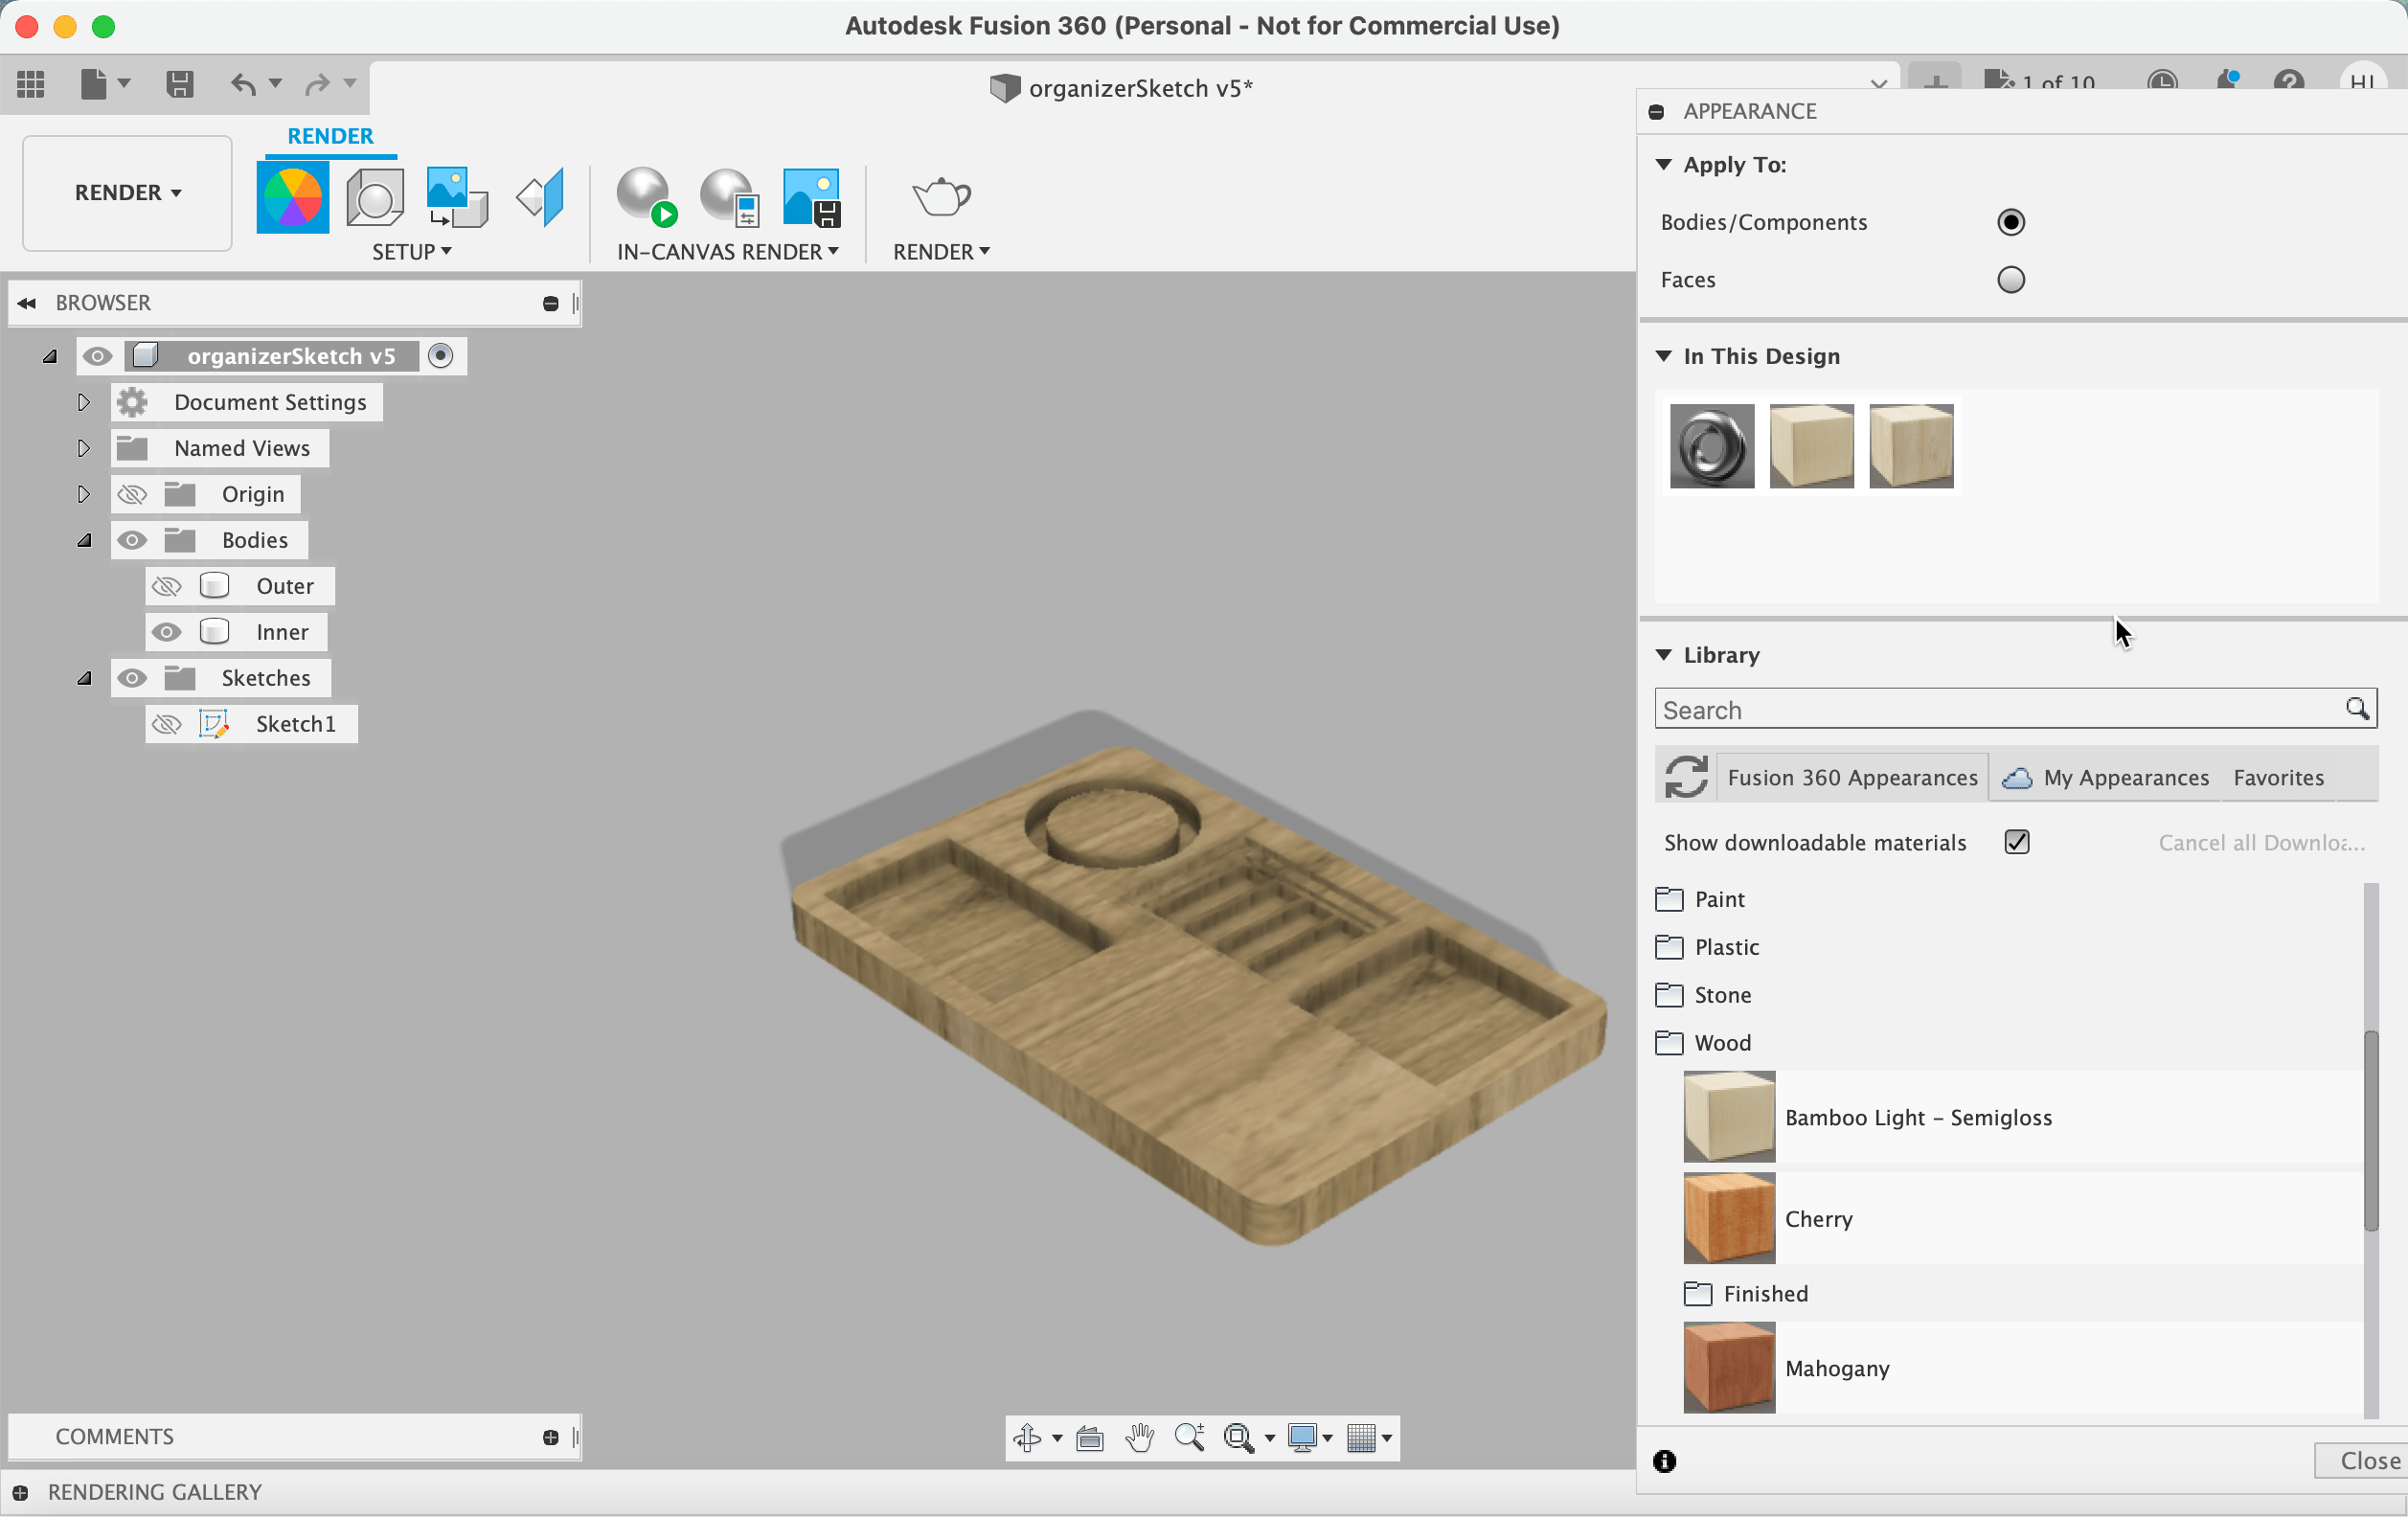
This also allowed me to render the sketch and apply a wood texture to see what my final product would look like.
After creating this design, I had training with Madison, and learned about the different kinds of cuts the shaper is capable of.
After using the machine during my training, I realized I had been overly ambitious at the beginning and decided I needed to downsize my design. Pocket cuts take a lot of time, and my mouse slot was way to big to be feasibly completed. So it was back to the drawing board.
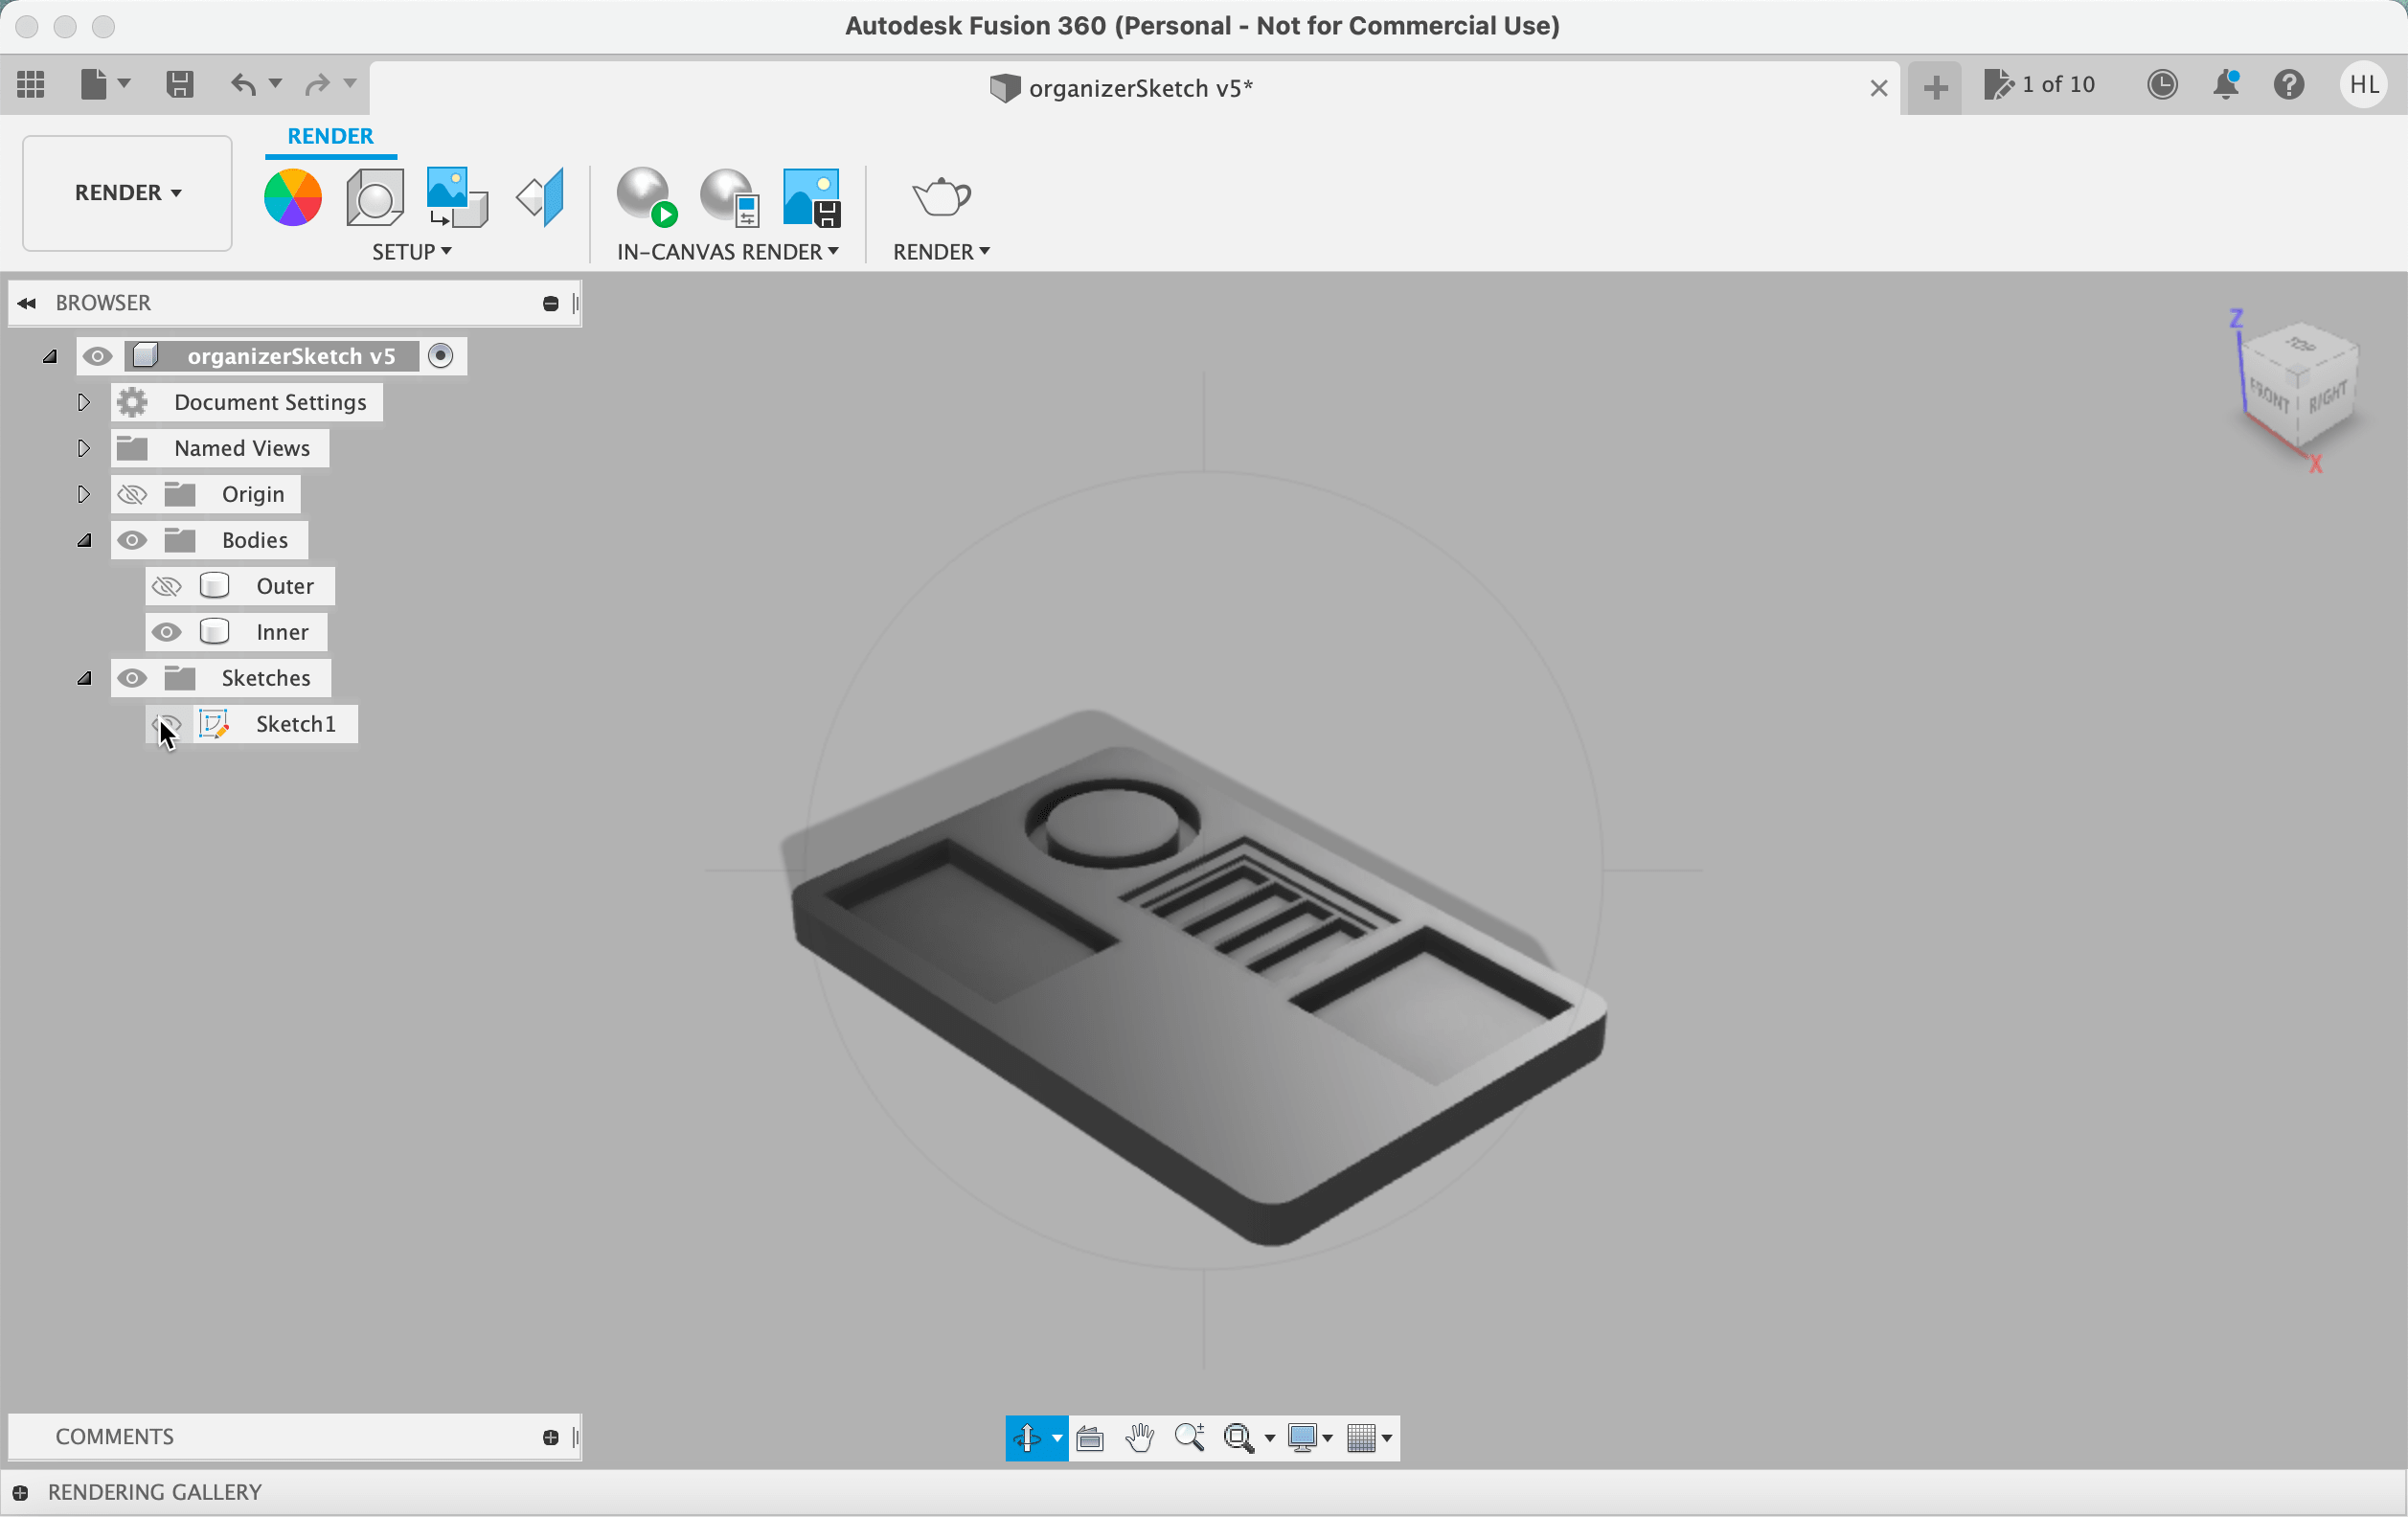
I replaced my mouse slot with a slot for productivity crystals, to add some extra good vibes to my desktop space. I also simplified the slots for the sticky tabs. With a new, more reasonable design, I moved on to the next steps.

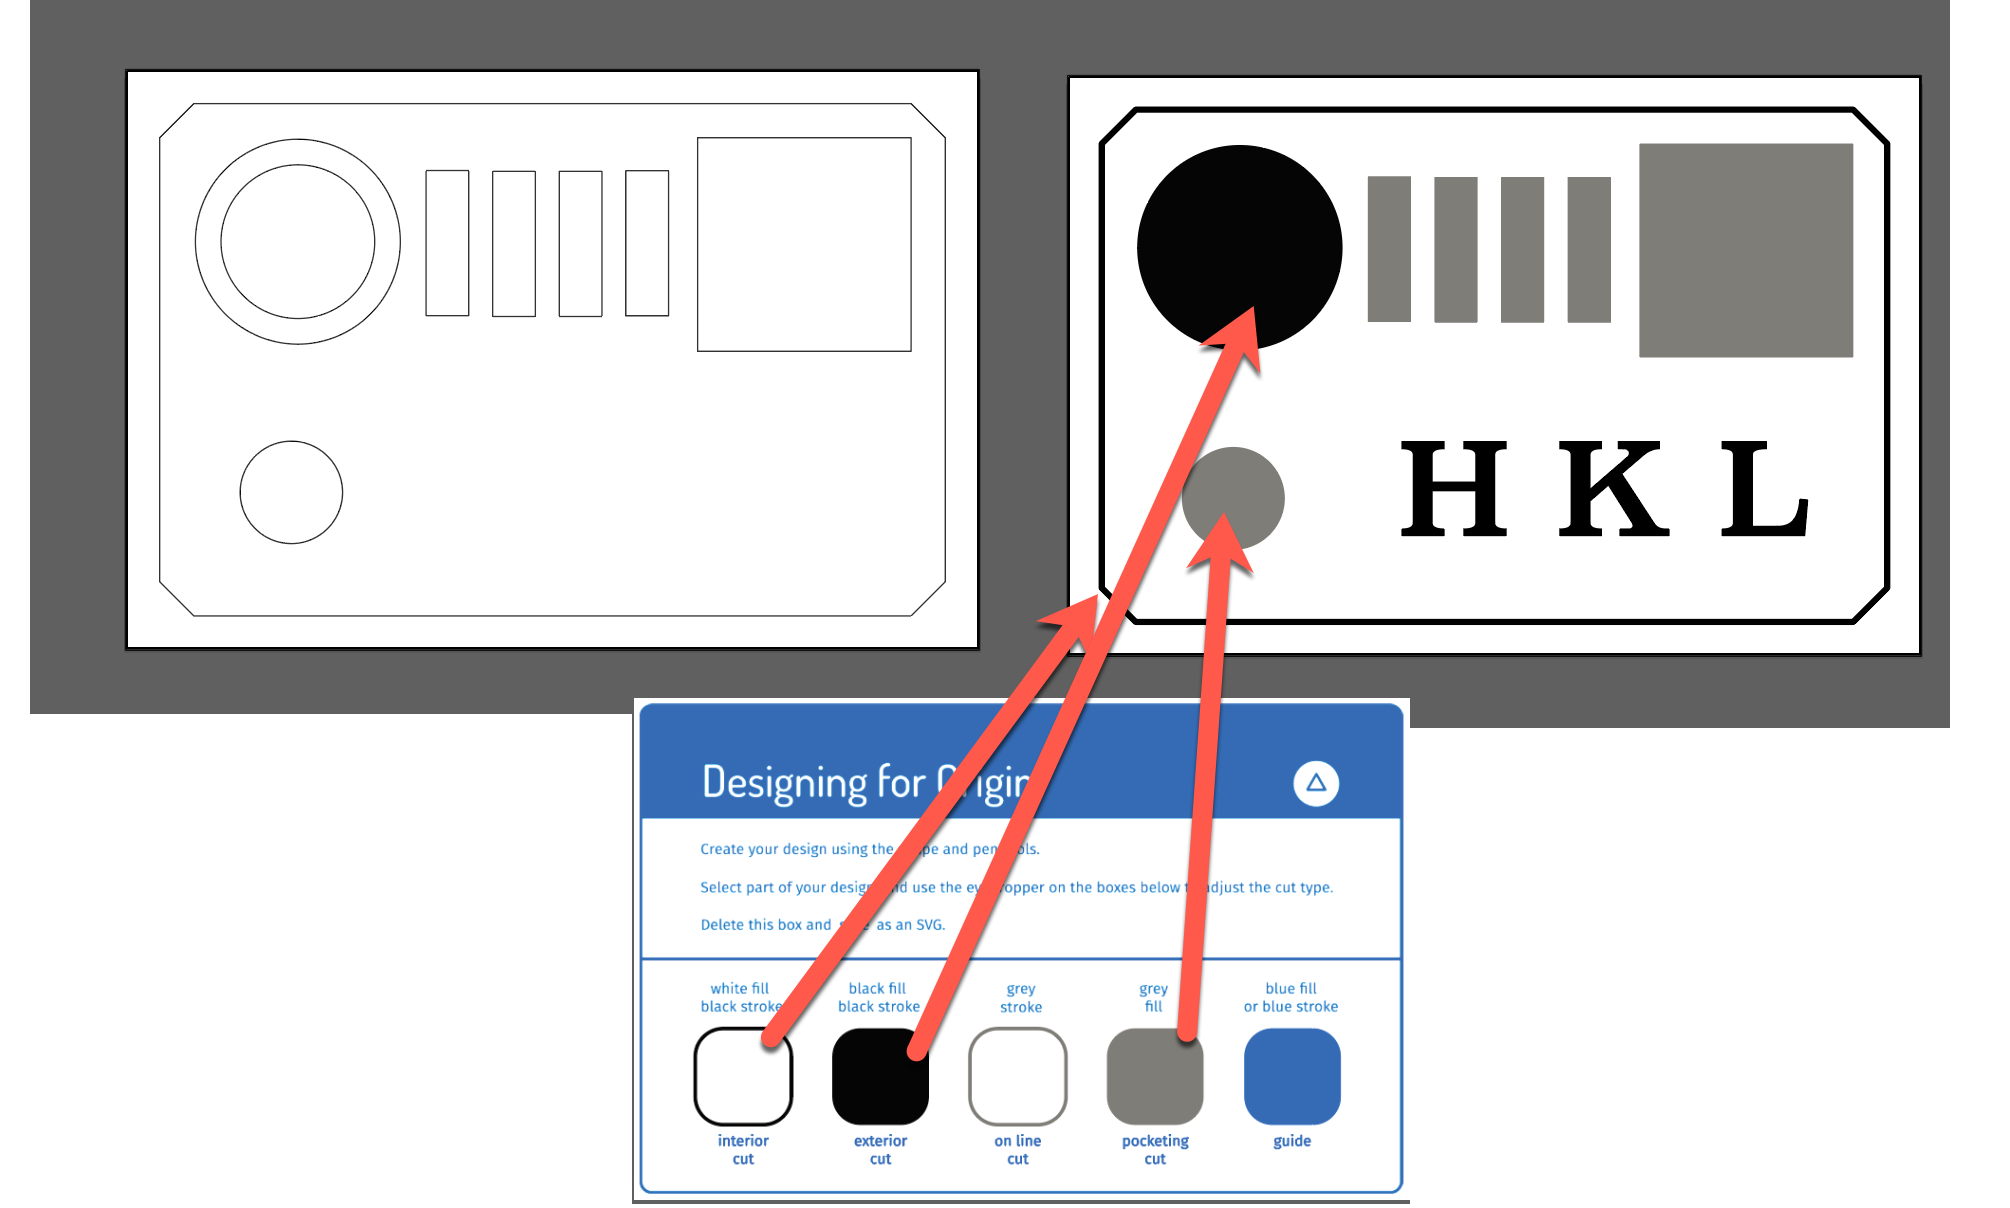
I exported my Fusion 360 sketch as a DXG, converted it to an ai file using an online converter, then opened it in Adobe Illustrator. After resizing, I color-coded my
cuts using a default template and added my initials, and with that, my design was complete!

There were definitely a handful of hiccups that occurred during the actual making process - but that's what learning is all about!
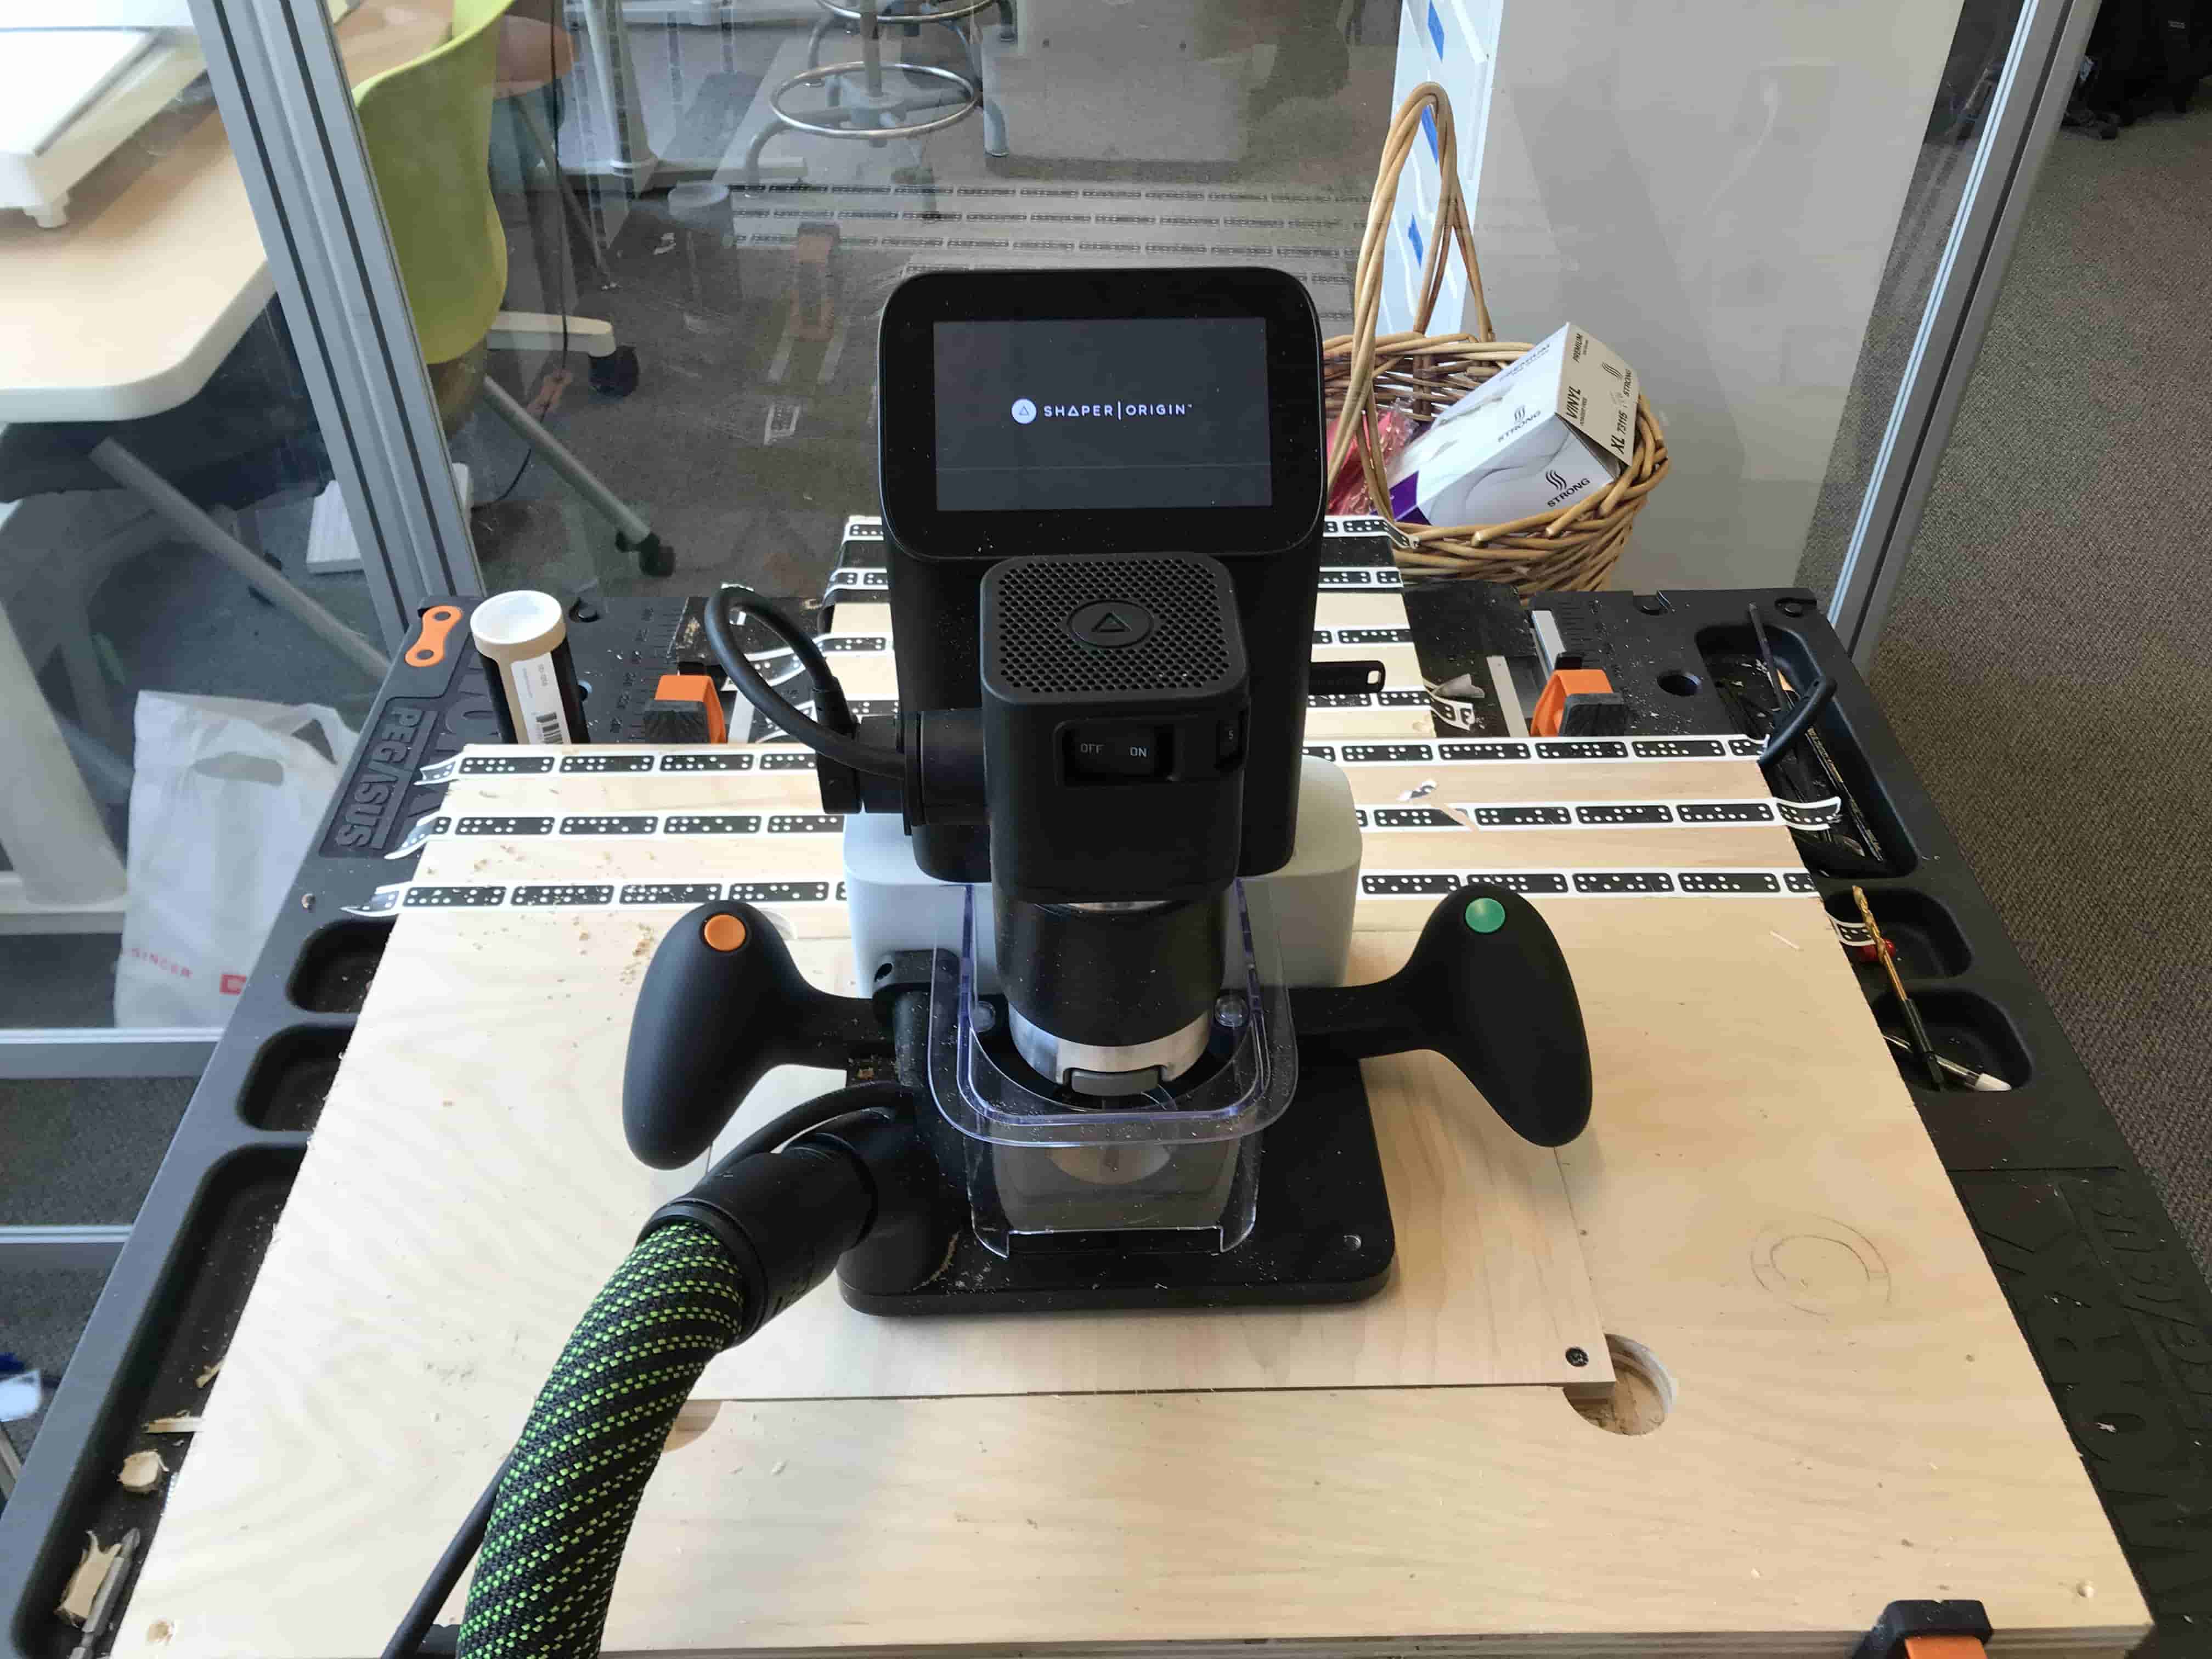
The machine used was a Shaper handheld CNC router, which uses subtractive manufacturing and cuts AWAY material. It also employs realtime photogrammatery to scan your workspace!
I uploaded my SVG design file to the Shaper's USB then placed my design via the touchscreen interface in the proper location on the board. With my design in place, I tied my hair back, threw on my
some ear protection and got to work!
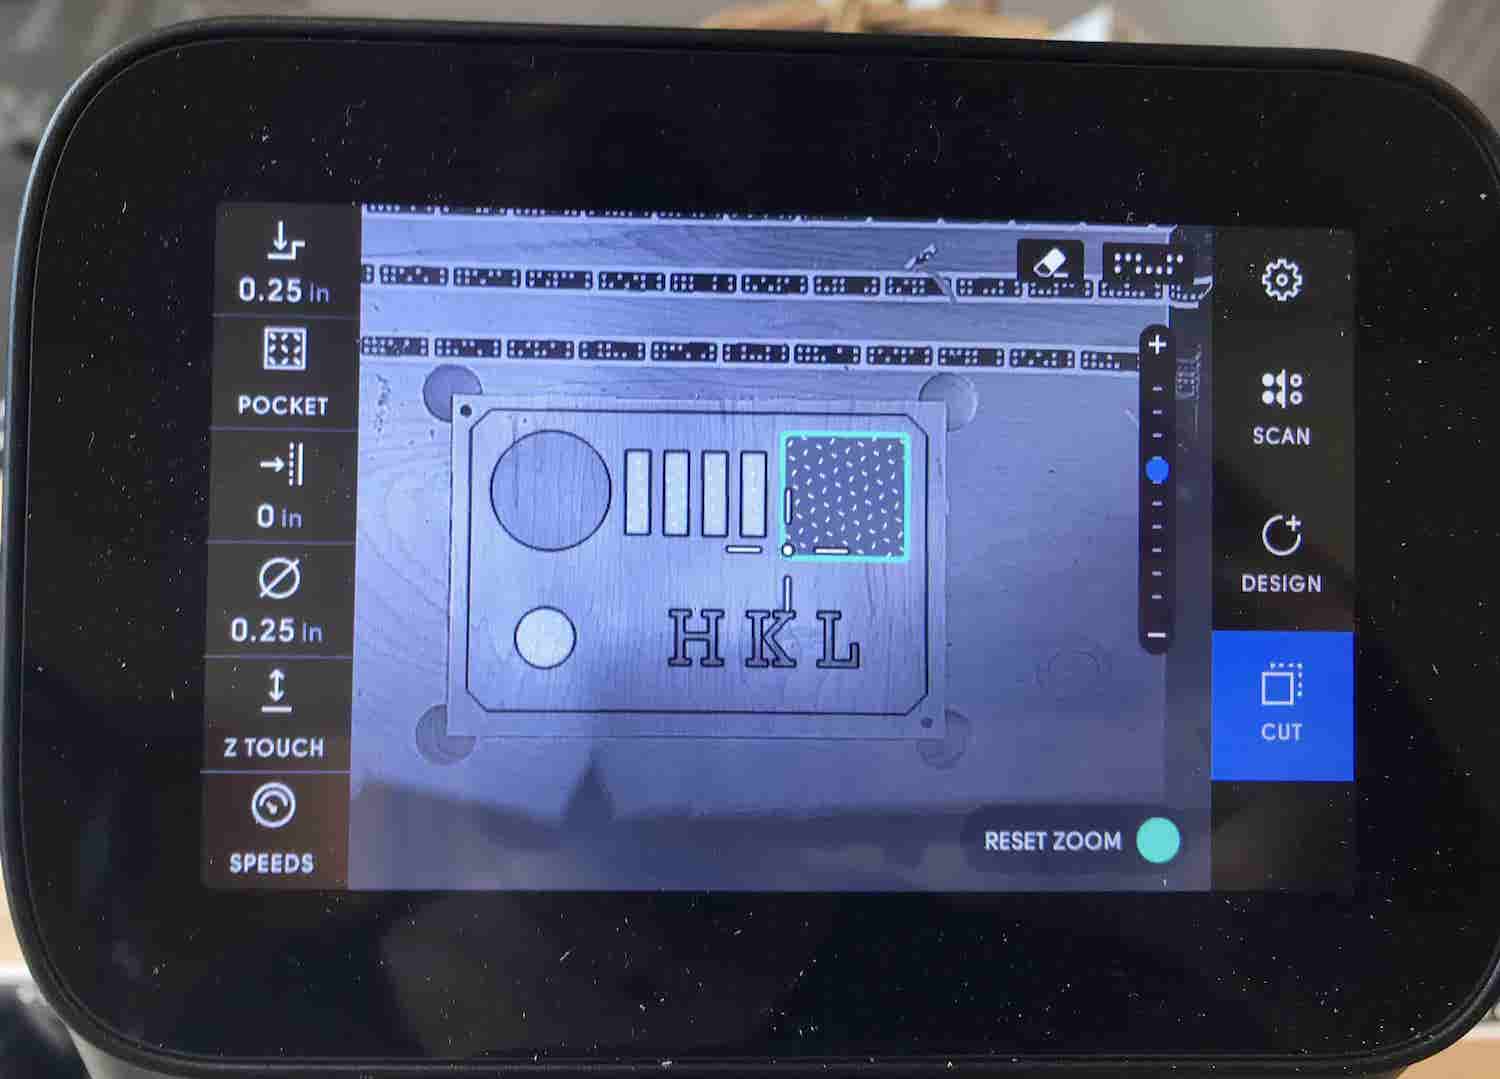
I used a 1/4 up-spiral end mill to make the pocket cuts for my sticky note pad, sticky tabs, and crystal. Pocket cuts are very time consuming, and also use a lot of arm strength - I was
very relieved I had ditched my mouse slot!
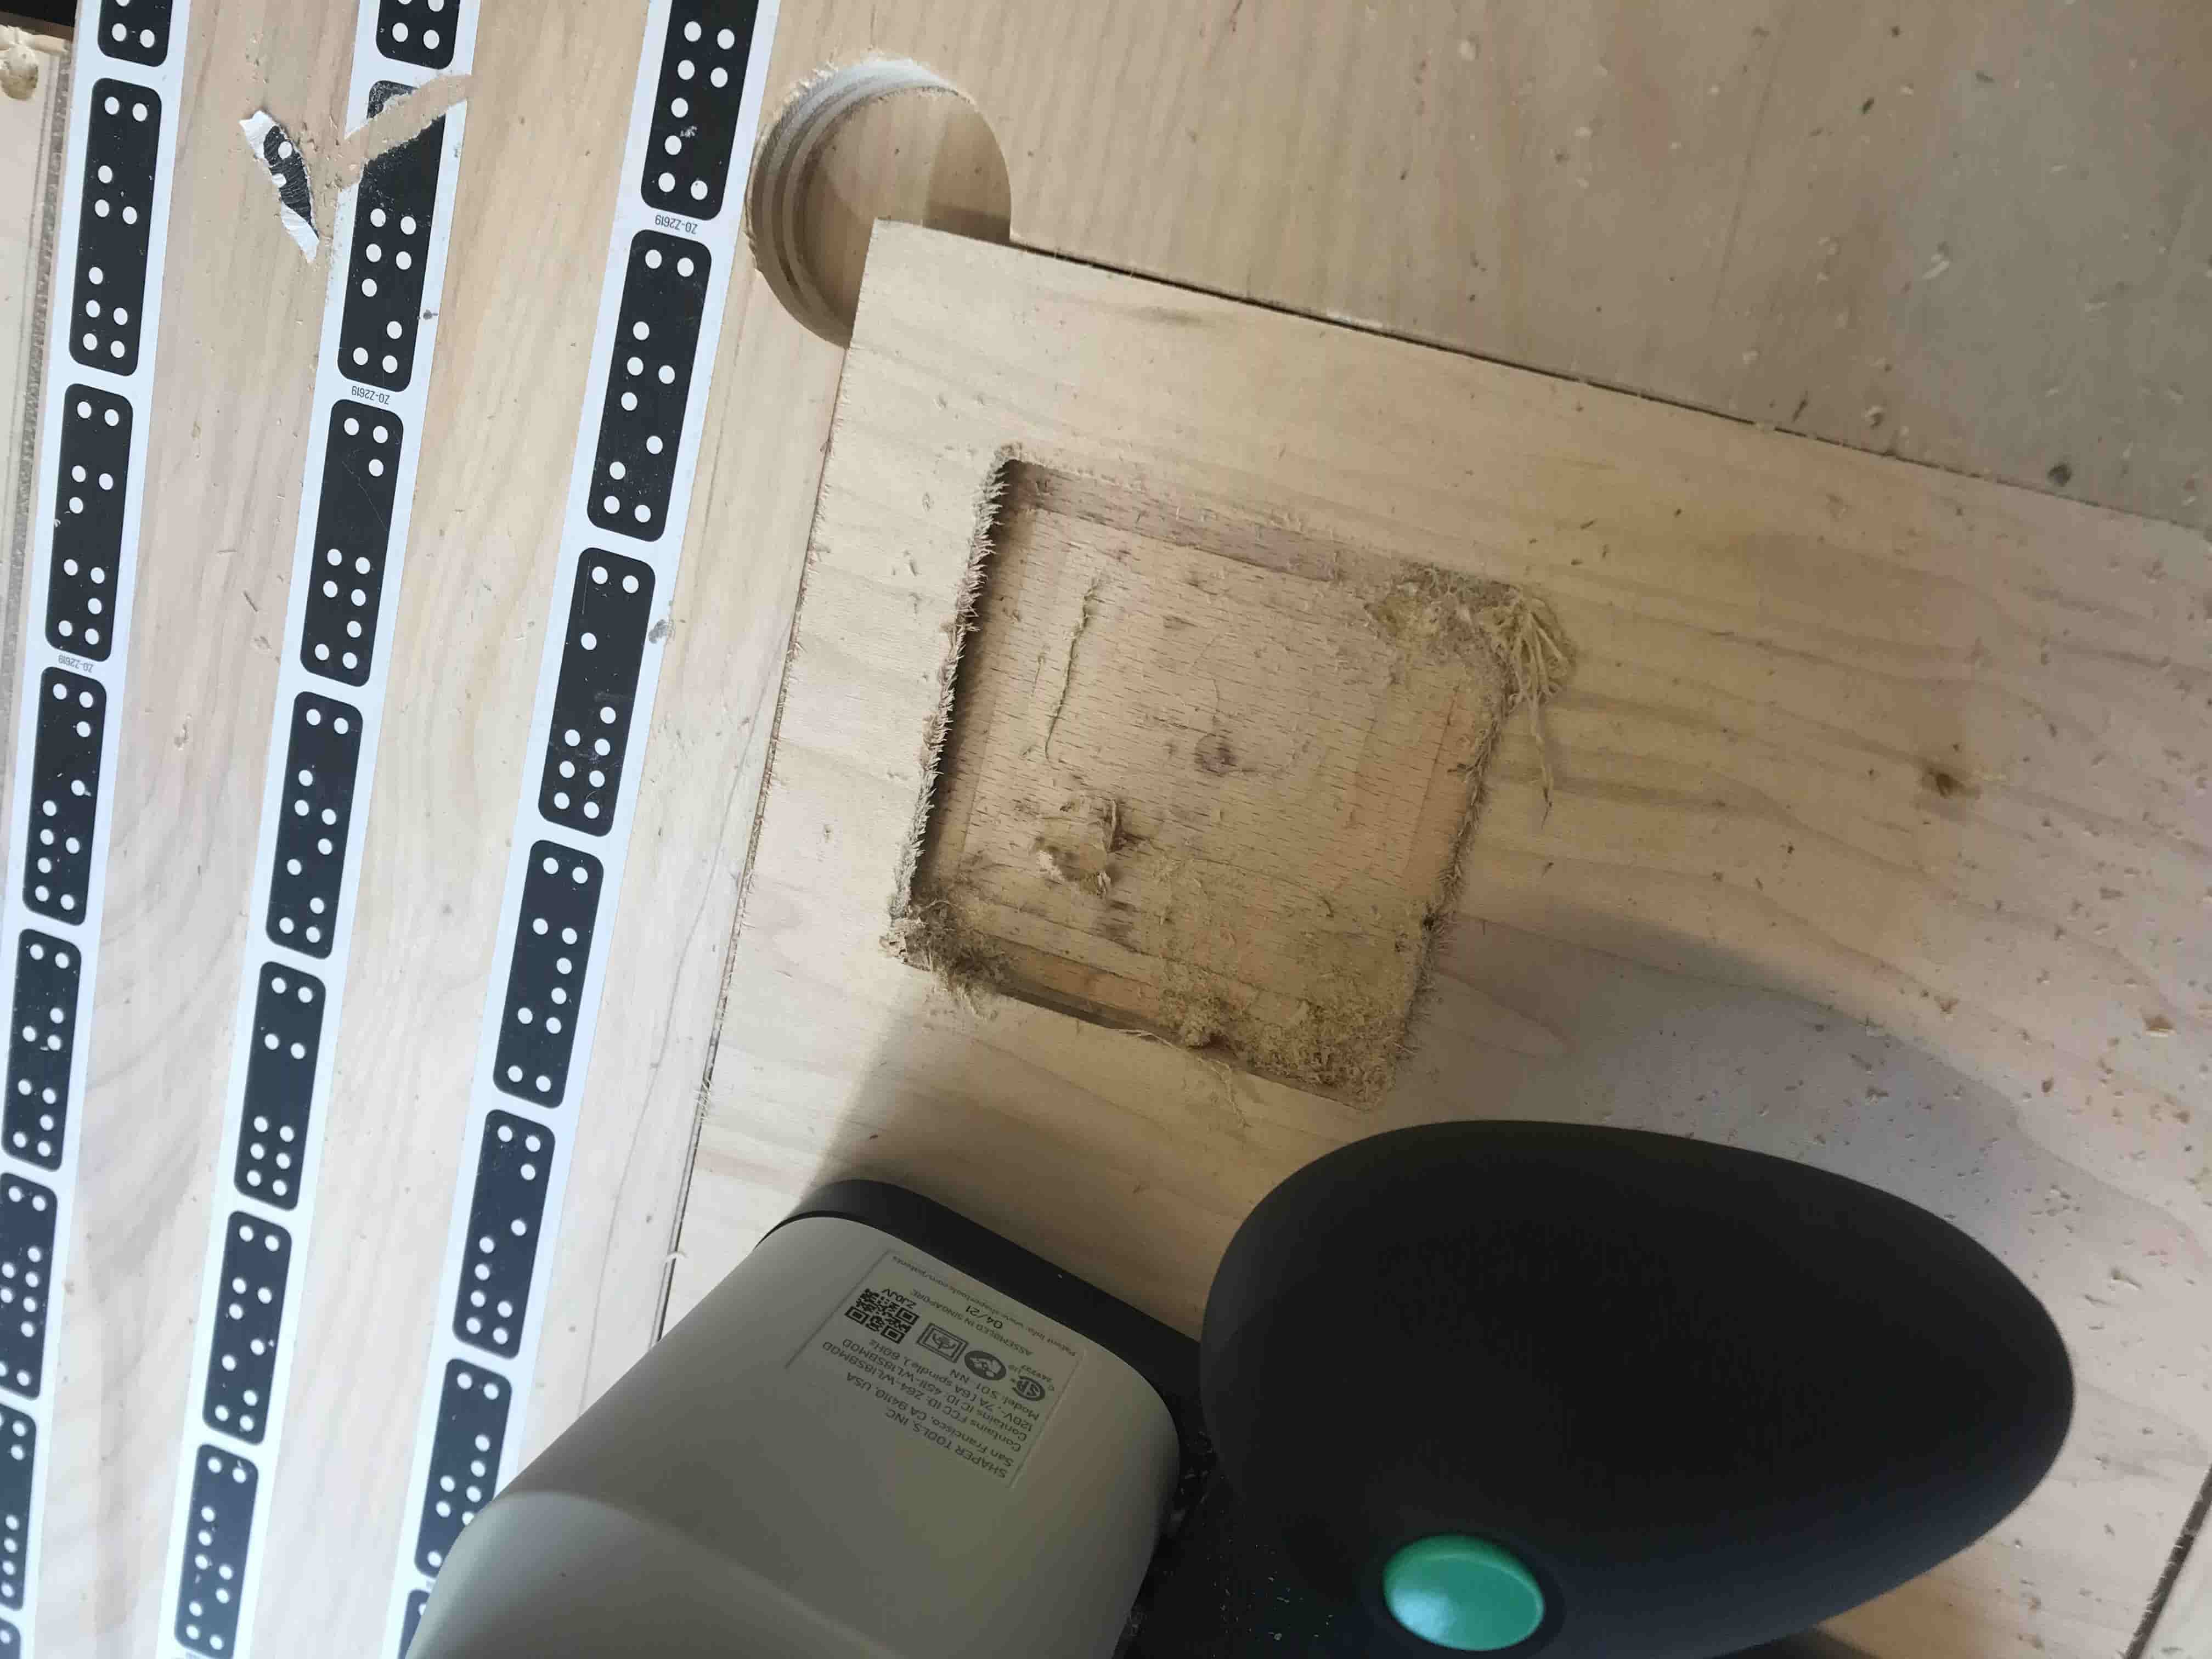
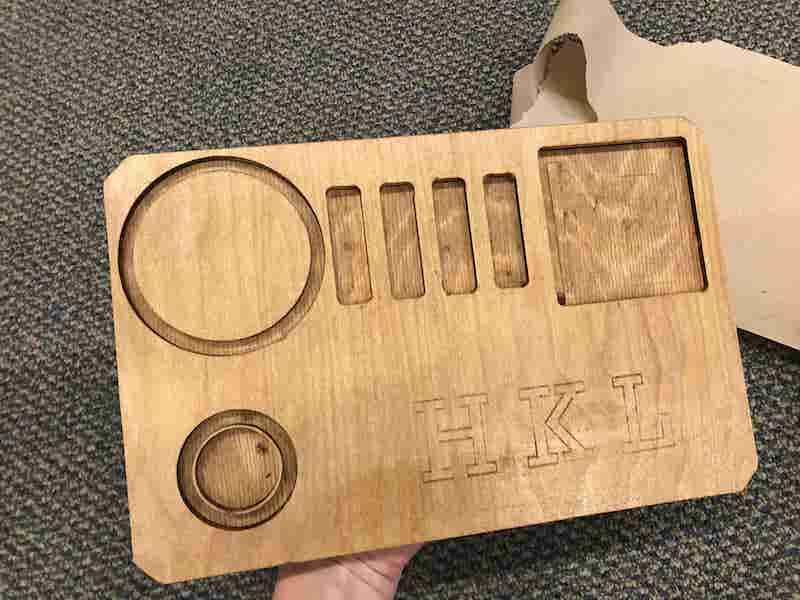
I then proceeded to (or so I thought) make an exterior cut around the 3-inch circle, but after finishing realized I had made an exterior cut around my pocket cut slot for my crystals. This wasn't a big deal, and it actually added a
decorative touch! But was definitely not intentional.
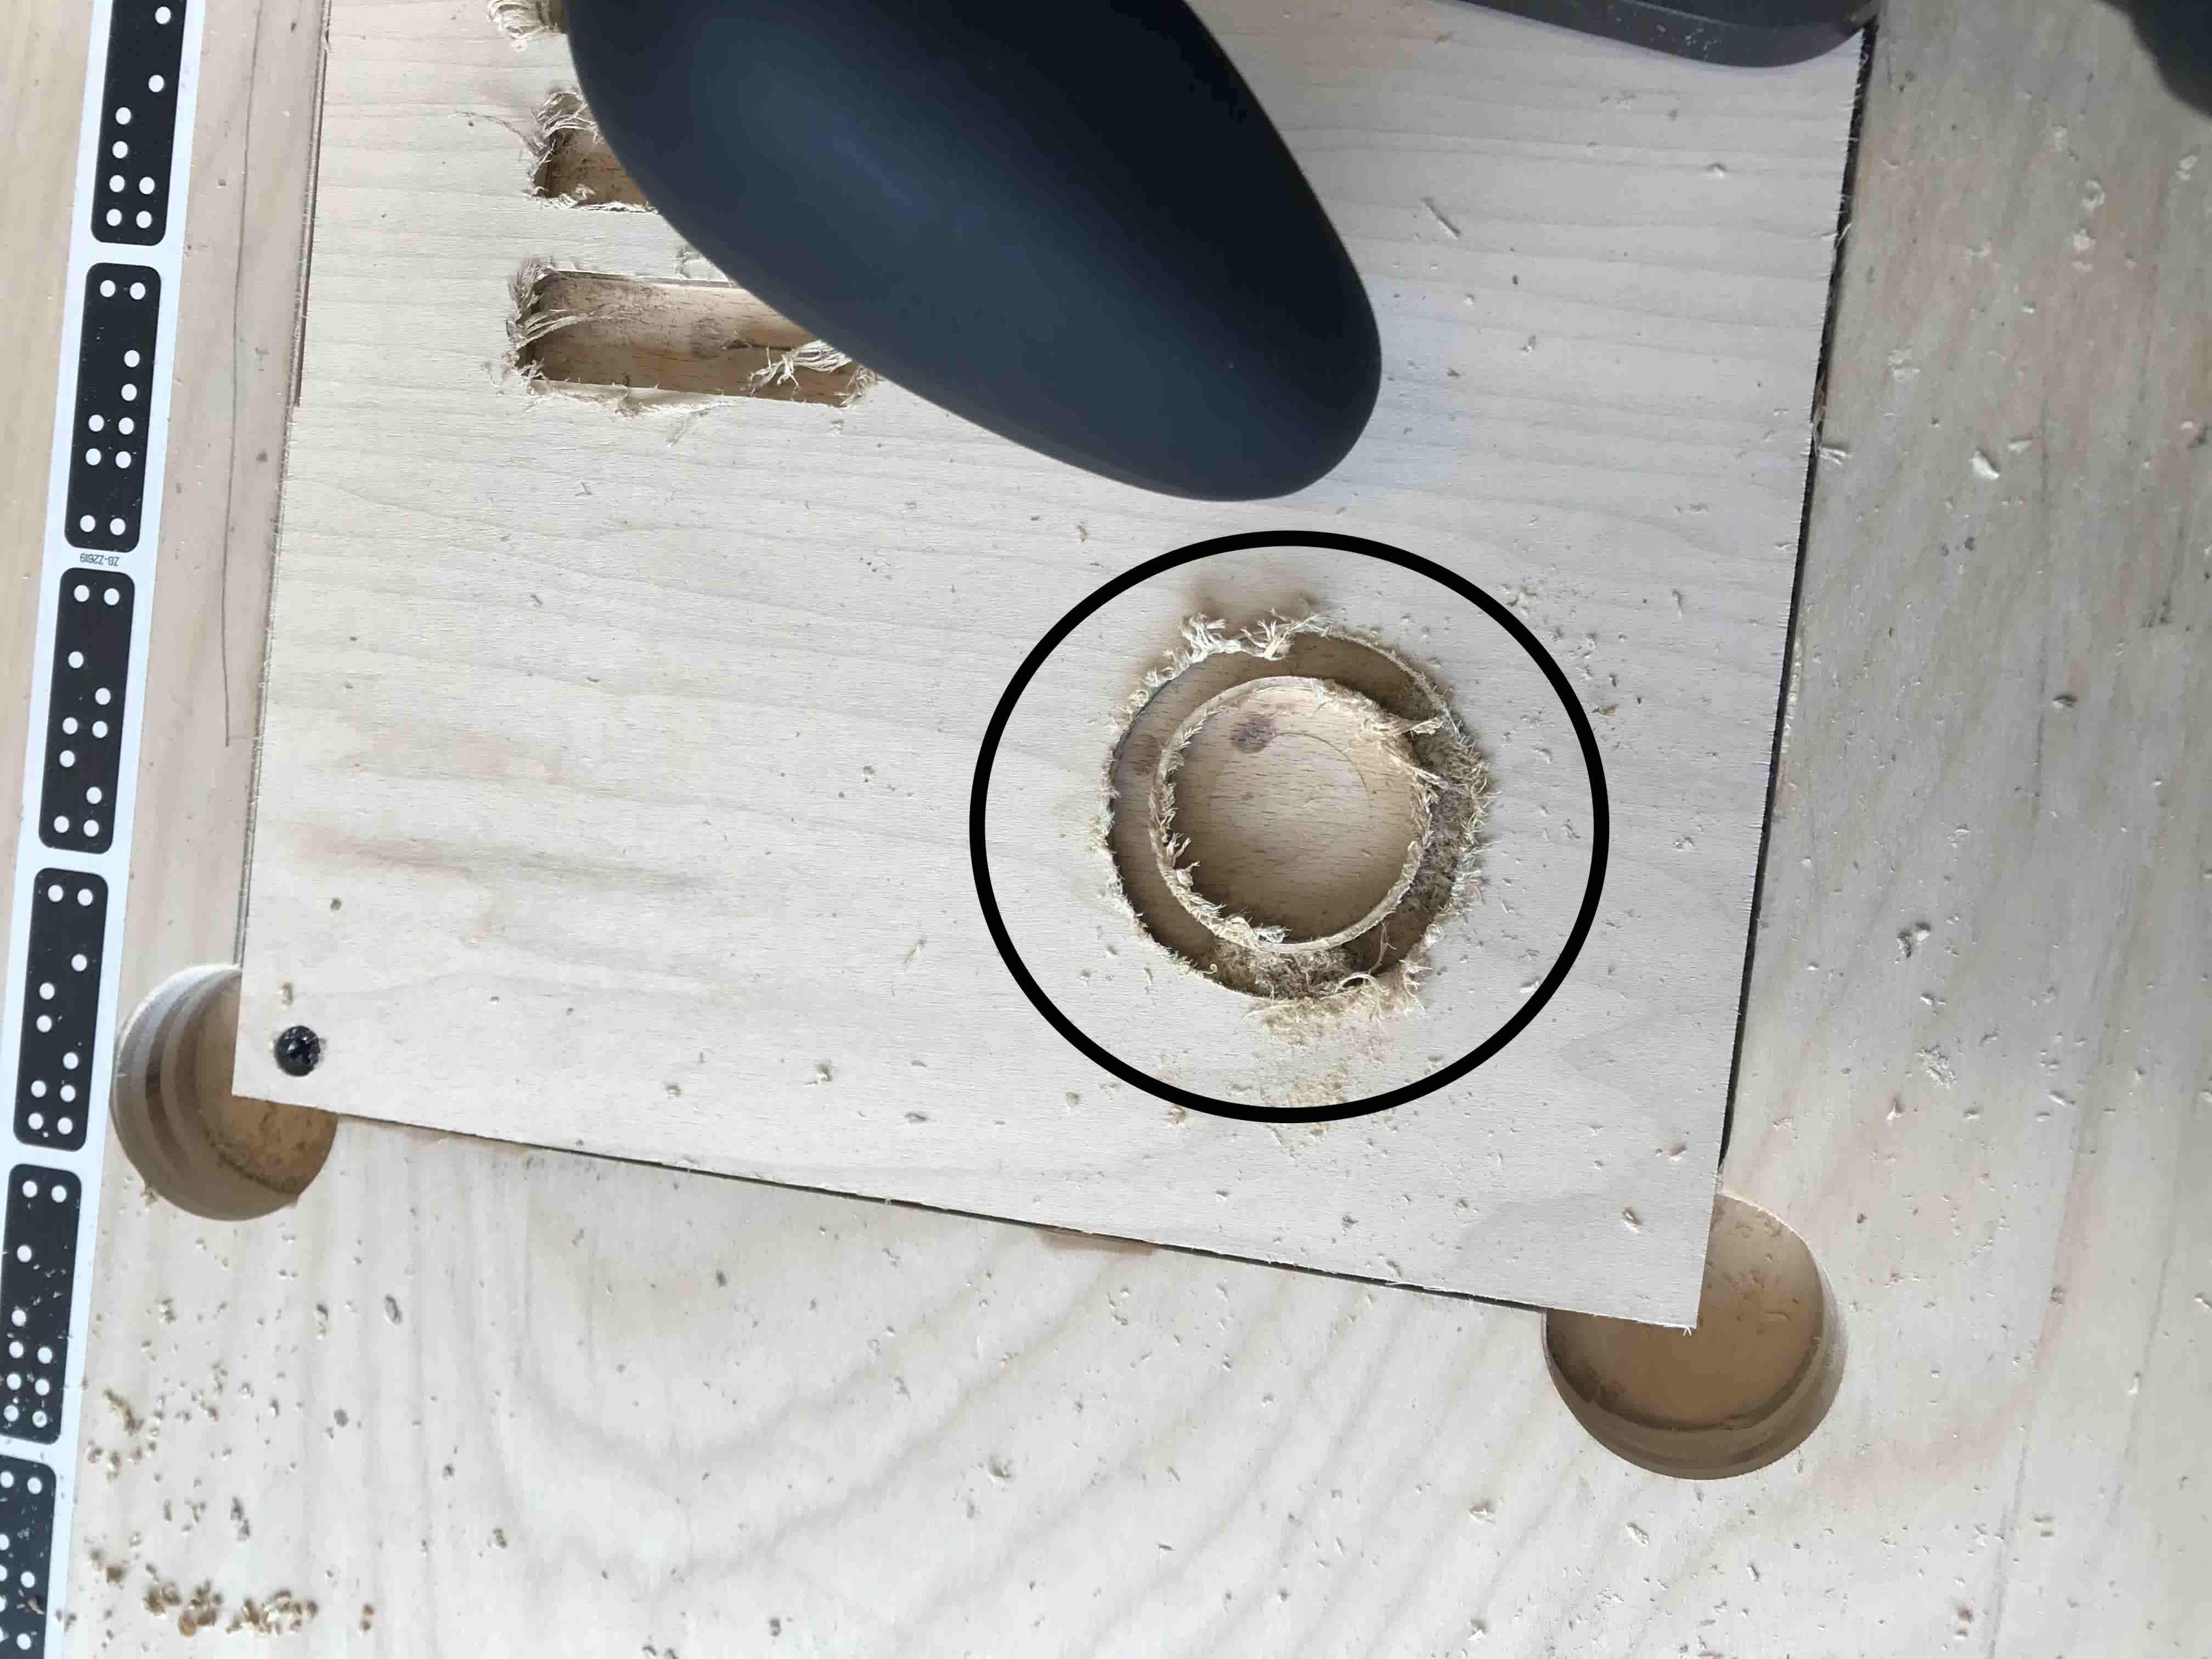
After, I ACTUALLY made the exterior cut around the 3-inch circle. Somehow, the circle came out the wrong size, larger than 3-inches. I believe I had deleted the inner circle as opposed to the outer circle in Adobe Illustrator when color coding my
design. But what was done was done, and I was reassured by Tuna that our pencil holders will be custom-made, so I can accomodate my mistake!

I switched the end mill to the v-Bit to engrave my initials, then immediately switched back to the up-spiral to finish up!

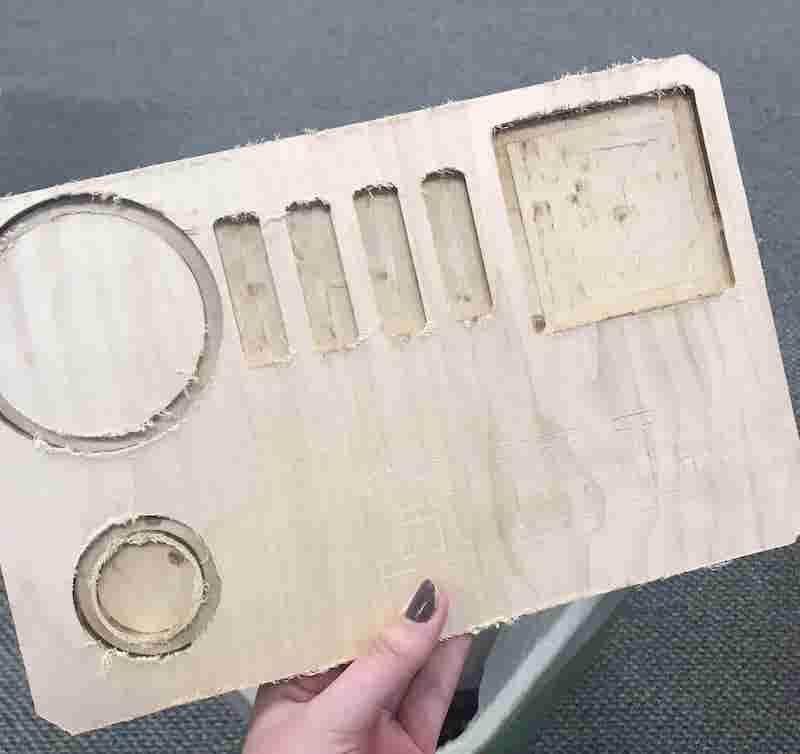
After struggling to understand how to tab my outer borders, and some trial and error (thank you Tuna for your patience), I was finally able chisel out my organizer! This also took some additional man power as my
tabs were *slightly* bigger than they should've been (thank you FabLab staff!!!)
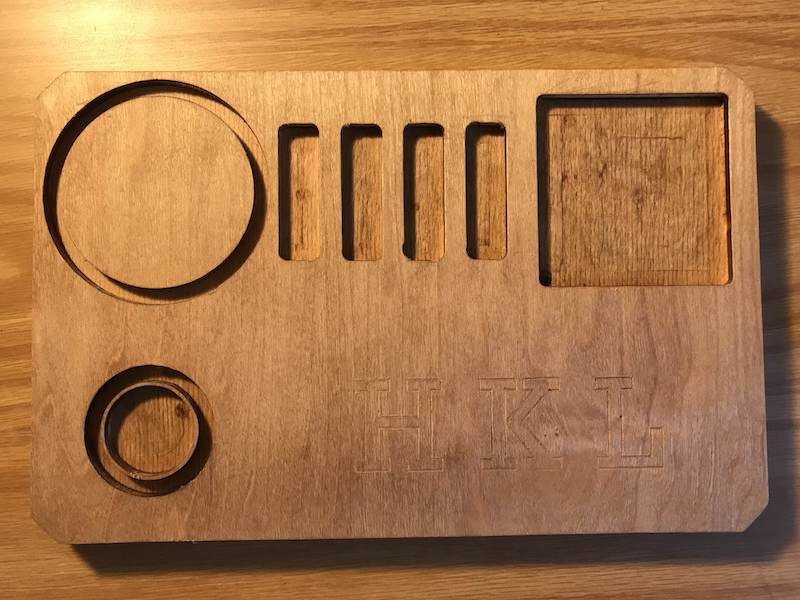
I sanded down the excess wood scraps and smoothed out the edges. My last step was to stain the wood, just to give it a more "finished" look.
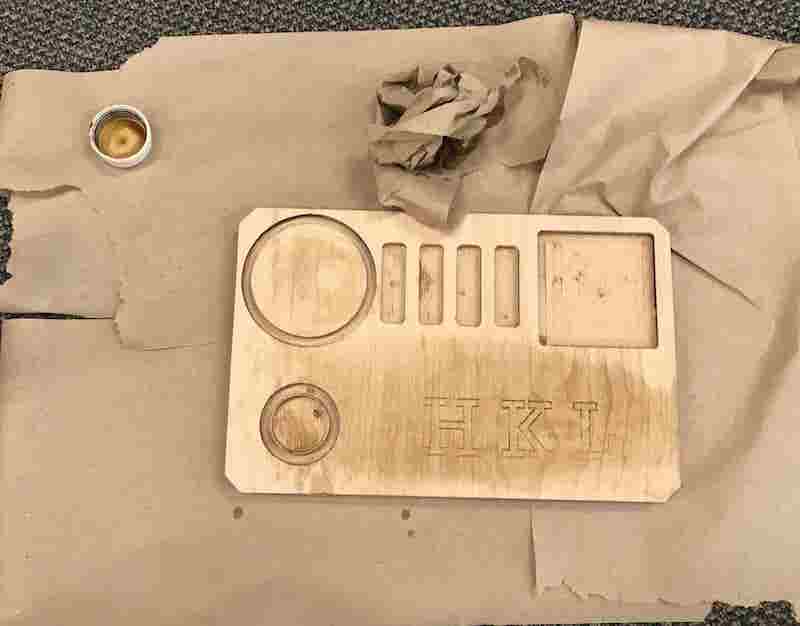
After 3 hours of work in the Fabrication Lab, my desk organizer was comlete and ready to be put to use.
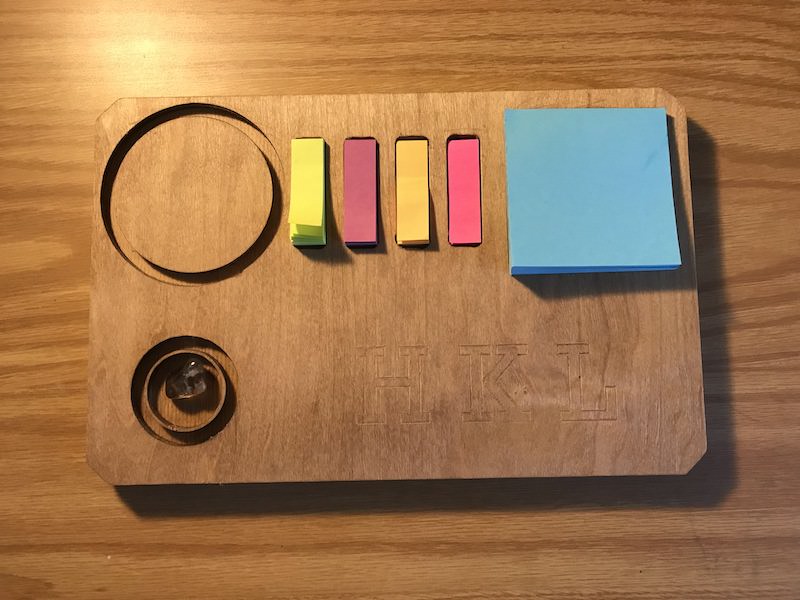
Back in my dorm room, I placed my items in the slots. While sticky tabs and crytal fit perfectly, the sticky pad was a tight fit, but this allows me to
peel off a single sheet without lifting up the entire pad.
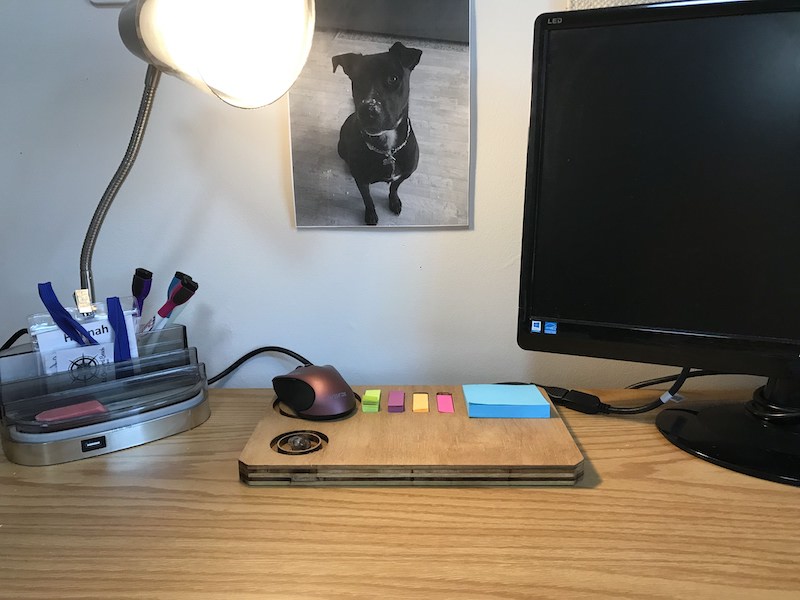
Below are some photos of the finished product!
I definitely hit a number of bumps in the road during this project. I was very lucky to have Tuna around to help me with the outer cuts of my board and general questions.
I was able to recall most steps from memory, but my workflow was less than efficient, as I had to change to the v-Bit halfway through, then back to the up-spiral.
The mistakes I did make - like the outer circle of the crystal hold and the 3-inch circle - were very frustrating, especially since there was no way to undo a step.
But this was also a learning experience as I haven't used power tools in a long time, and can now succesfully say I know how to work a handdrill!
The finished products from this machine were mindboggling, and I look forward to using the Shaper again sometime in the future!