Week 4 was a little bit different from previous weeks. Instead of getting trained on a actual machine in the fabrication space, we were tasked with making a complex Fusino 360 design based on a tutorial. These designs were then printed on an SLA printer. The SLA (stereolithography) printer is different from the FDM (Fused deposition modeling) printer we used to make 3D printed pots last week. Due to safety, the fab lab staff would be printing our designs. But the actual design process was up to us!
SLA printers
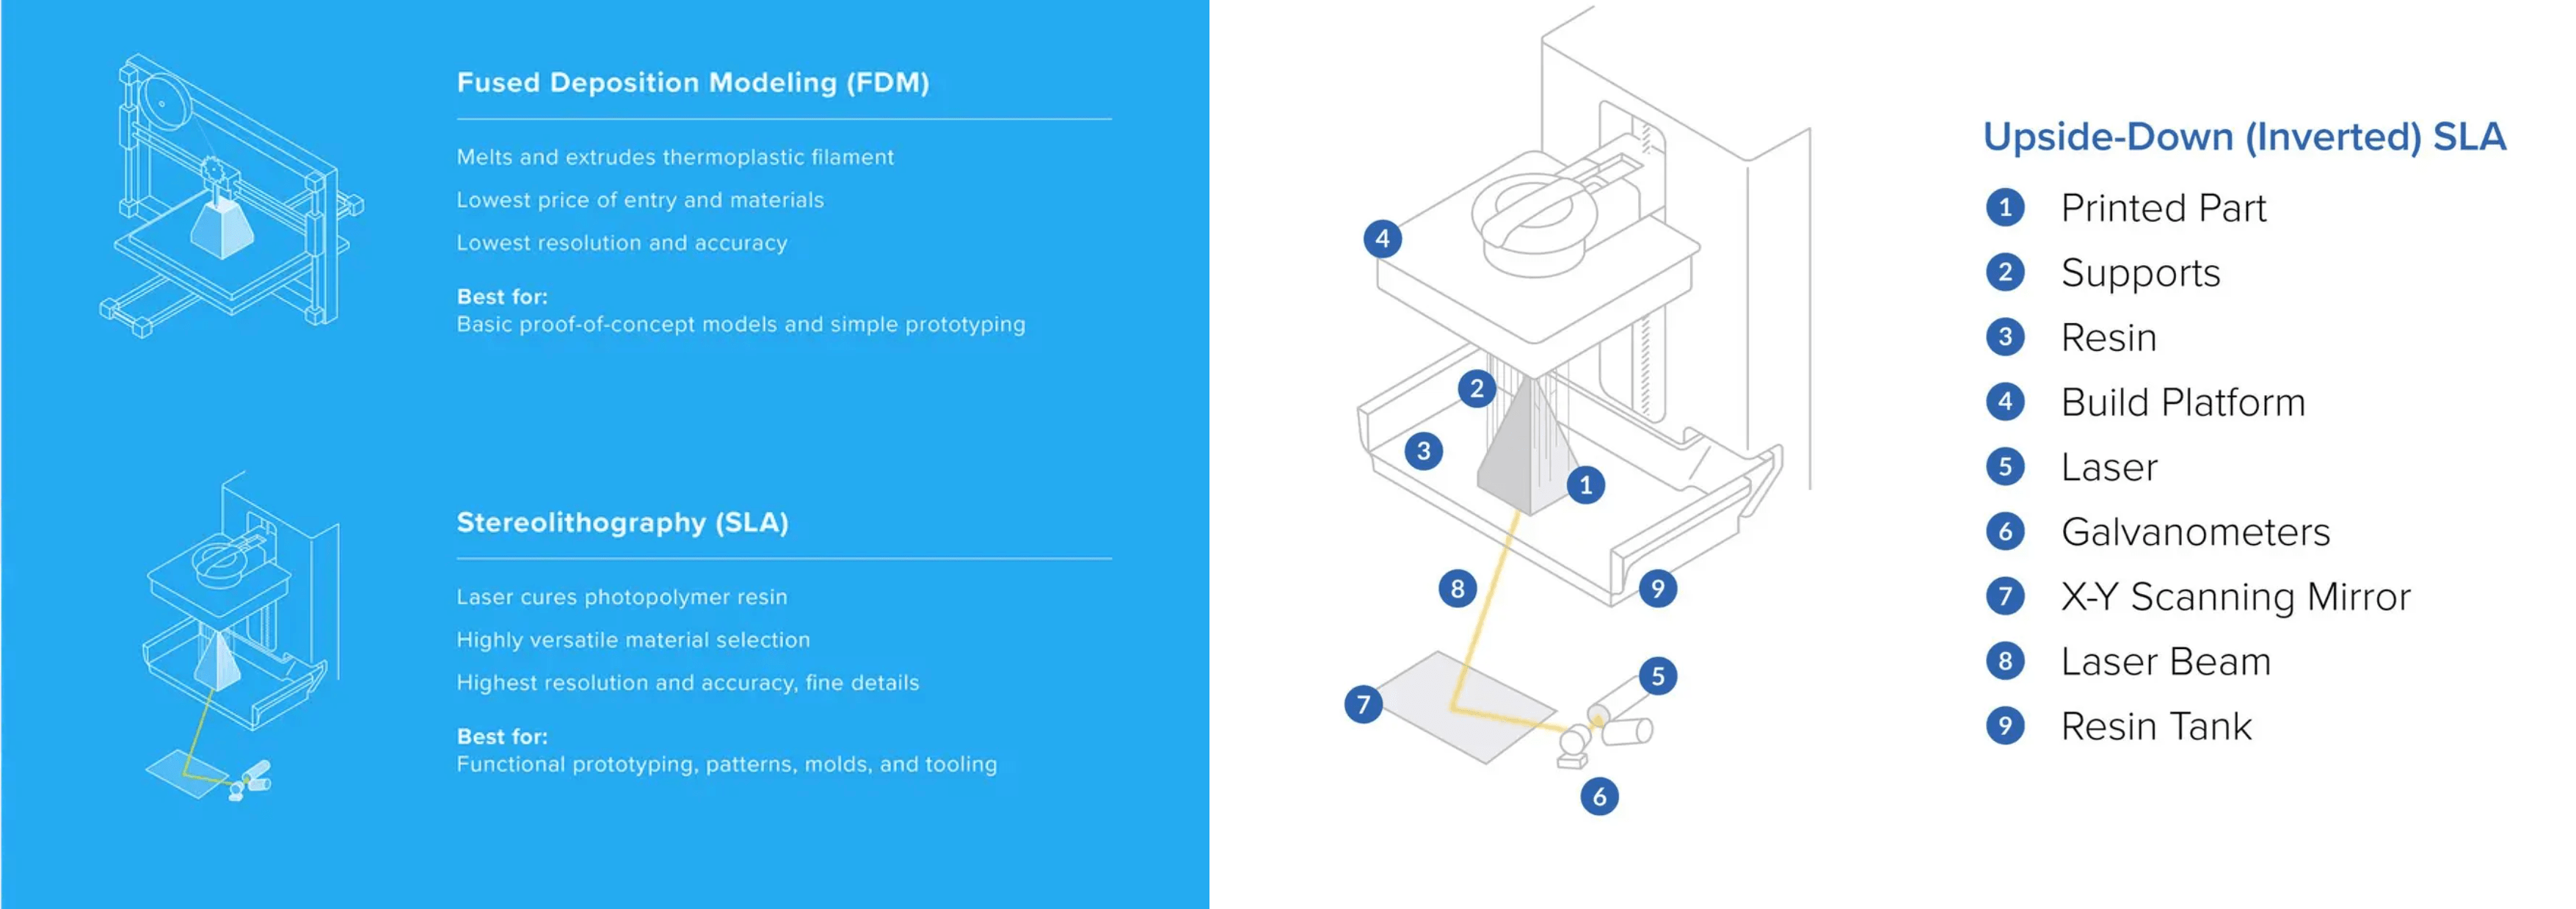
use additive manufacturing to create high resolution, highly precise models. As opposed to the PLA filament used in FDM printers, SLA printers use resin. This material is light reactive, and is cured by a laser to create a hard plastic.
SLA printers are the most accurate and precise 3D printers on the market, but are also the most costly. The infographic below from FormLabs highlights the differences between SLA and FDM printing. The diagram of the printer is also from FormLabs and shows the basic components of the machine!
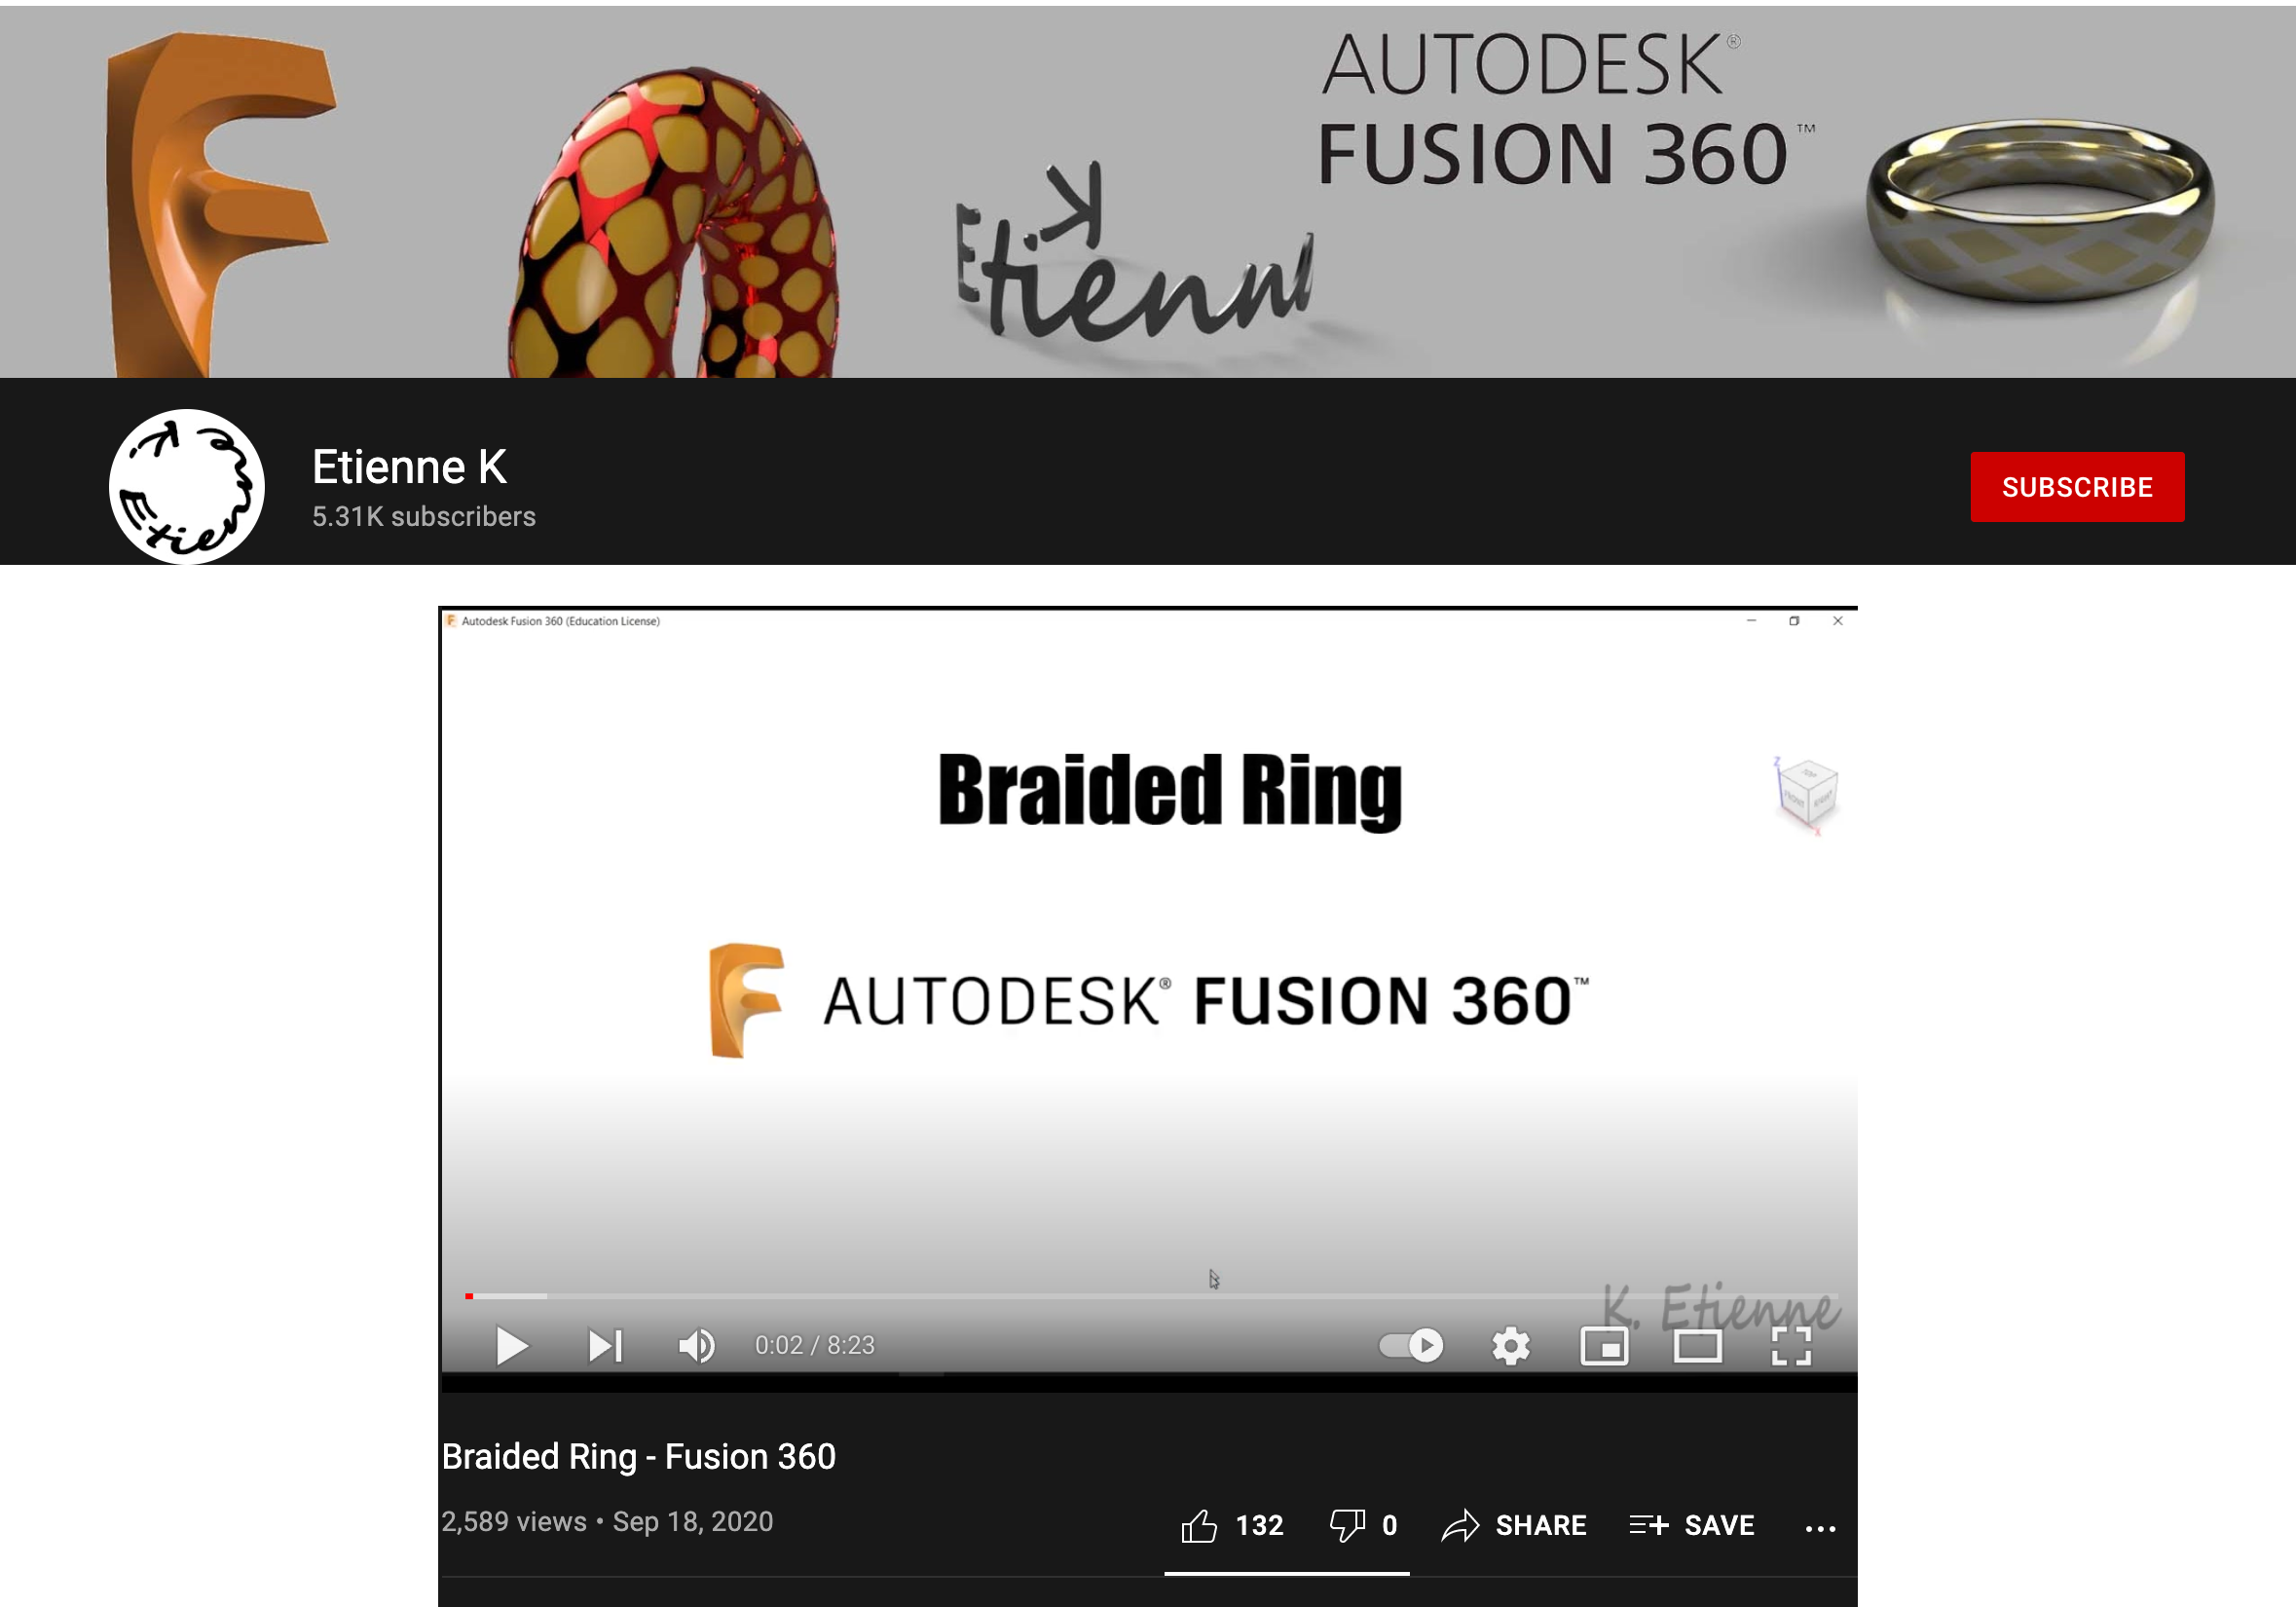
I followed a YouTube tutorial by Etienne Kto create a braided ring in Fusion 360.
The tutorial made good use of a variety of tools and was a very thorough about measurements and reference sketches. Some of the extrusions and pieces were unnecessary for the final design,
but made the building process much easier.
Unfortunately, there was no voice over or descriptive text that I could use to follow along. Instead I had to carefully watch the mouse's movement and ensure I didn't miss any clicks. With the pace of the
video being relatively fast, I continually had to rewind and rewatch certain sections to understand exactly what was being done. Having a voiceover description of the steps would've made this tutorial much easier.
Following the video tutorial, I was able to employ some of the previous tools we had learned as well as learned a few new ones!
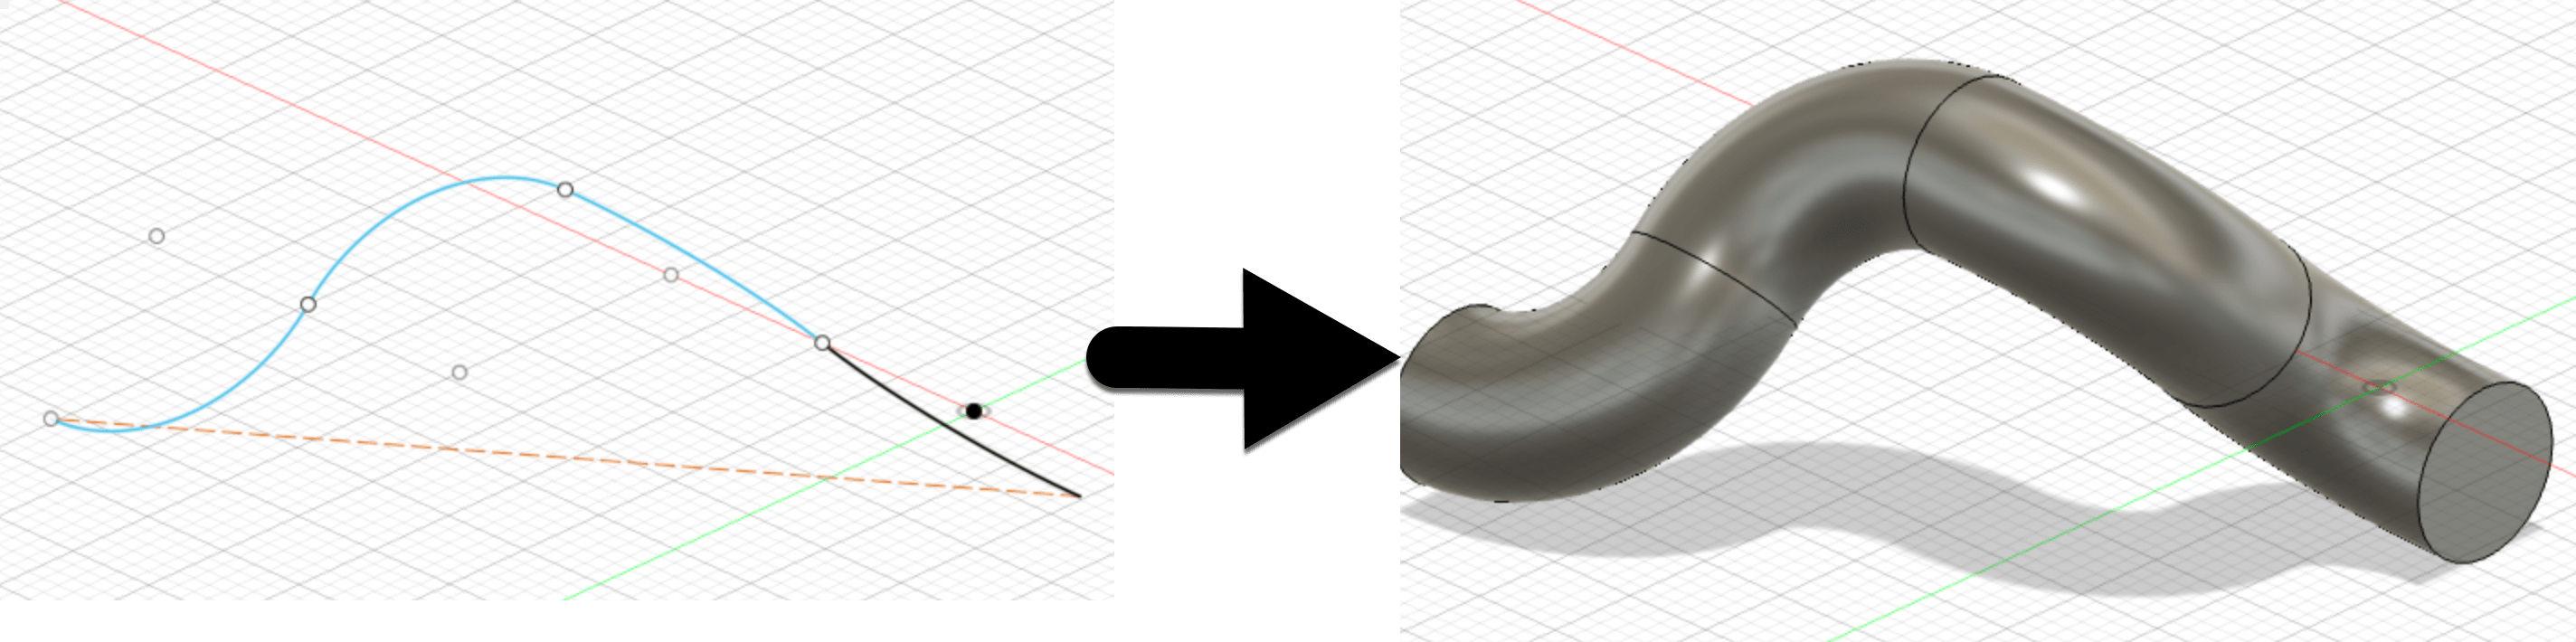
The first new tool I used was Pipe. It creates a cylinder around a specified path, and was used in this project to create the "wires" of the braid.
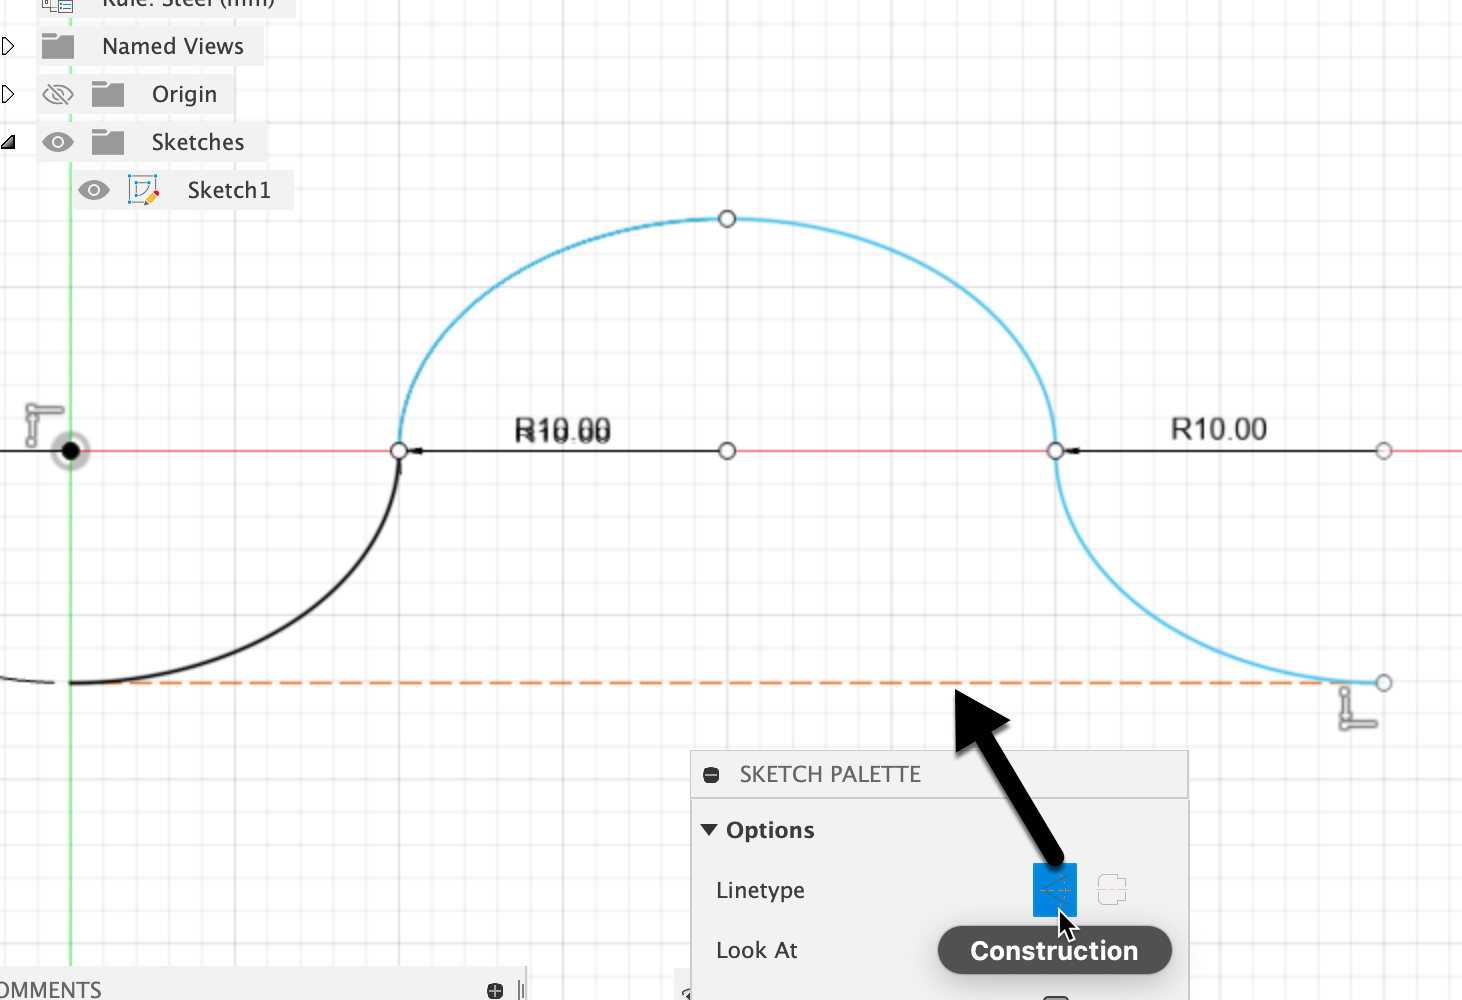
Another handy feature in Fusion 360 is the use of construction lines. These lines in a sketch can be used solely for measurements and reference!
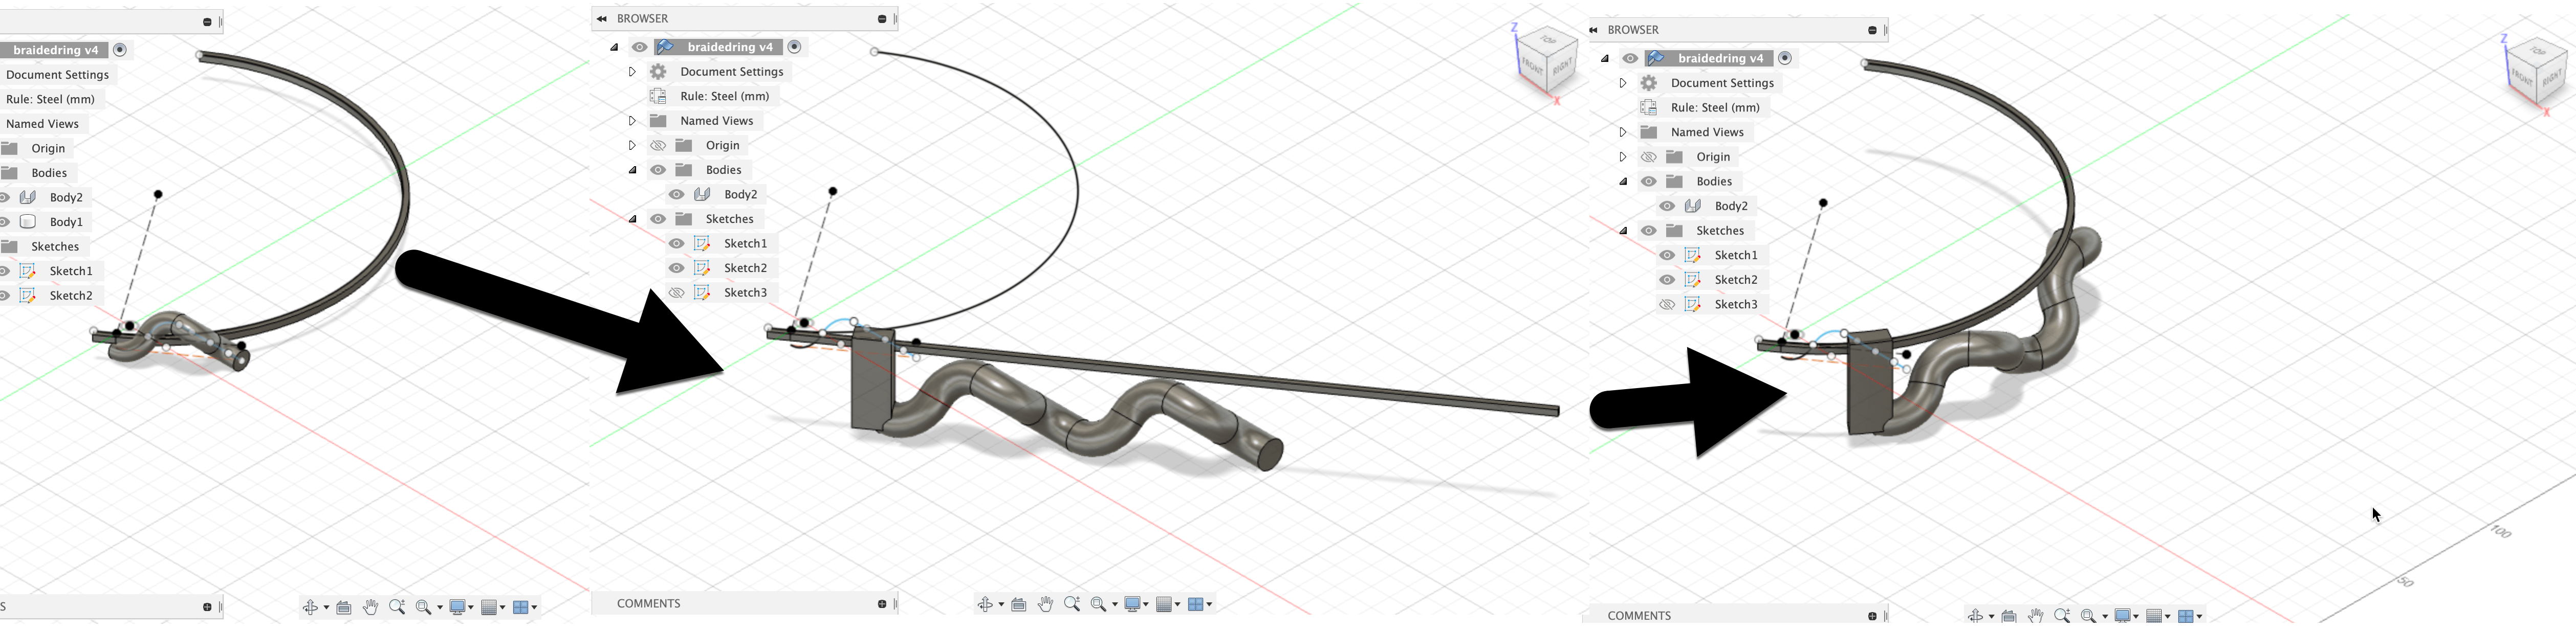
In order to get the "ring" shape, I used the fold motify utility. This tool, located under the sheet metal tab, allows you to unfold a body based on a stationary face, then refold it back to the original bend.
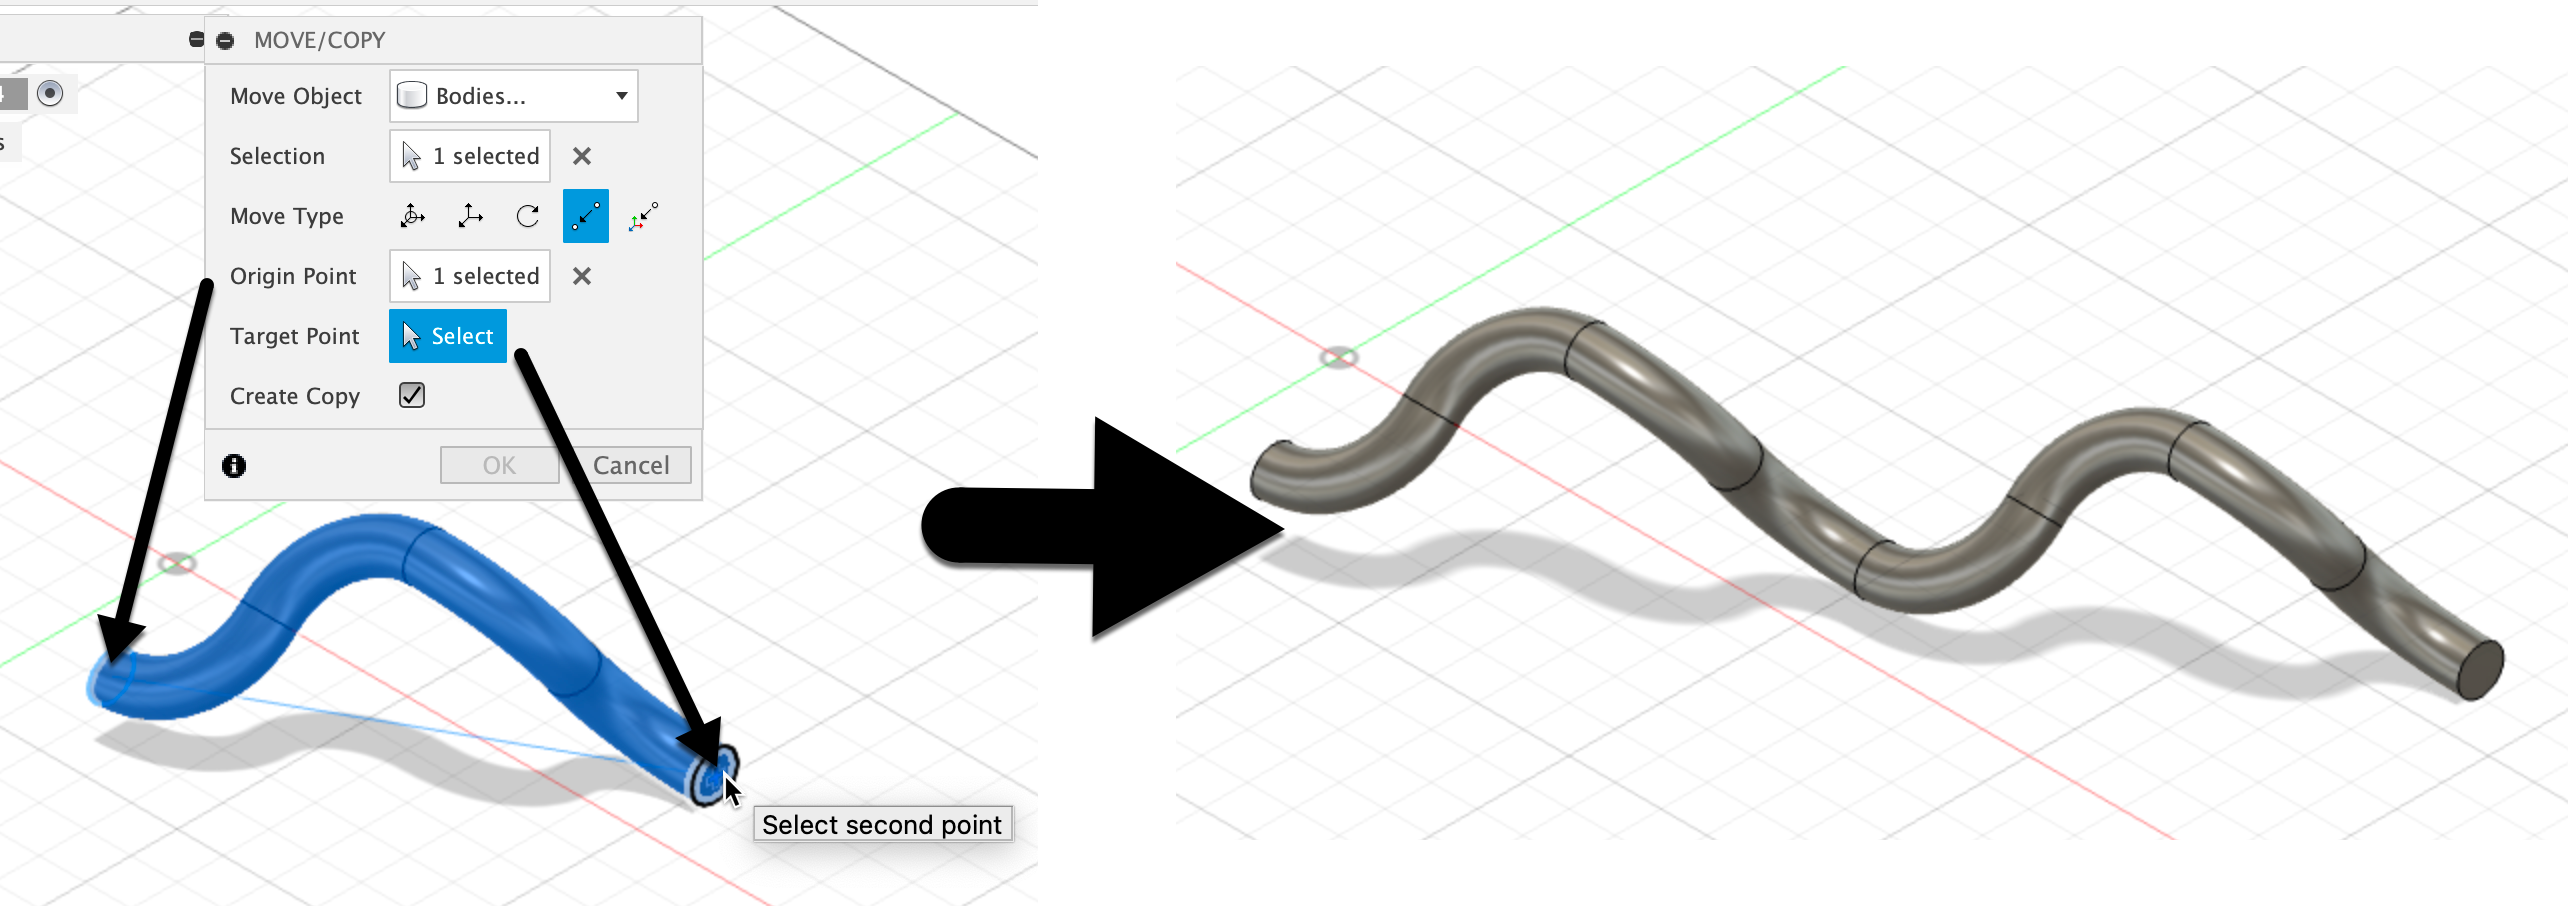
This is a very basic tool that I wish I had found sooner. When you want to move an element of the sketch or a body, you can select the point to point option as well as check off the "copy" box. This allowed me to easily copy and connect the initial pipe!
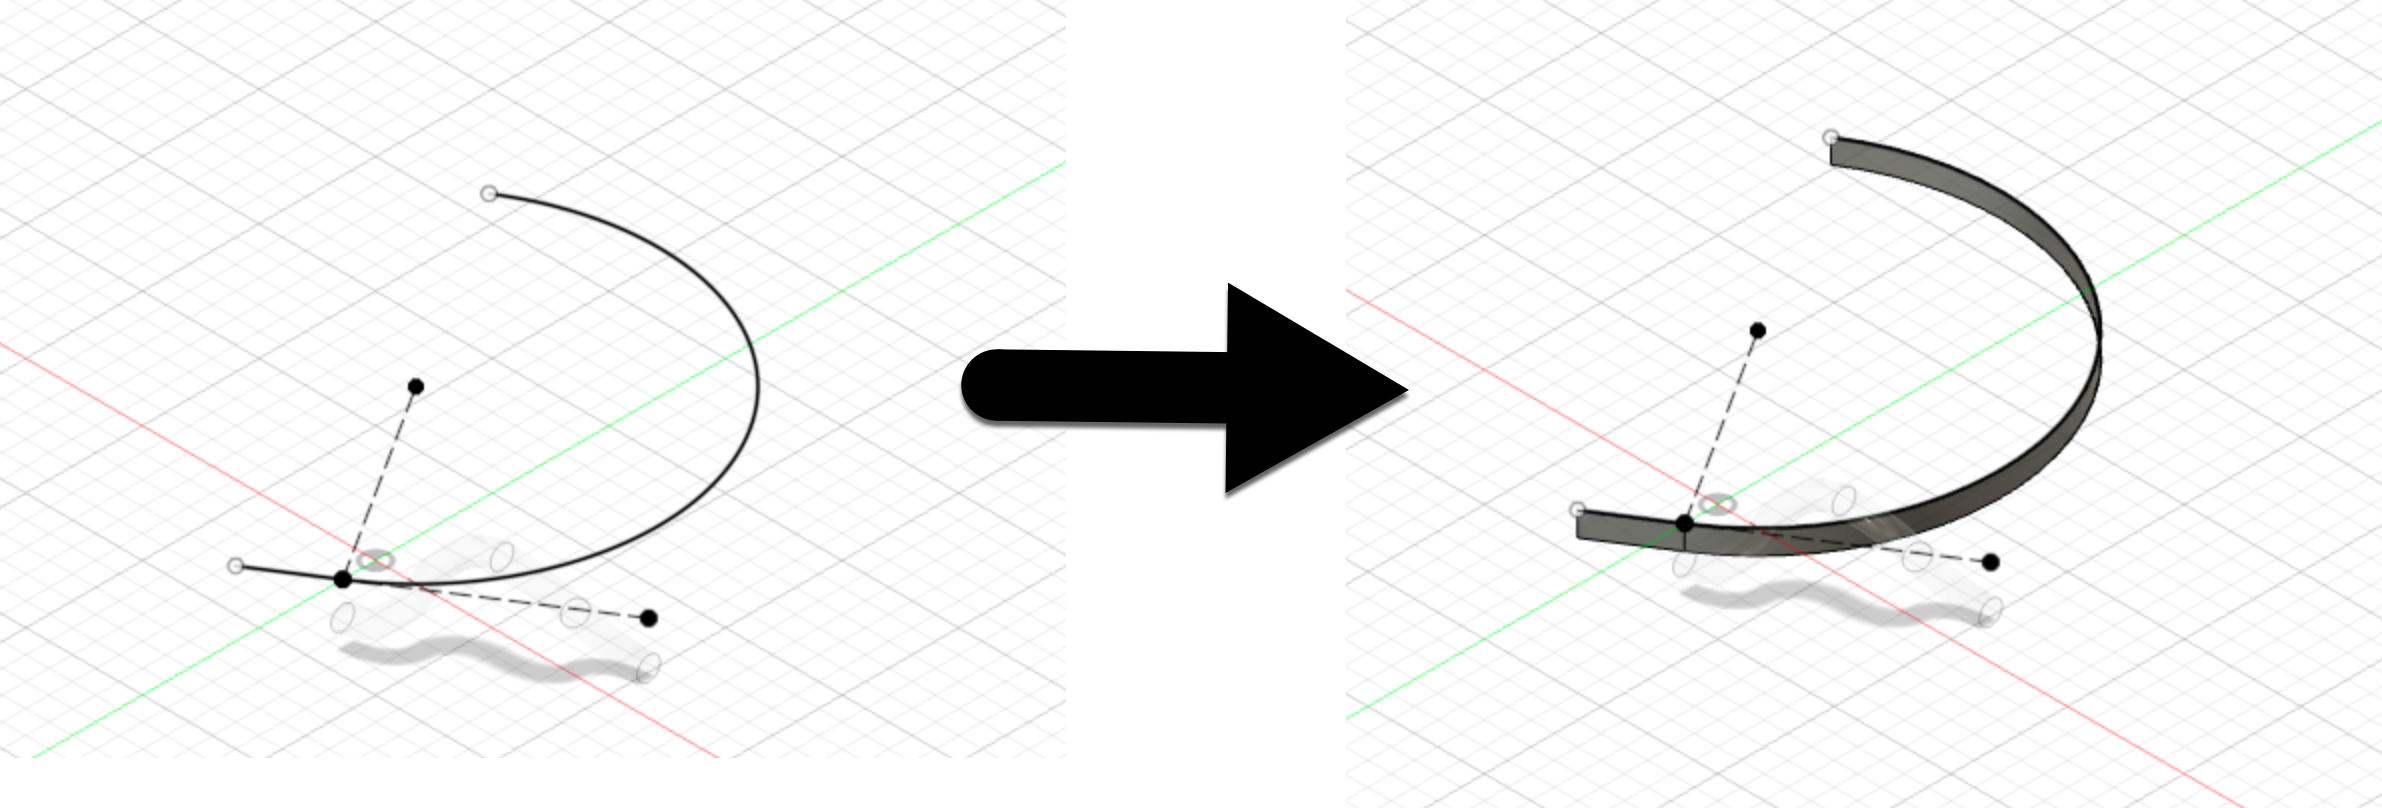
This last new tool is under the sheet metal section. The flange tool creates a sheet metal face from a sketch or edge. Since it is sheet metal, it is bendable and does not have to be an entire face in order to create the extrusion. This tool was used to create the reference bar for the half circumference of the ring.

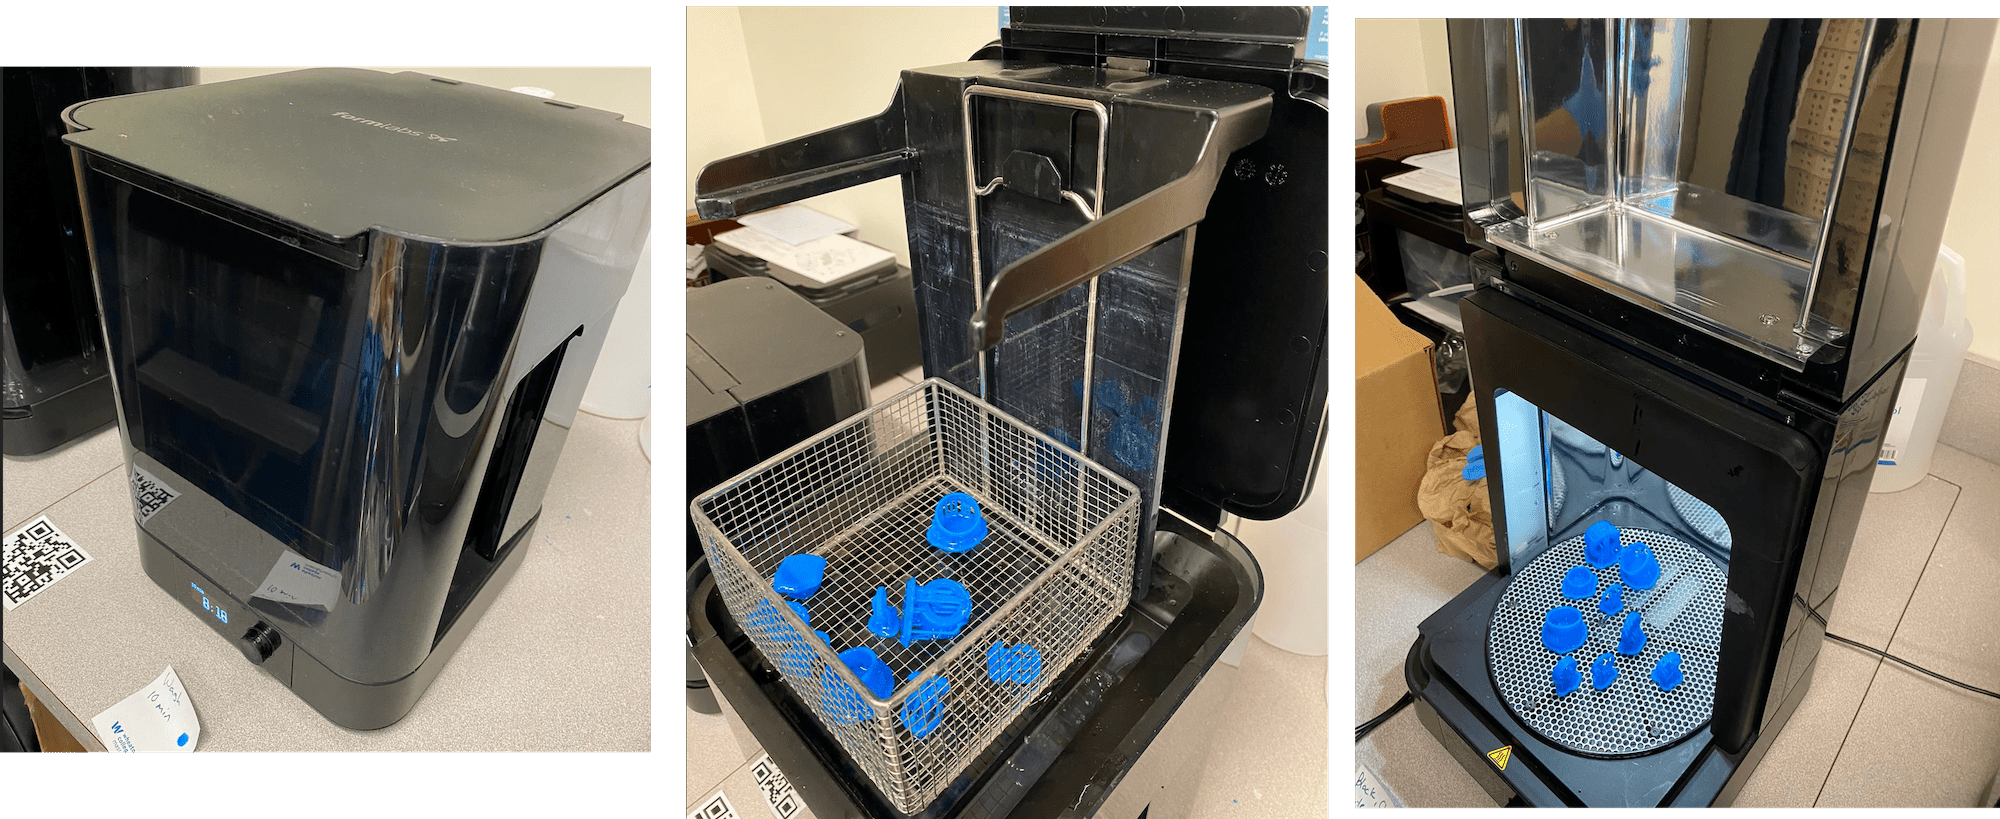
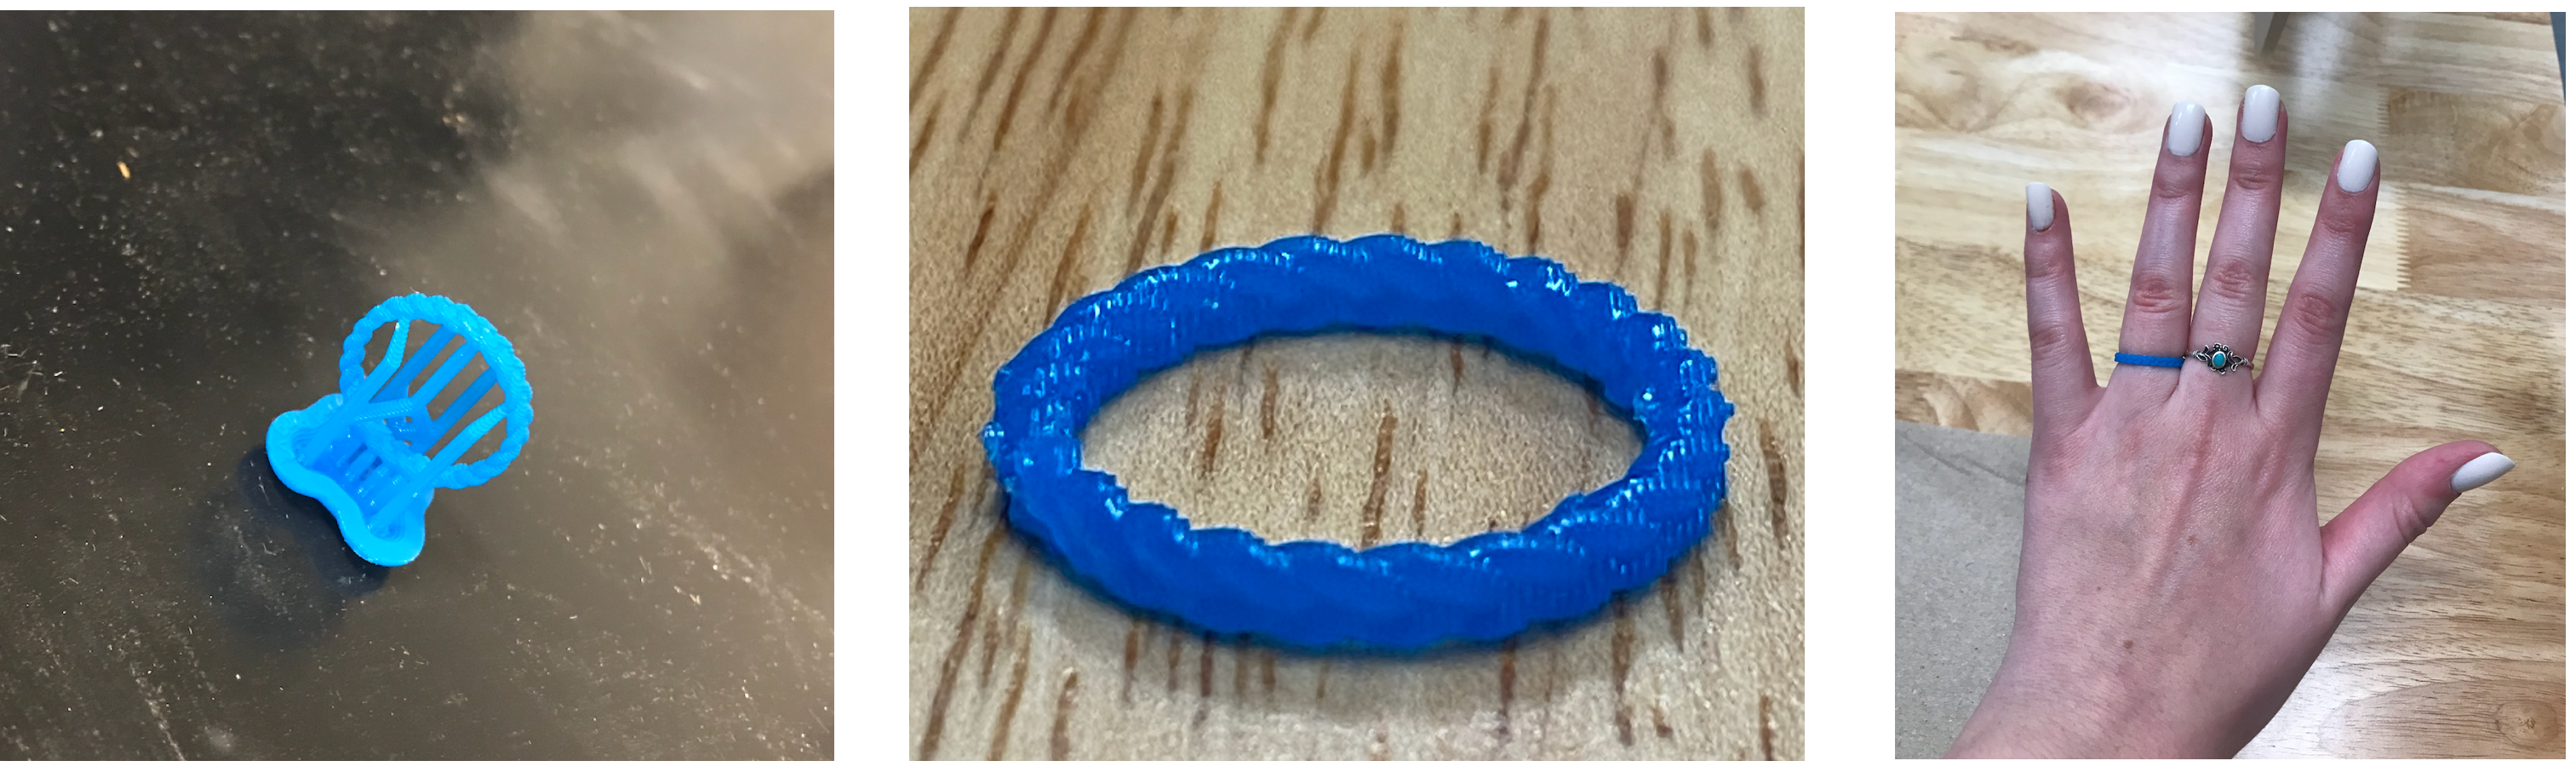
A few days after submitting my design, Tuna had completed the printing process for my ring! After cutting off the supports, I could see how detailed the finished product was!
Tuna also provided some photos of the machine itself as he was printing our designs.
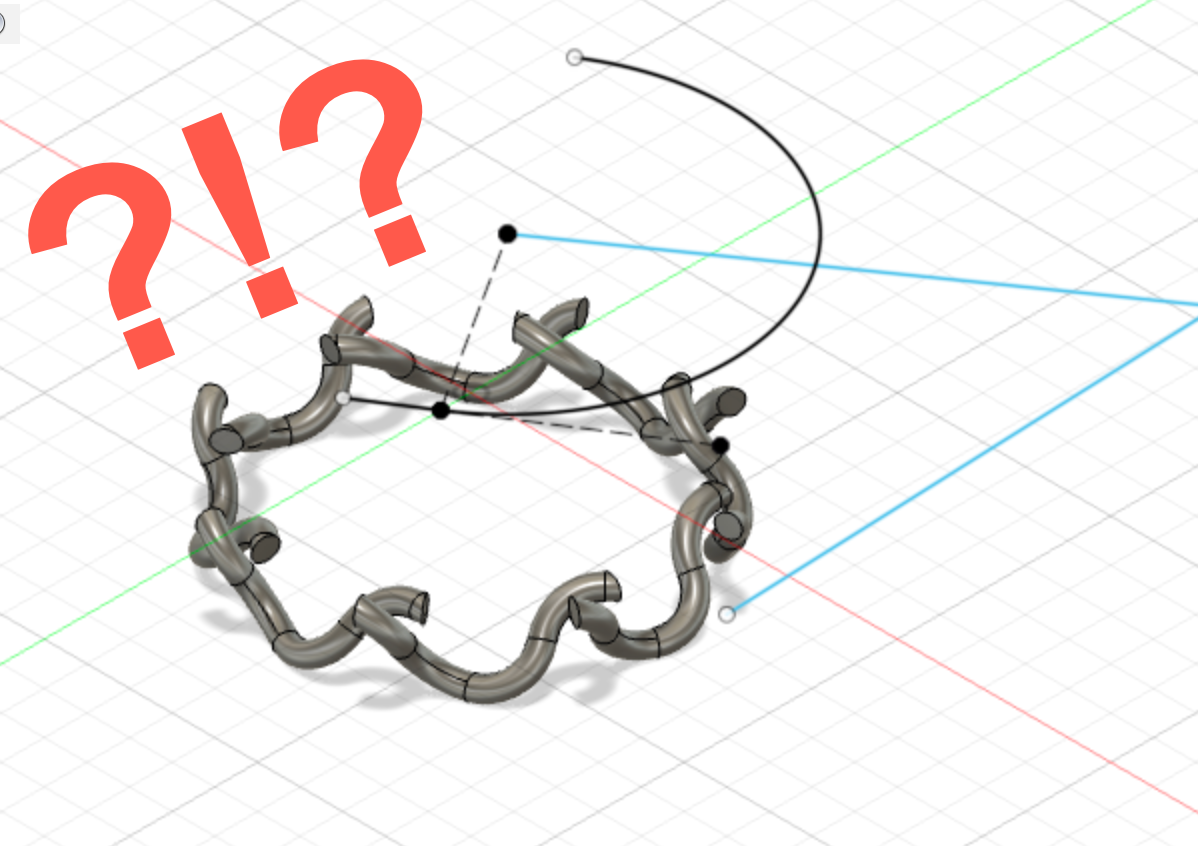
During the design process, I had to continuously rewind the tutorial to make sure I was correctly following the steps. I would occasionally get stuck, but would go through the video at 0.5 speed repeatedly until I was able to duplicate the tutorial. The first time I completed the tutorial, my ring was super wacky and the edges did not connect. I believe this was because I had been using CM instead of MM, like in the tutorial. Instead of going back through and trying to find my mistake, I started from scratch with mm as my units. This time constructing the ring was much quicker and it came out perfect!
Another challenge I faced was changing the view and orientation in Fusion 360. It was incredibly furstrating not being able to get the angle I wanted and having to constantly toggle between the pan and orbit tools. But eventually I got the hang of it, and know this will get easier with practice.