For week 3, I used Fusion 360 to design a pot that was then 3D printed on a Prusa MK3. While I'm still waiting on the finished product, see below for some of my initial experiences with this project.
I designed my pot in Fusion 360 - that same CAD program I had used last week. The process included some basics as well as some new tools offered in the software!
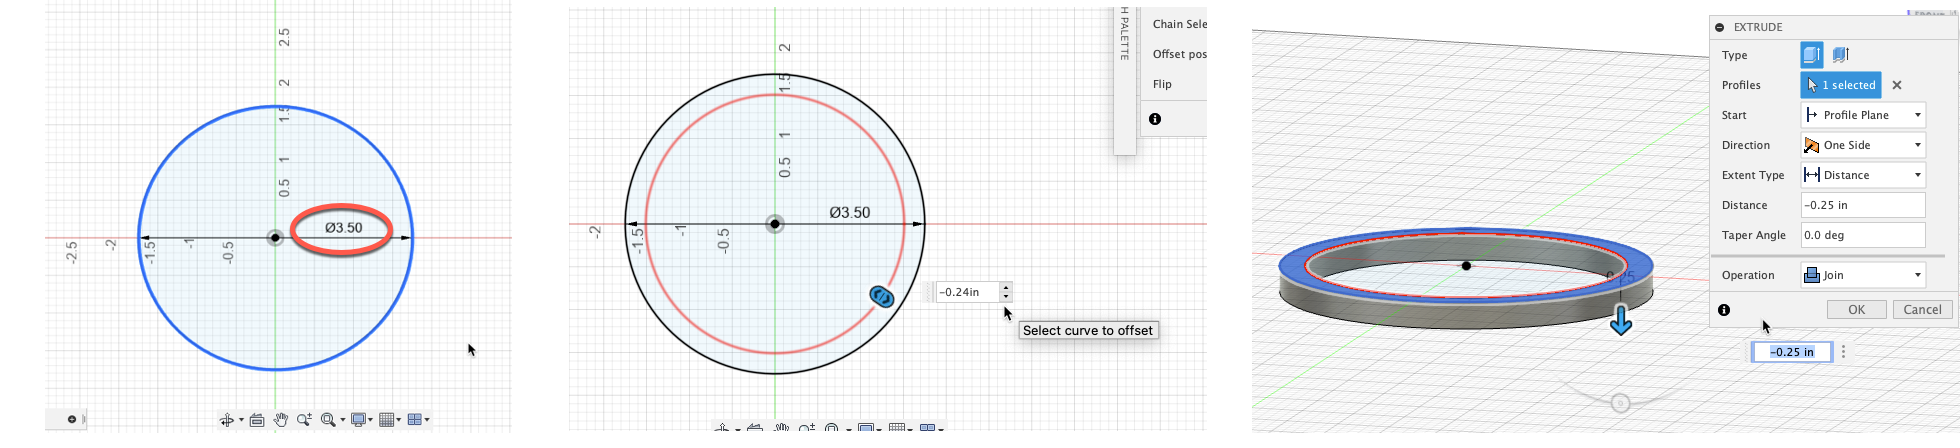
Based on my CNC routed organizer, the base of my pot had to be 3.5 inches in diameter to fit in the designated hole. I additionally added a 0.24in offset to account for the
quarter inch width of the slot. The depth of the cut had been 0.25 inches, so I extruded 0.25 inches downwards. On top of the base, I extruded a 0.15in surface to act as the bottom of the pot.
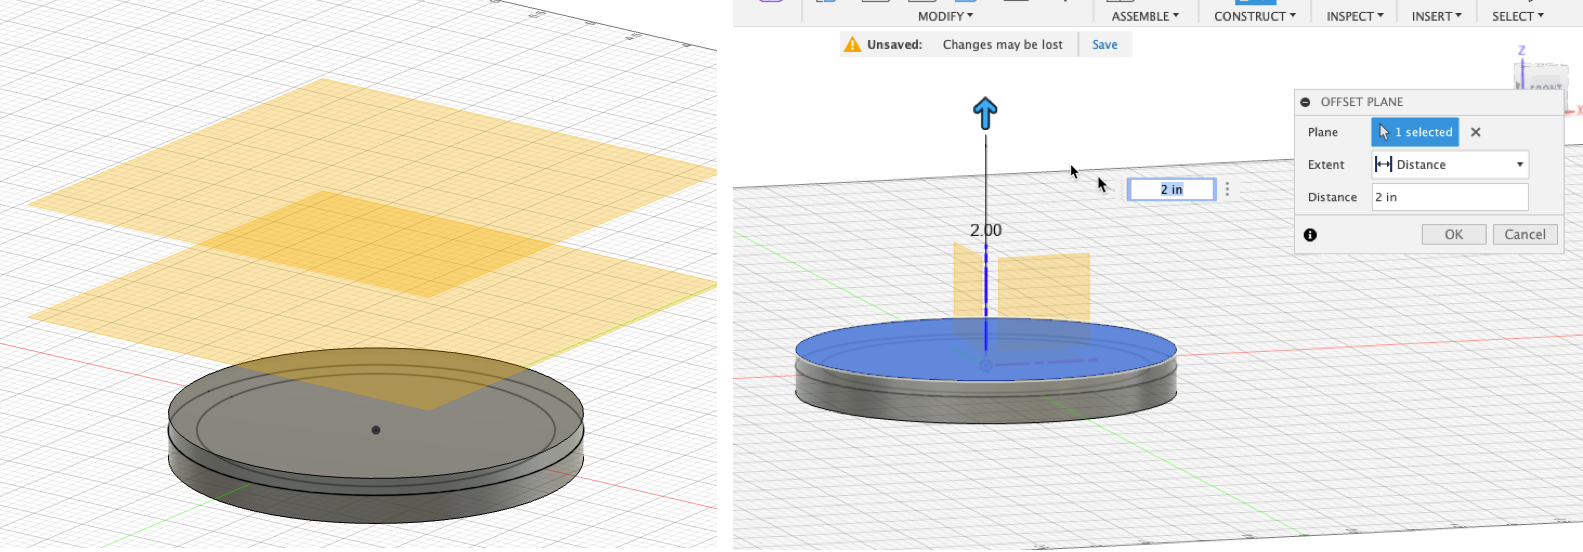
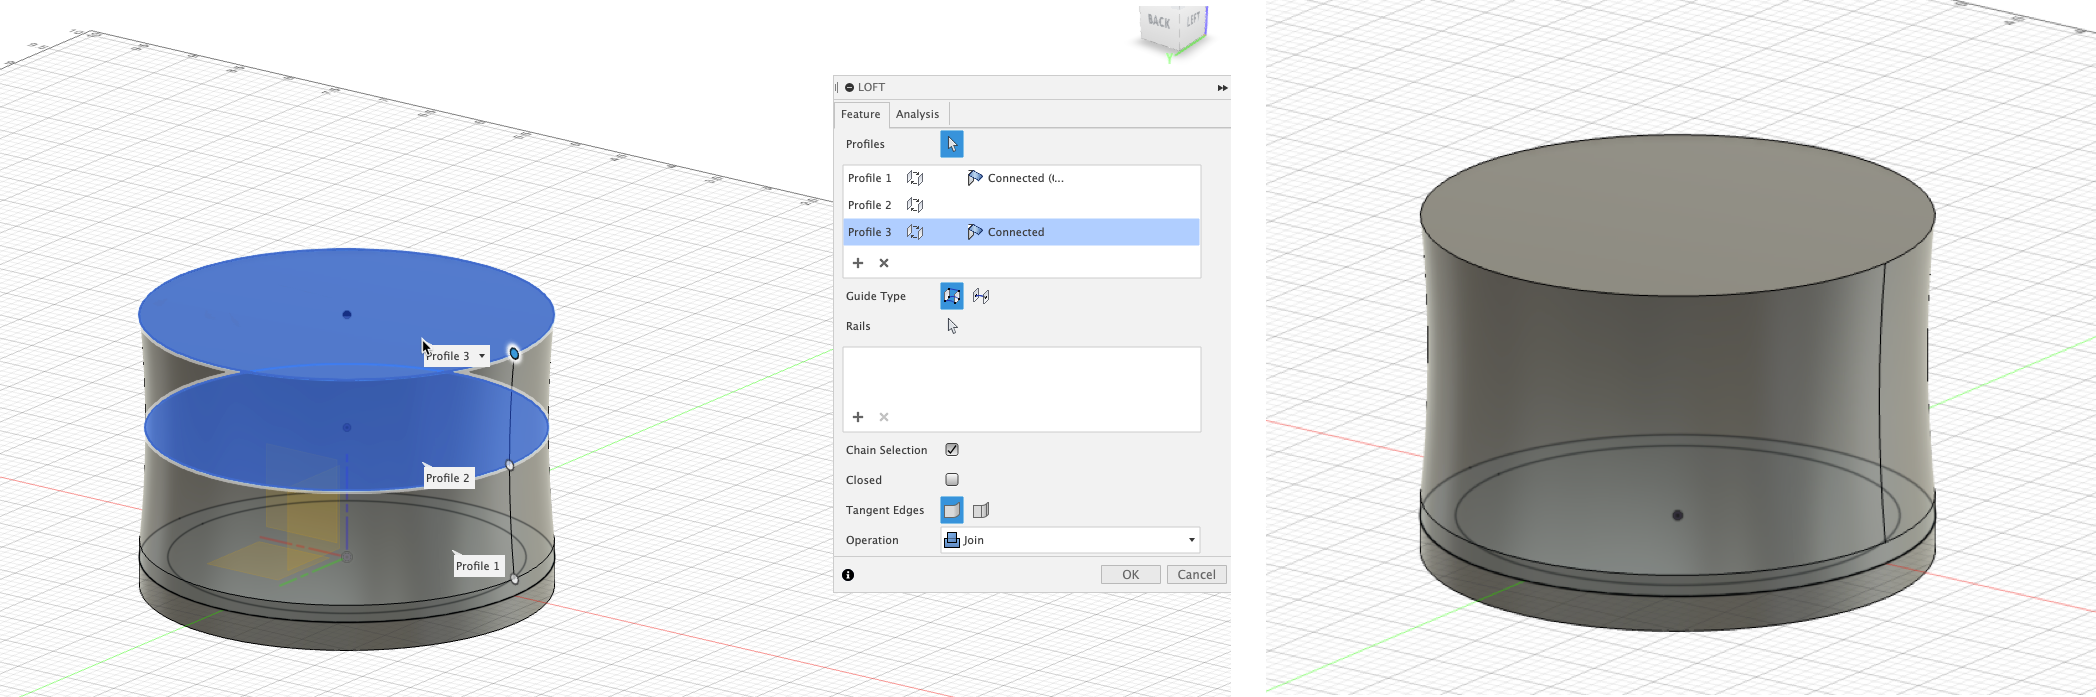
Now for a new feature! I created two an offset planes at 1 inch and 2 inches above the base plate.
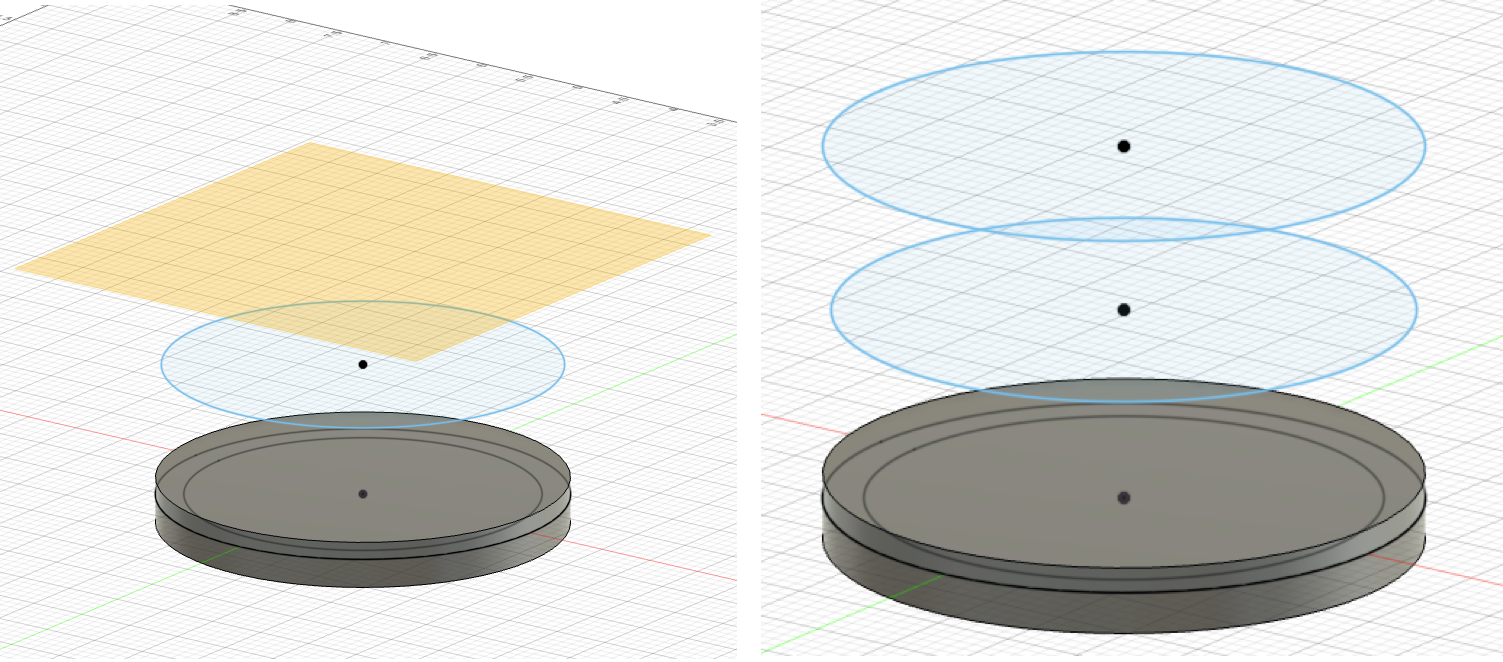
On each offset plane, I created a new sketch. The circle at the 1-inch plane was slightly smaller than the base, while the circle at the 2-inch plane was identical to the base. This gave my pot some extra life and added curves!
I used an additional new feature called lofting to connect my two offset planes to my base.
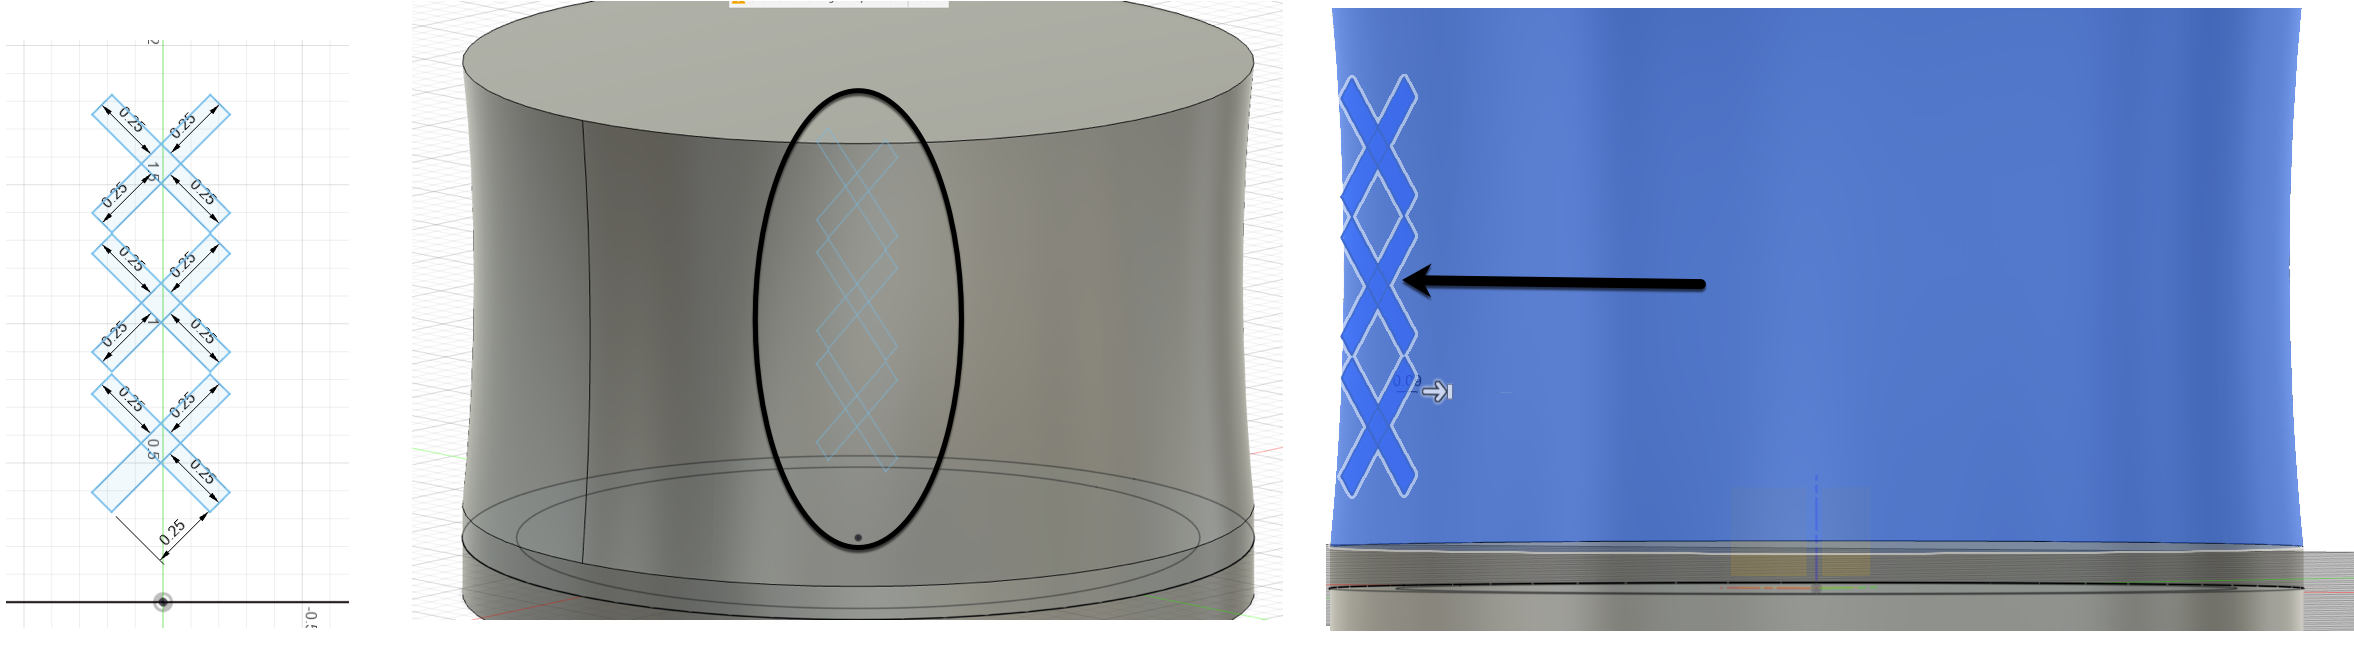
Now that I had my basic pot shape, it was time to add some creative touches! I created a new sketch along the vertical plane that contained "X"s I planned to repeat around the circumference of my pot. After arranging them, I shifted them a little bit outside of the width of the pot. When extruding, I altered the settings to extend the "X"s back to the surface of the main pot body.
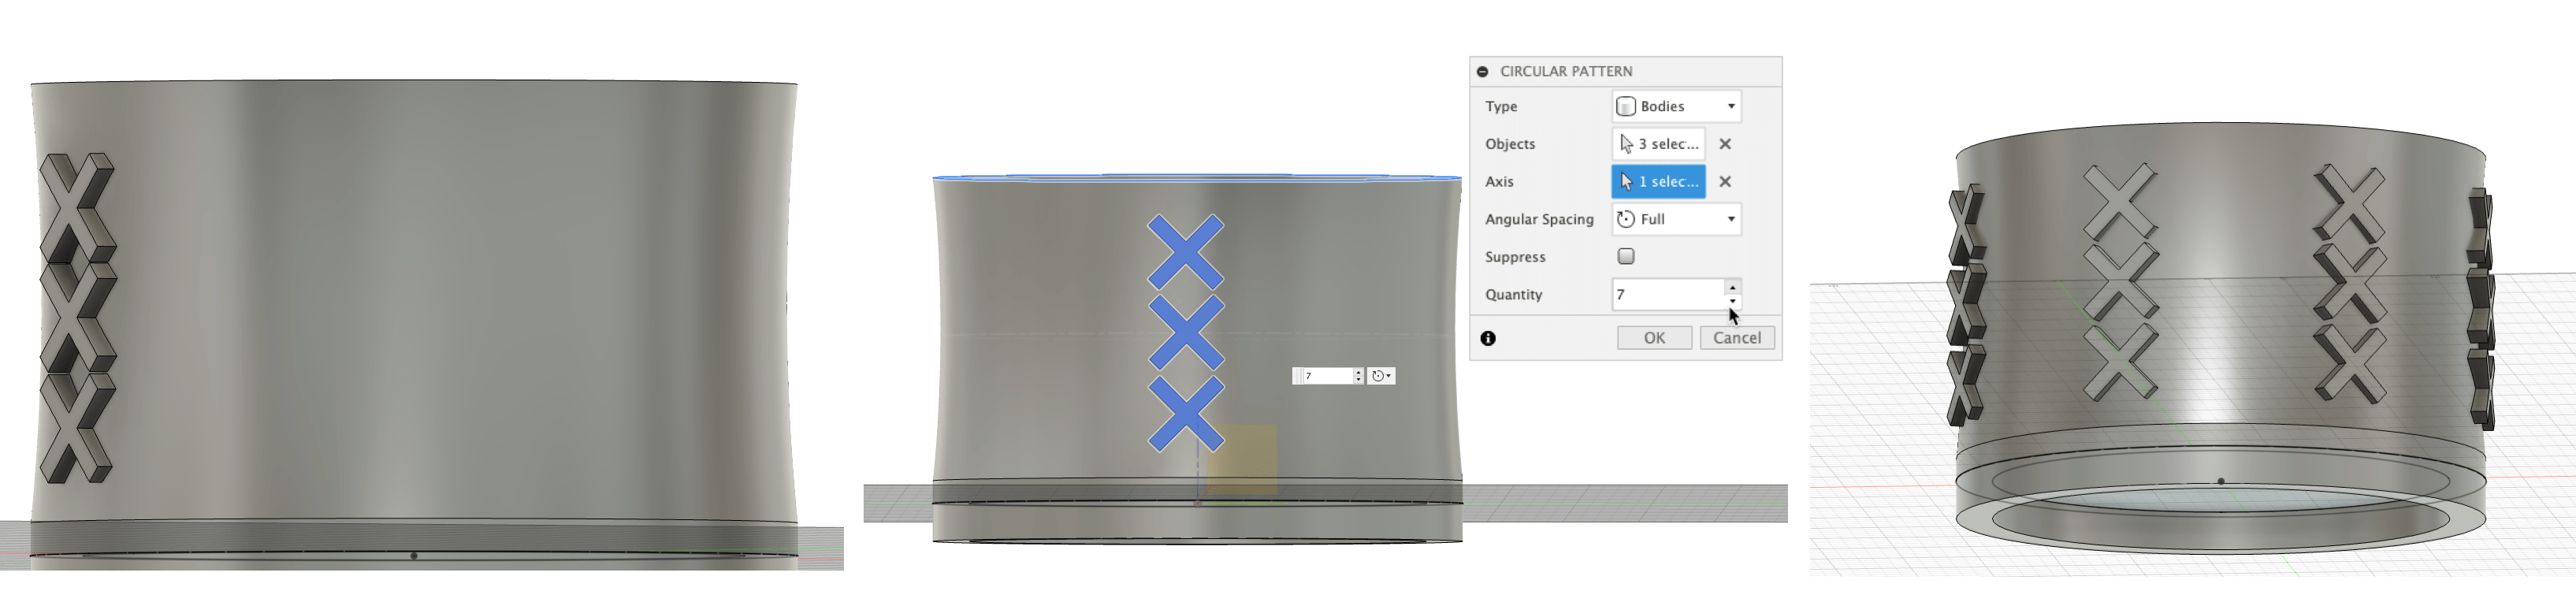
After extruding, I selected all 3 "X" bodies to create a circular pattern, selecting the 3.5inch base circle as the axis. This repeated the pattern 7 times, equidistant apart along the face of the pot.
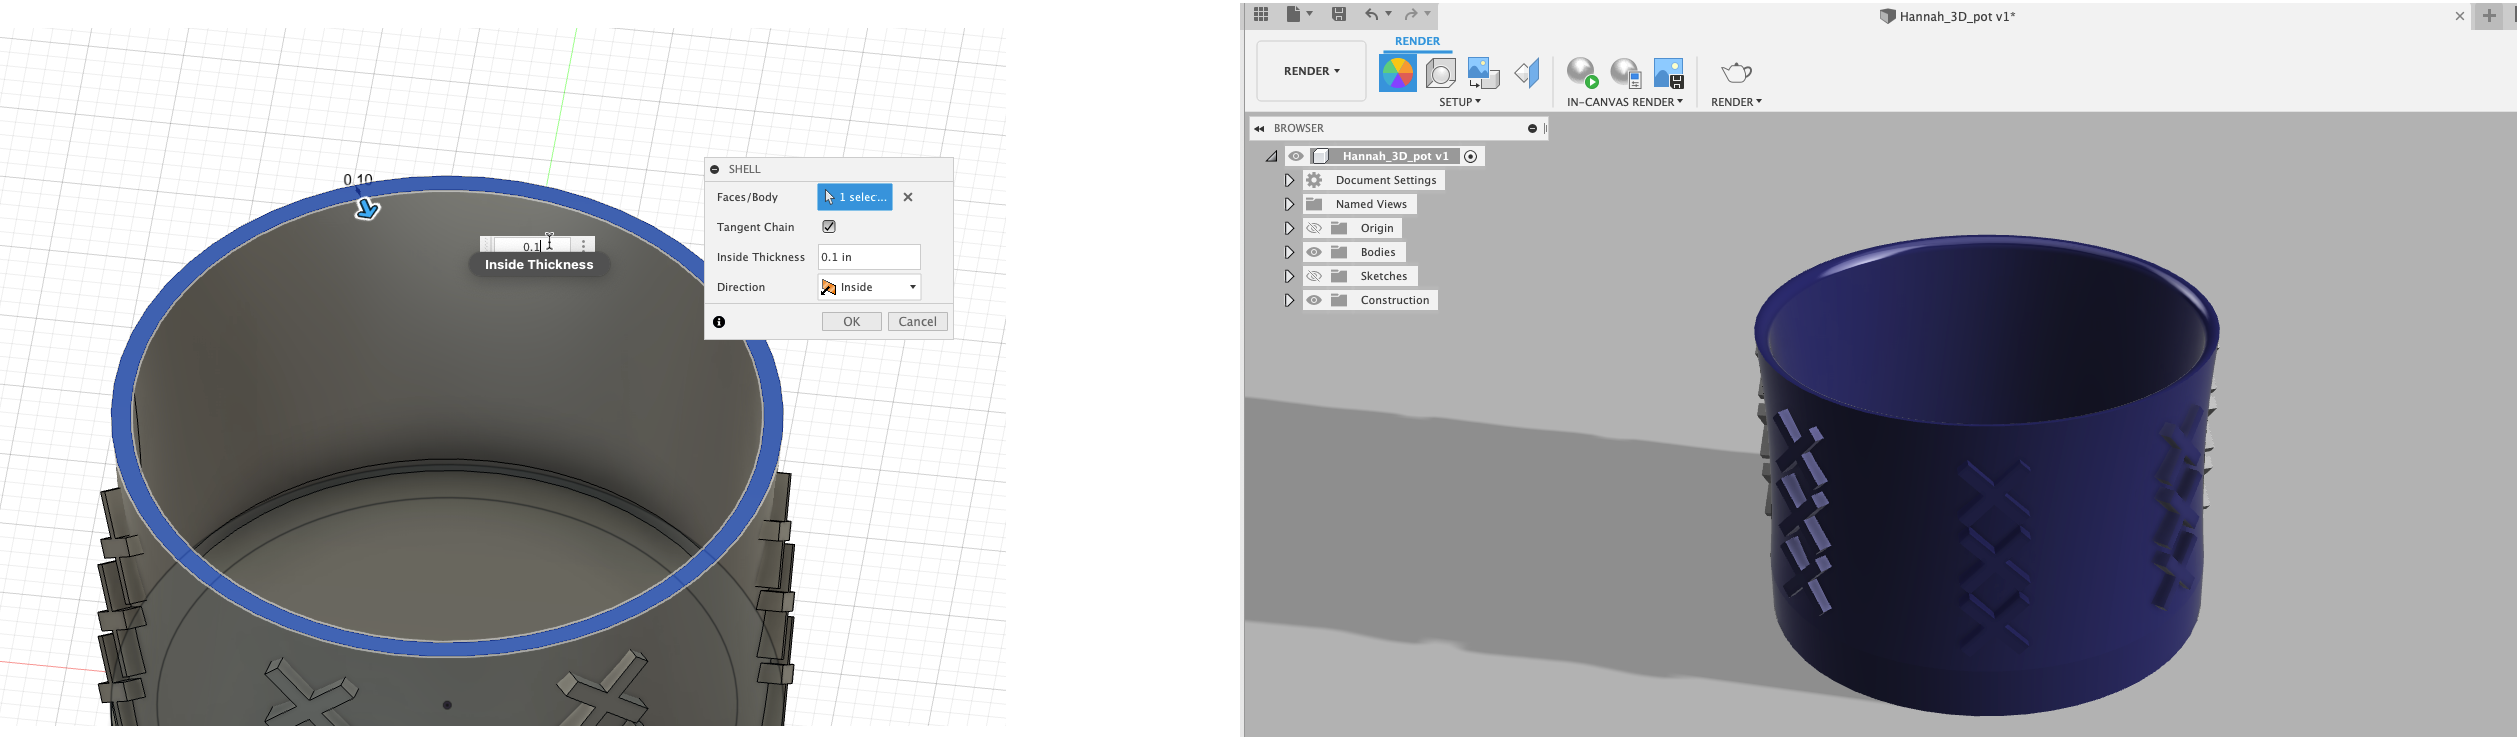
My last step was to shell the pot, making the inside hollow. I added a slight filet to the rim and my design was complete!

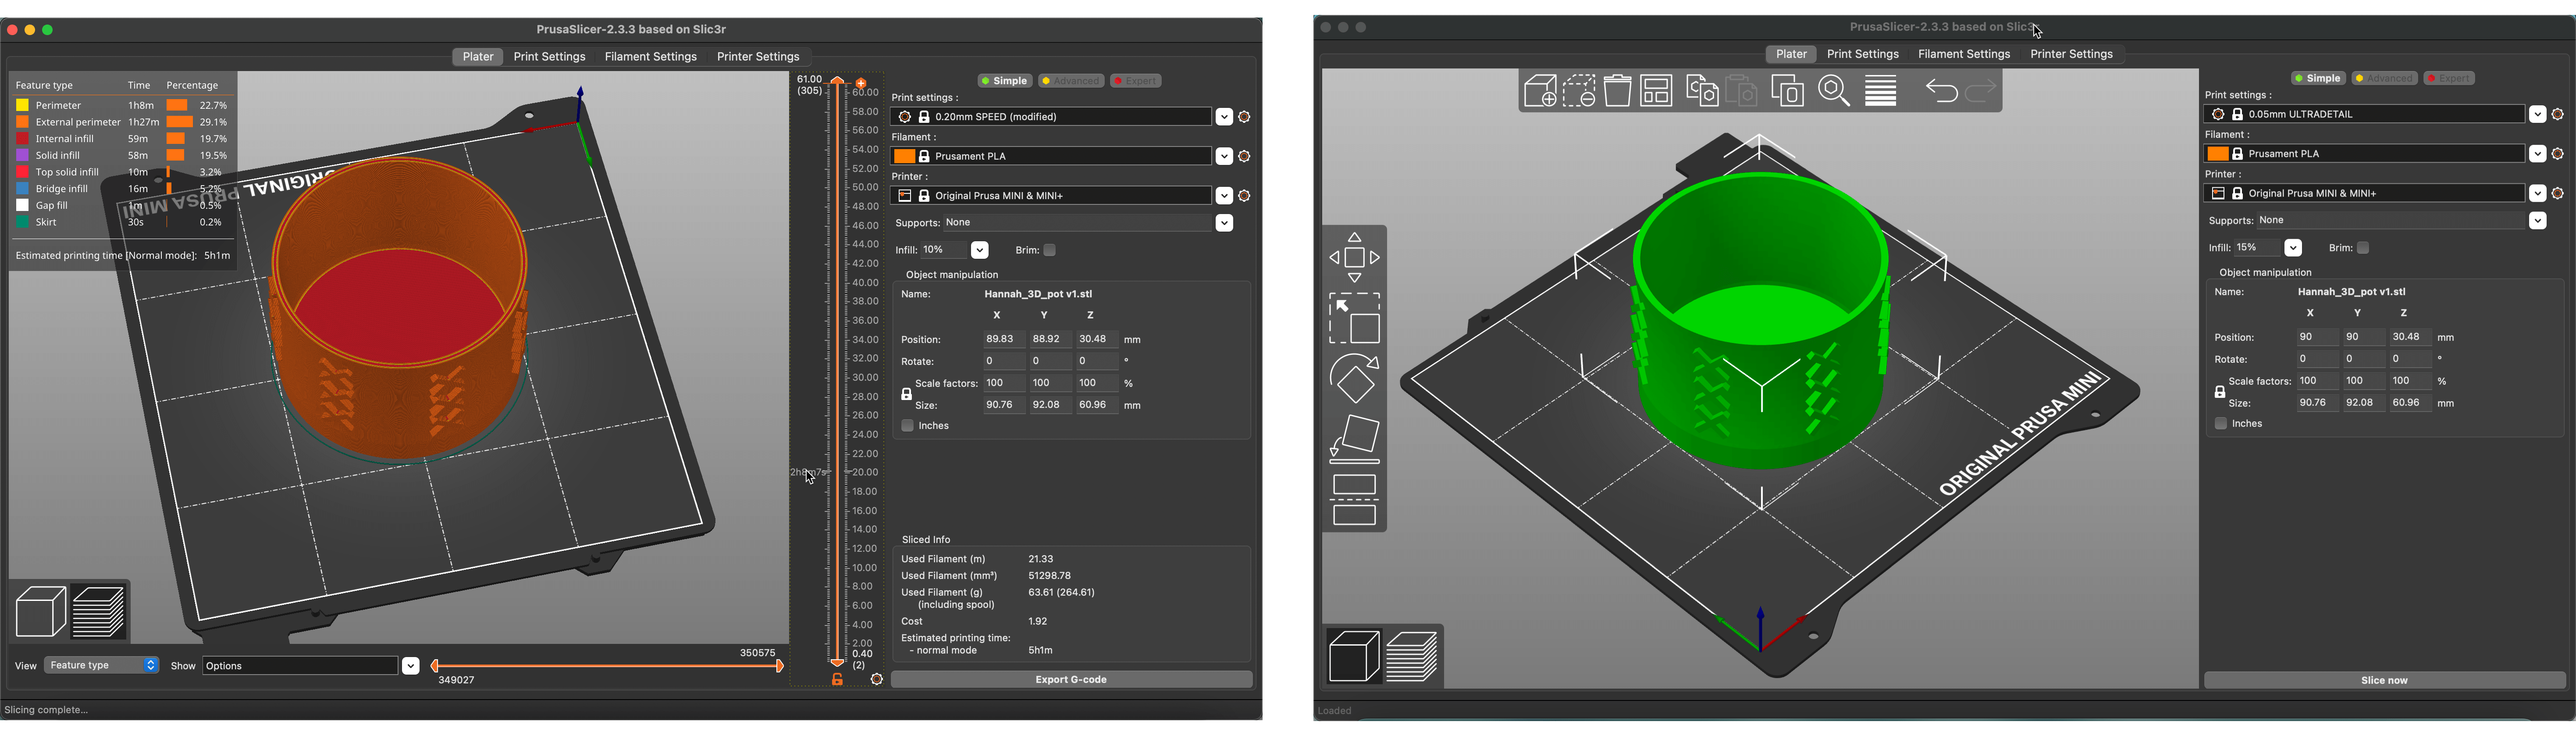
I imported my STL design into Prusa slicer, to get an estimate on how long my print would take - approximately 5 hours. Prusa slicer is a CAM (Computer Assisted Manufacturing) software, which converted my design into G code that could be read by the printer. I opted out of extensive supports after hearing from other Digi Fab students. I exported my G code to an SD card and headed to the printer!
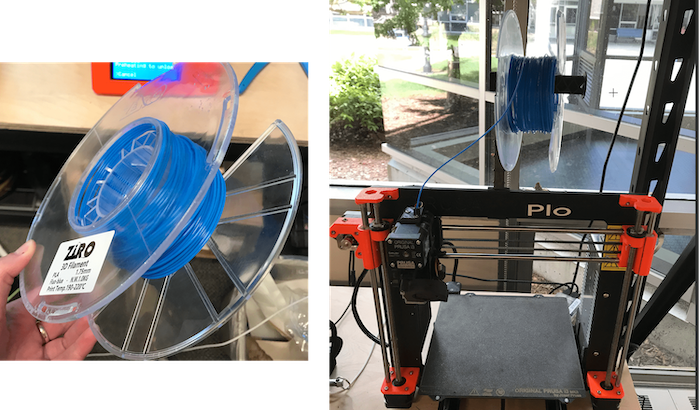
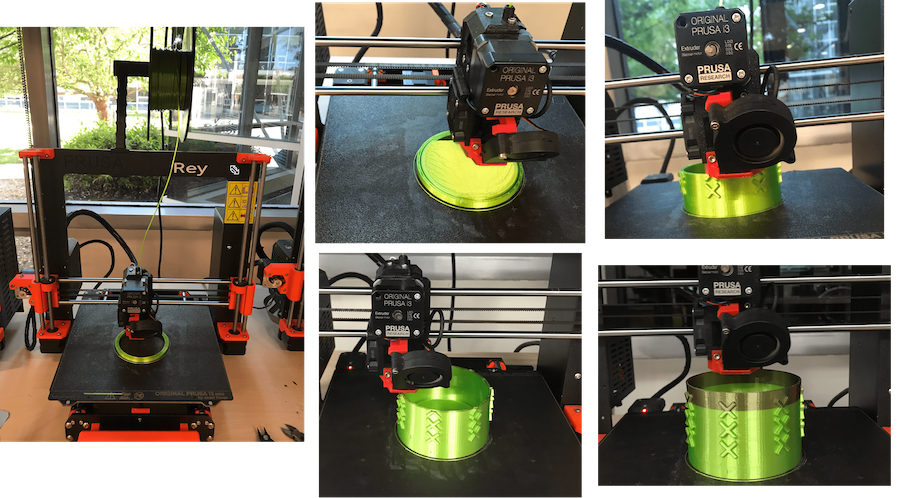
After recieving my training I reserved my time on a 3D printer in the Fab Lab. The Prusa printers work by heating up the filament and piping it out of the extruder onto a baseplate based on a design that has been converted to G code. I loaded in a blue PLA filament into Plo (a i3 MK3 in the Fab Lab) and inserted my SD card. After selecting my design via the (3D printed!) interface, Plo began printing, as I held my breath. Most failures occur within the first 30 minutes or first 2 layers. Since this was my first larger-scale project on the printers, I planned to stick around a little longer than that to keep an eye on the progress.
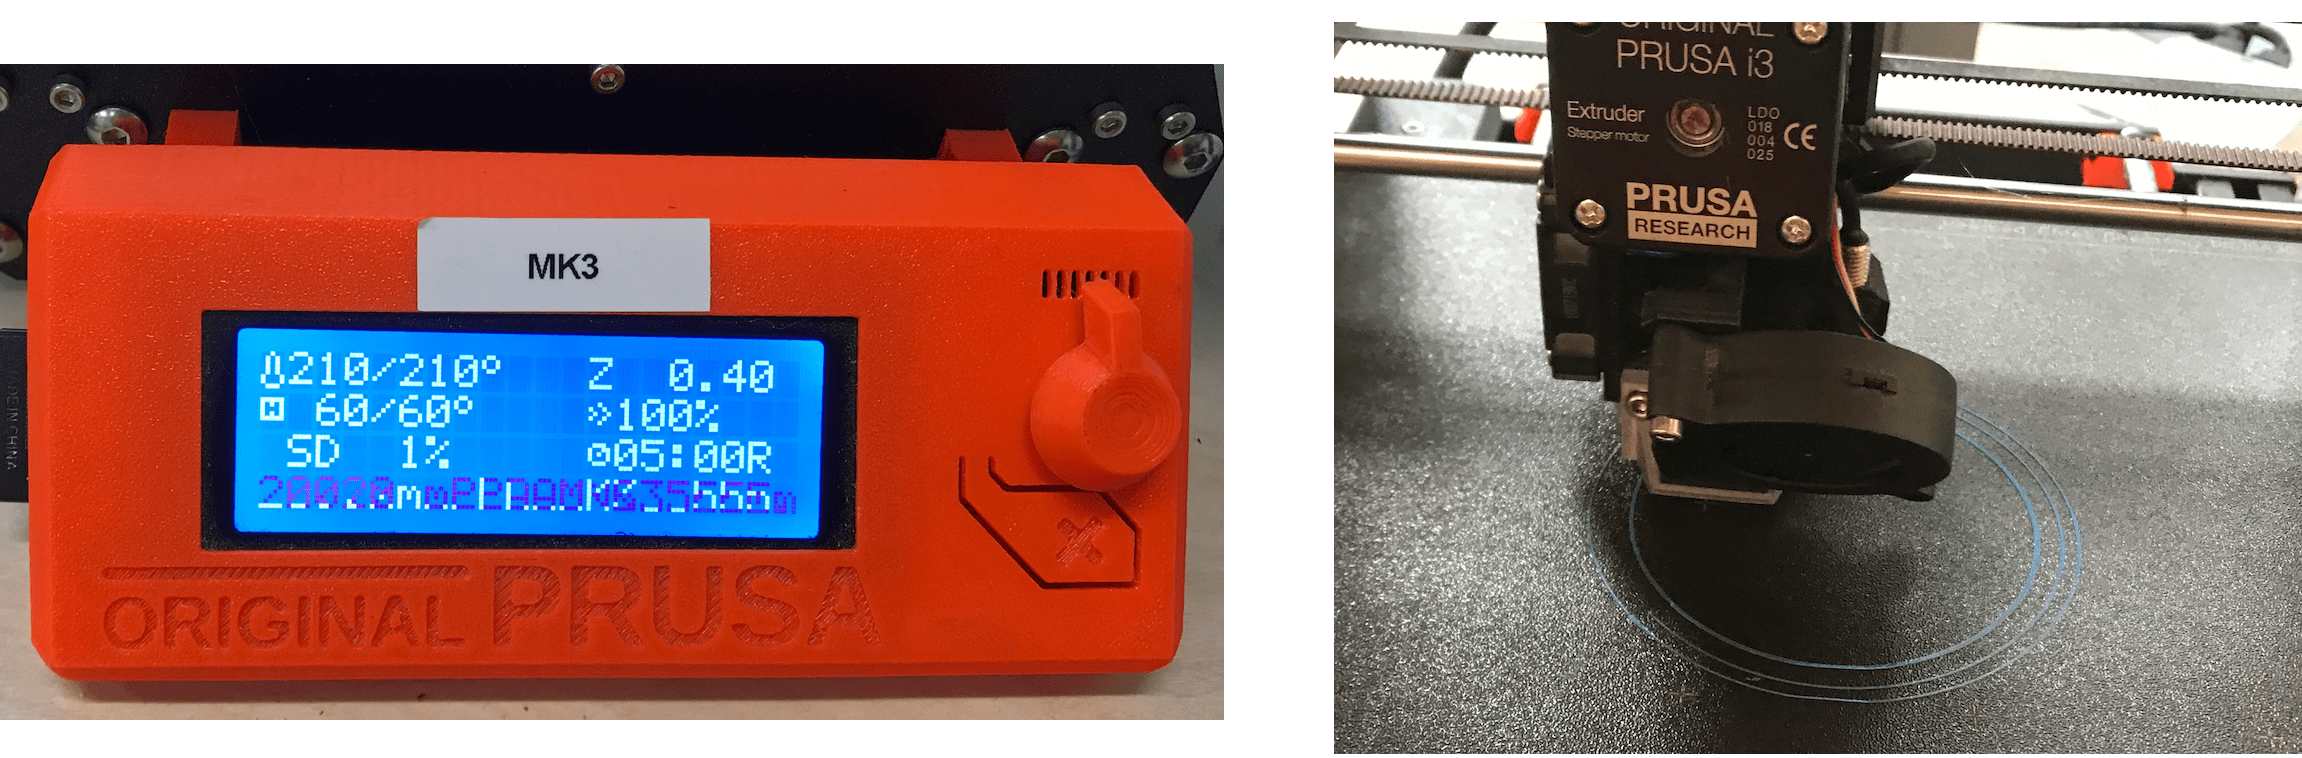
The part I was the most worried about was the bottom. Printing over thin air is, as one would expect, impossible. So I watched painstakingly as the printer bridged back and forth across the perimeter.
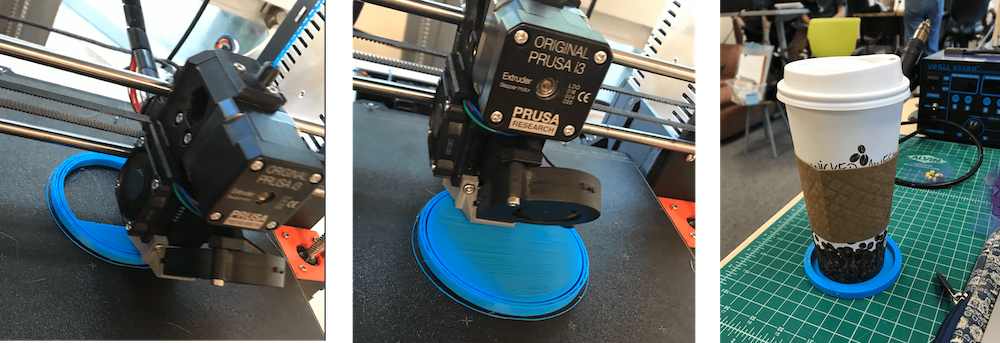
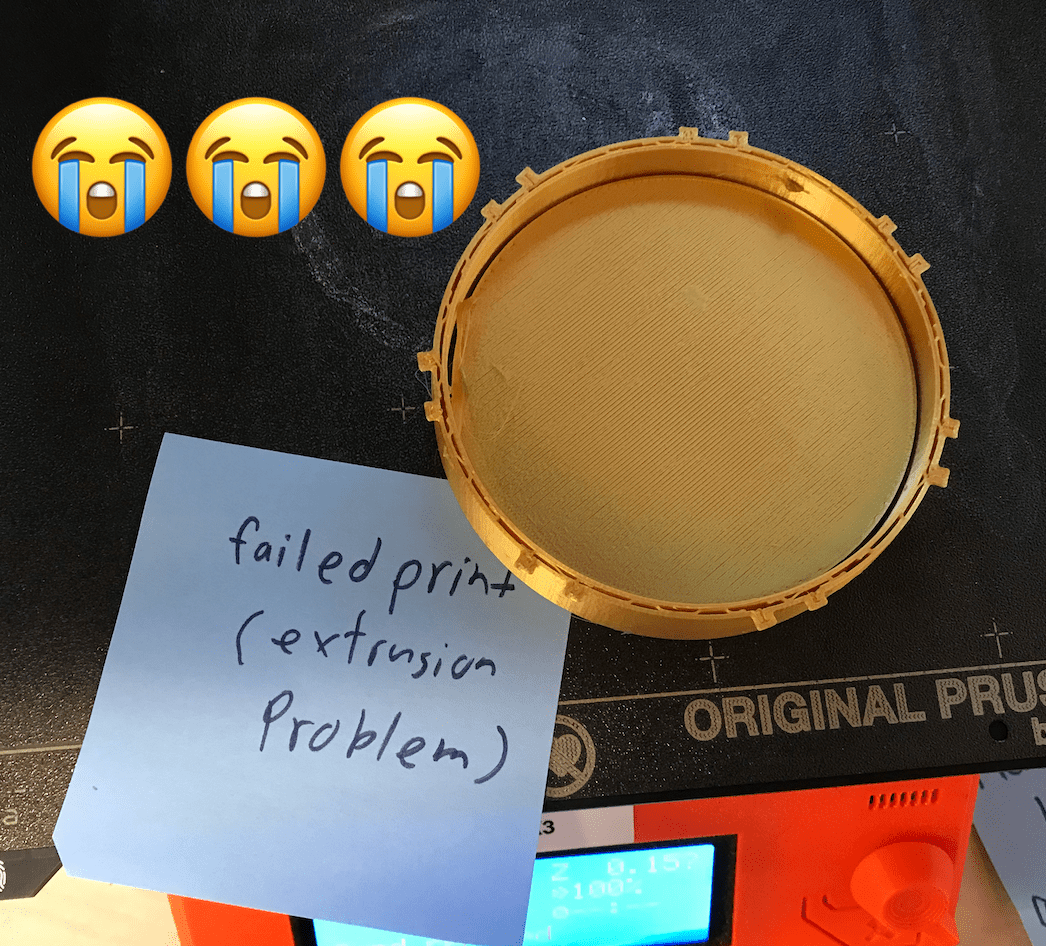
I was estatic after the first couple layers of the bottom were completed! But my excitement was cut short. I had to pause the print to make sure the filament reel wouldn't get tangled, and when it went to resume, the printer was no longer extruding. I was forced to cancel the print. :( A Fab Lab staff member came over to tinker with the printer, while I had to sit in agony and stare at my sad little print. But! I was able to come up with a use for my failed print - a coaster!
Finally, I was able to get back on the printer with a new gold filament and start my print back up again, this time with my fingers crossed. But, hours later I returned to the printer with a sticky note message claiming that my print had once again failed...
The next day I was FINALLY able to successfully print my pot! Halfway through, I ran out of filament and had to replace, but luckily this didn't cause any issues, and looks pretty cool!
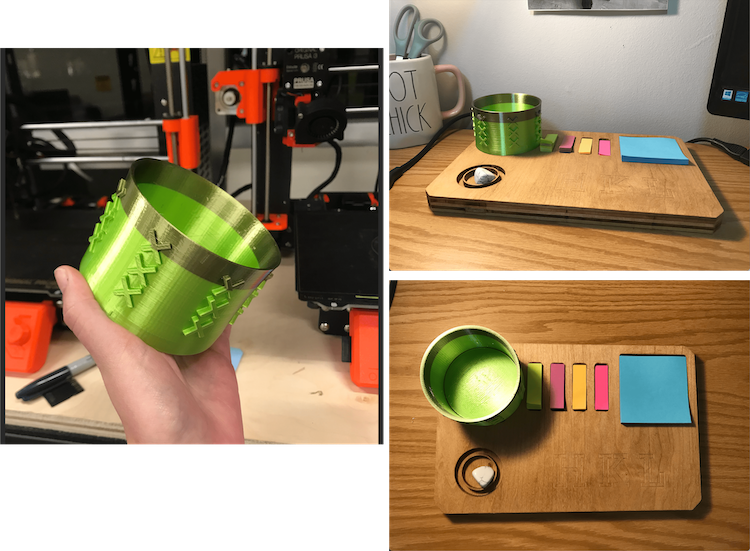
After 5 hours of printing, my pot was finished! It fit snuggly in my CNC routed desk organizer! See the photos below for my finished product!
Never having used a 3D printer before, I tried to go as basic as I could with my design, unsure of what exactly the machine was capable of. By the time I had completed my training, the only slots available for printer use were on Monday, the due date. This put some extra pressure on me to ensure my print didn't fail - which it did! The failure(s) were very frustrating since the machine issues were out of my control, but it was a learning experience, and the whole FabLab team pulled through once again to help me every step of the way.