Over the next few weeks, I will continually update this page to show off my progress on my Digital Fabrication final project!
Here are a couple of ideas I had initally for my final project! I was unsure about how complex our projects should be, so I created three different scale ideas.
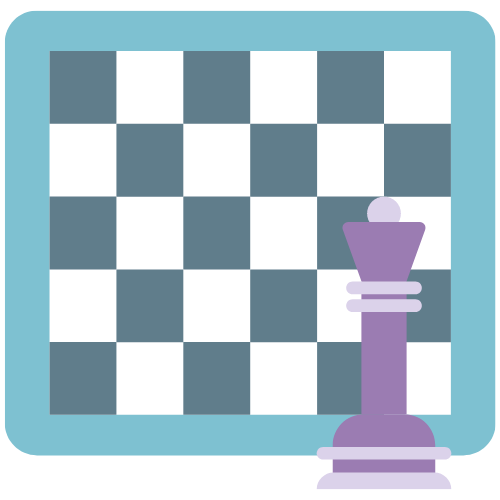
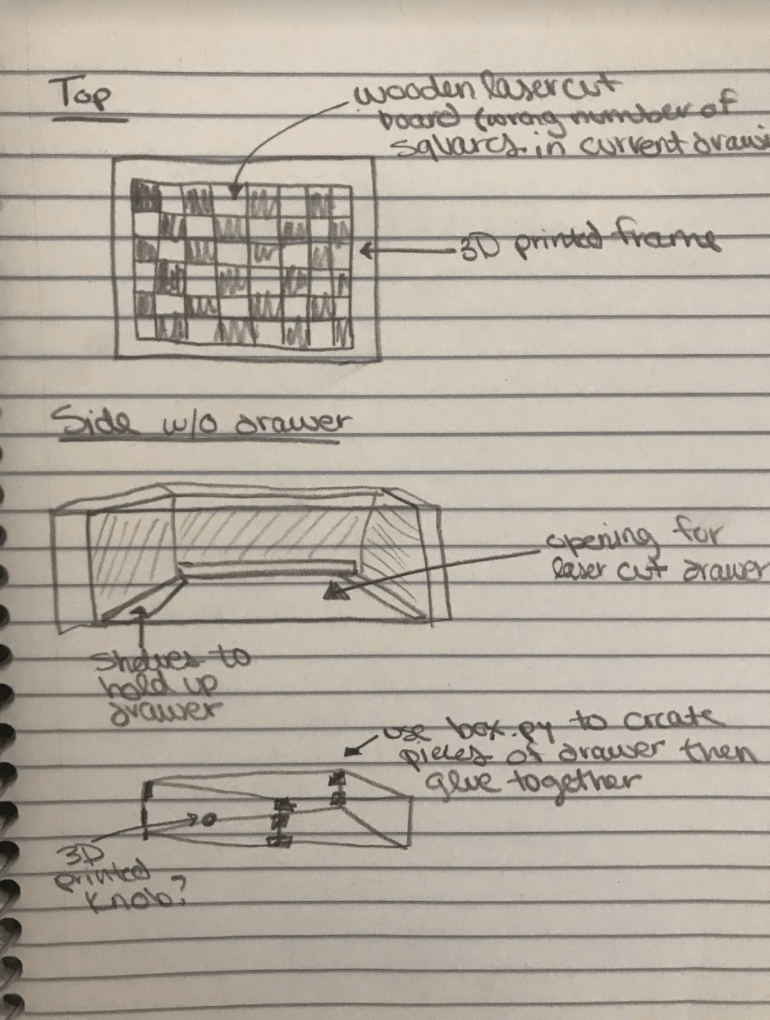
My first - and most involved - idea is a chess board. The components would include 3D printed pieces, a laser cut checkerboard, a 3D printed frame and a laser cut box drawer beneath the board.
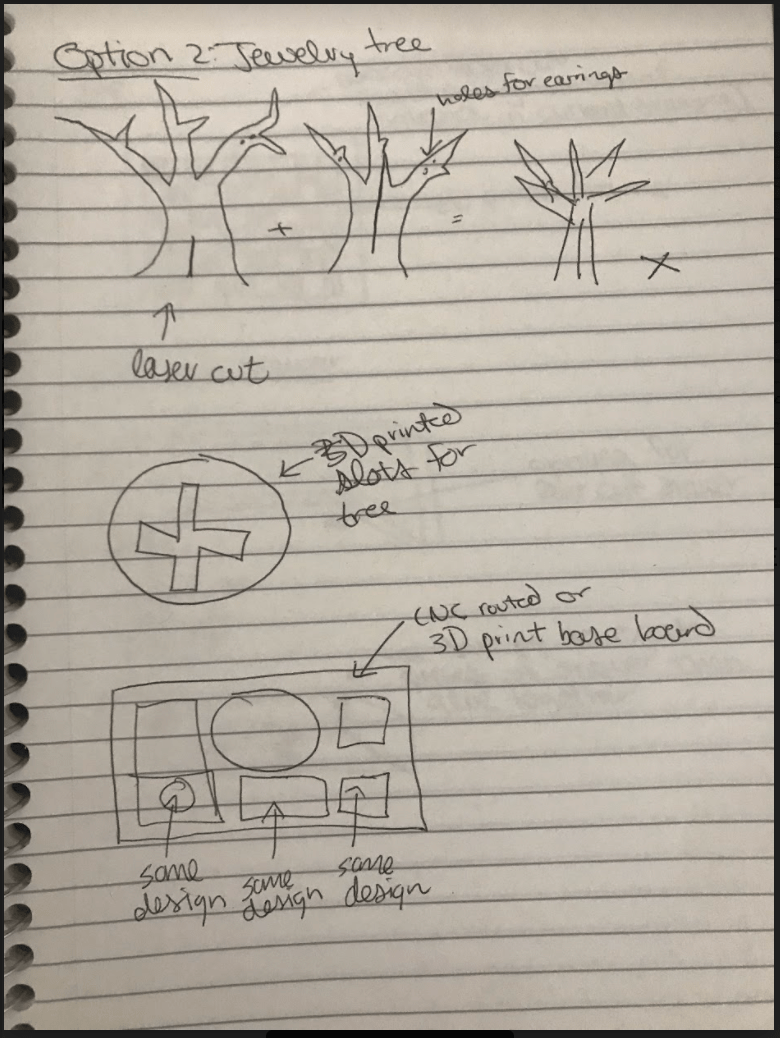
My second - and slightly less involved - idea is a Jewelry tree and custom base. The components would include a laser cut 3D tree with holes and hooks, and a 3D printed base with slots for other jewelry and an "x" slot to hold the tree.
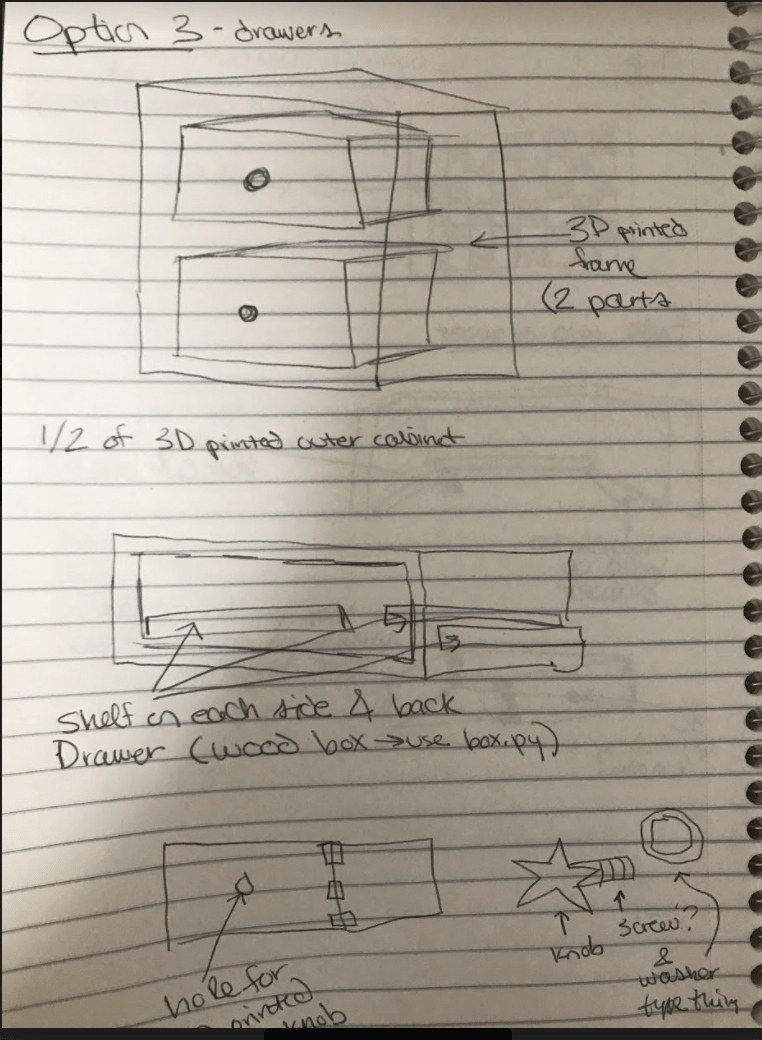
My third - and simplest - idea is a desk top organizer with working drawers. The components would include a two pieces of a 3D frame that would be secured together, laser cut boxes for the drawers, and 3D printed knobs.
Initially, I drafted a couple of ideas that I then propsed to Whitney during my consultation. With her help, I decided to pursue my first idea.
I plan to create a custom chess board, with a laser cut board, an attached 3D printed piece holder, and 3D printed chess pieces.
I did have to reconsider the design of my framing element, as I planned on initially 3D printing this component. Prusas are not very good at flat elements, and my initial full frame around the entire checkboard may be to big for
the printers in the Fab Lab. So - instead I will be creating a box element with a checkboard on top using the Glowforge, and creating 3D printed piece holders that are secured to the board. My current plan for securing
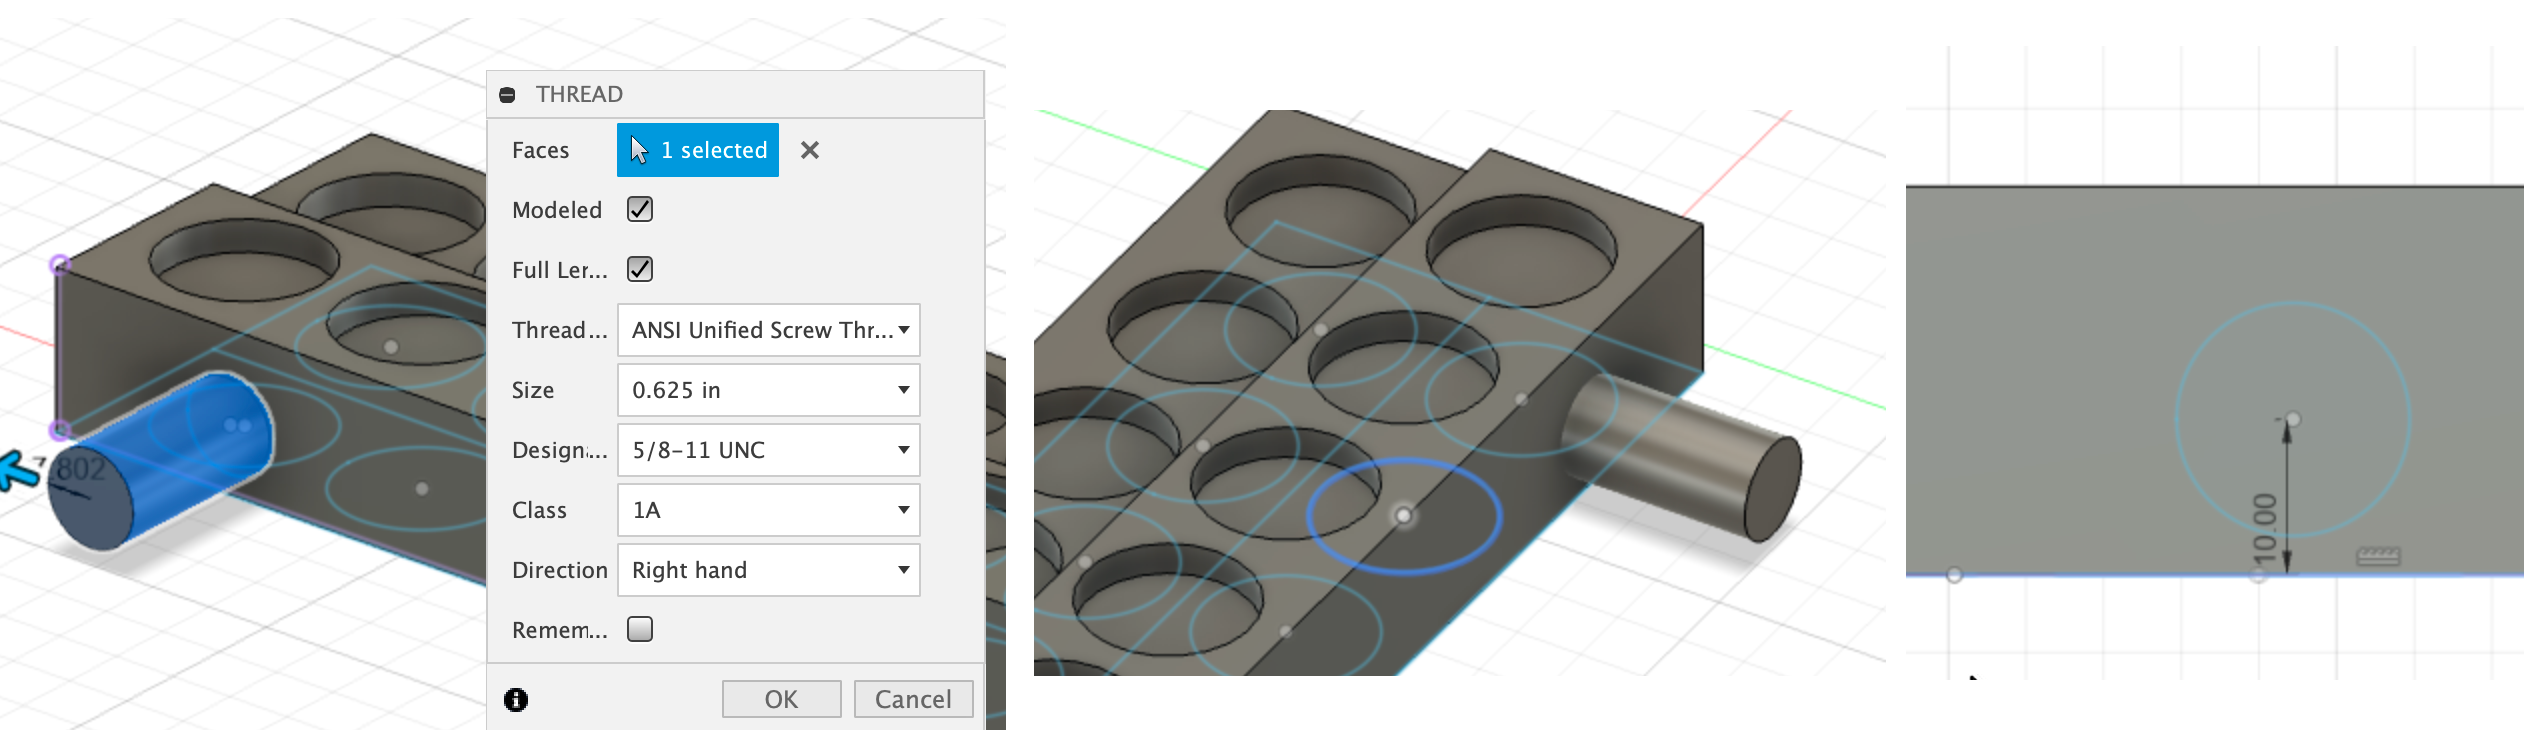
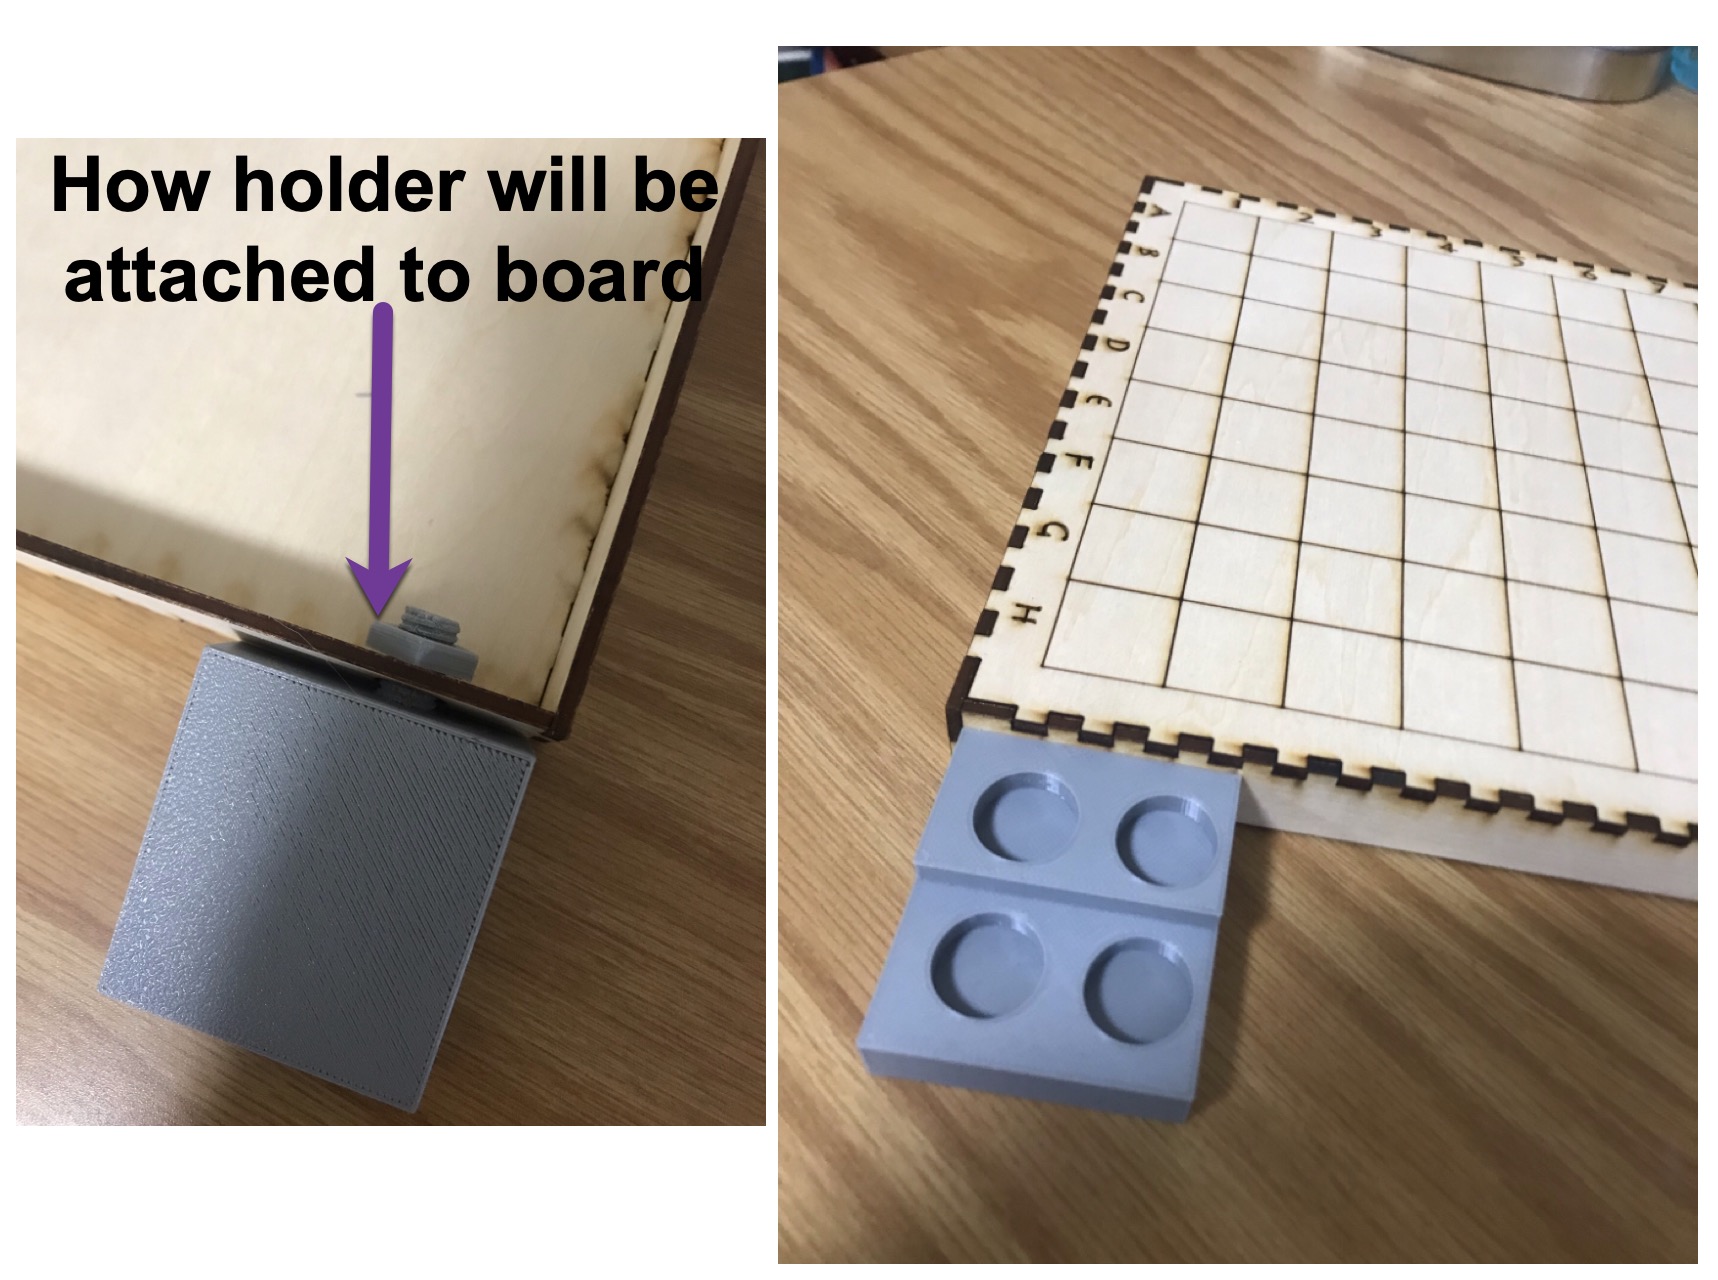
the piece holders to the board, will be to add two holes in the side pieces, then add a two threaded screws to the side of the holder, which will fit in those holes and will be fastened with 3D printed nuts. I have found a couple of online tutorials for
creating threading in Fusion 360 I plan to follow.
Currently, this is my plan for my iterations:
Over the last few days, I have been painstakingly printing and re-printing my prototype for a screw and nut in order to attach the piece holder to the board itself. I used Fusion 360's thread tool to create the internal and external threads. After four tries, I have finally was able to get a good fitting screw onto my prototyped piece holder.
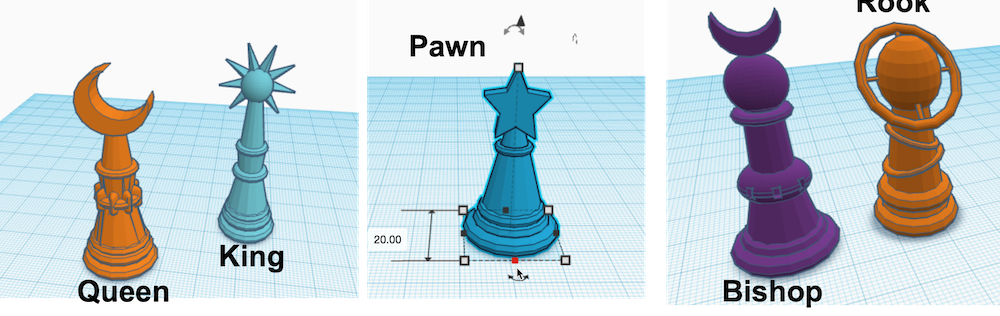
I have also been prototyping my pieces. After a couple of iterations, I decided to have a base of 20mm. While still a little small, I cannot have them exceed this size as the piece holder would
then end up being too large for the printer plate. I designed my pieces in TinkerCad as opposed to Fusion360,
since they are not super complicated, and with six different pieces to design, I opted for the simpler more user-friendly interface. I have also decided to have a astrology theme for my board to make it more exciting!
Here are some of the current designs I have for my pieces.

My next steps are to finish up the piece holder design - I plan to add some designs on the bottom of the slots to specify where each piece goes - then print it, as well as begin printing more pieces. Additionally, I plan to
laser cut my board design and assemble to make sure the components fit together before cutting into acyrlic.
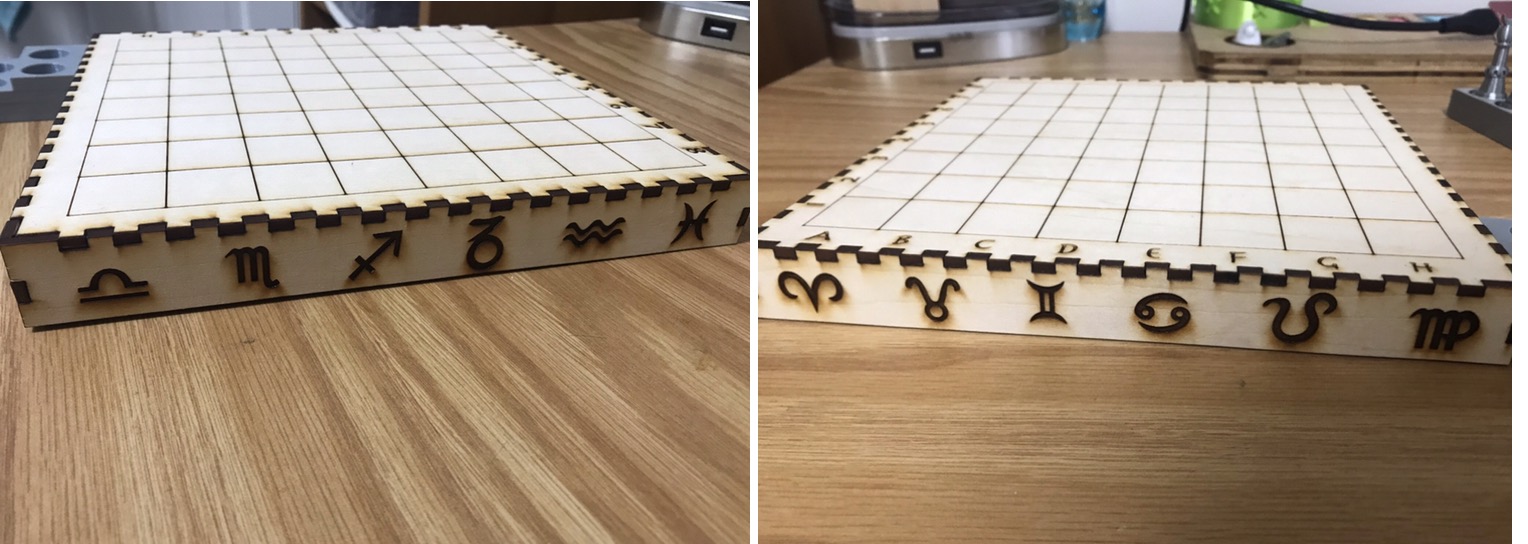
I have spent many hours over the last week proto-typing my chess board and pieces. I have finished designing all pieces and have made final
decisions on the sizes. I laser cut my board into wood to test out the design and ensure that the holes of the board lined up with the screws on the piece holder.
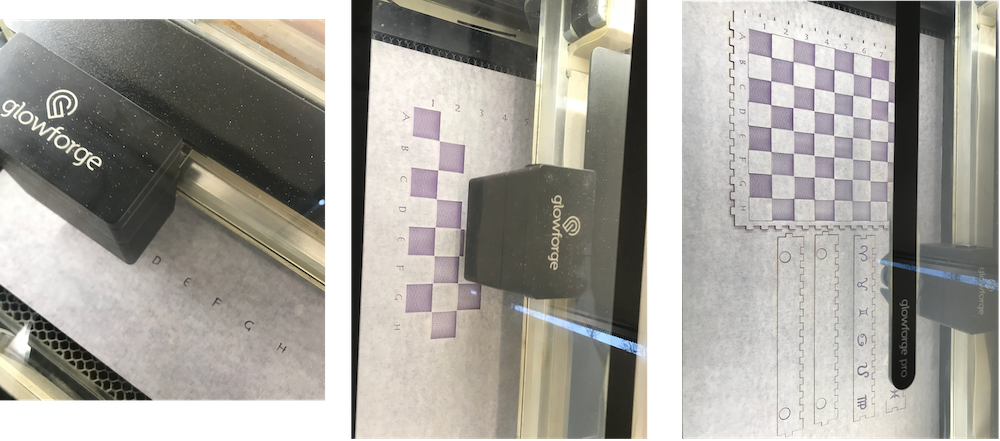
The Glowforge was going to take over an hour to engrave the checkerboard, so for the proto-type I opted out of this - and will discuss with Madison if I should plan to paint the acrylic version, as
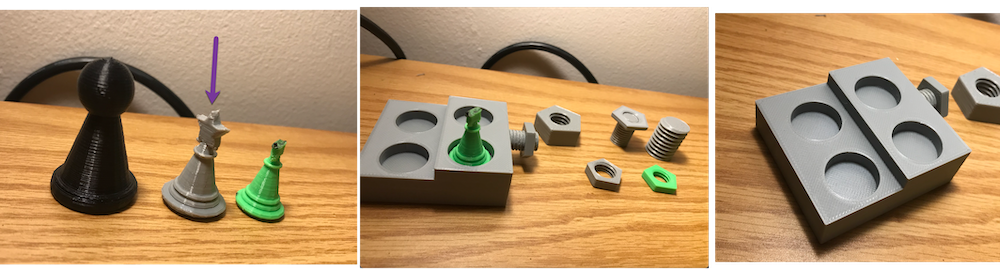
it will take much longer with that material. Everything fit together wonderfully! I am still having some trouble with my nuts and screws, but the piece holder fits the pieces perfectly and will attach nicely
once I get the right nut size. I plan on re-printing the piece holder with a higher quality for the final product.
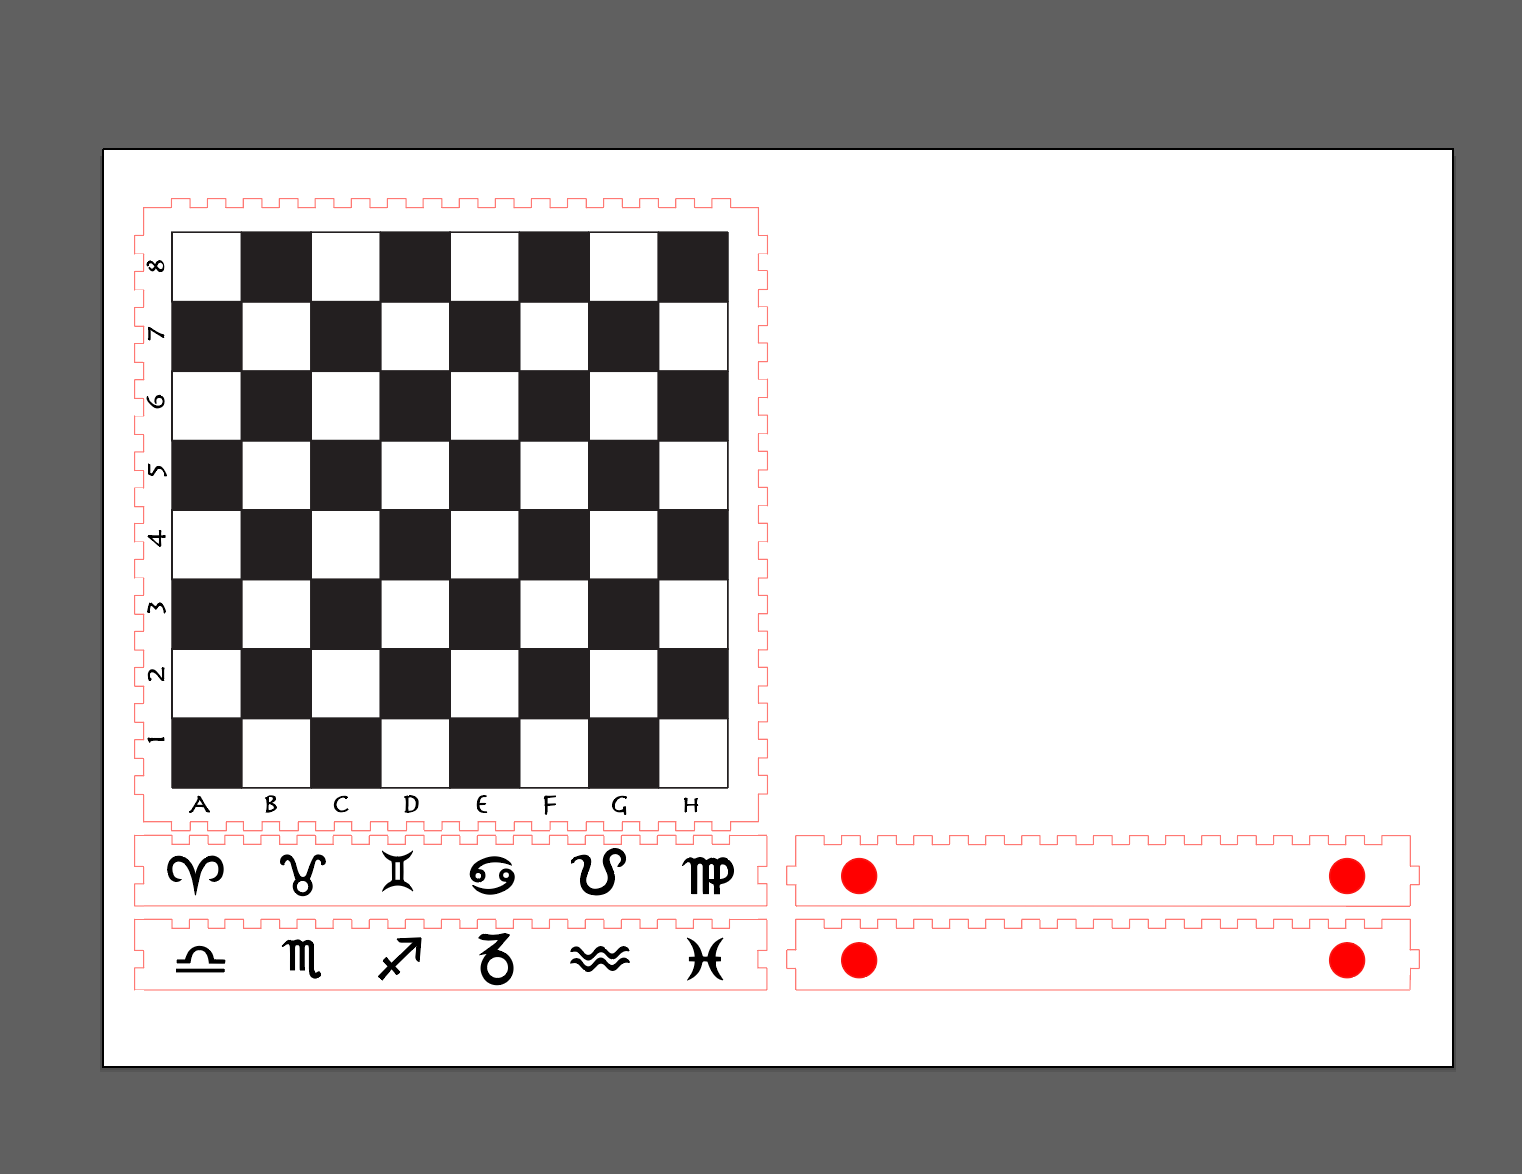
Below is my SVG file for my board that I created using Boxes.py and Adobe Illustrator, as well as some images of the assembled board.
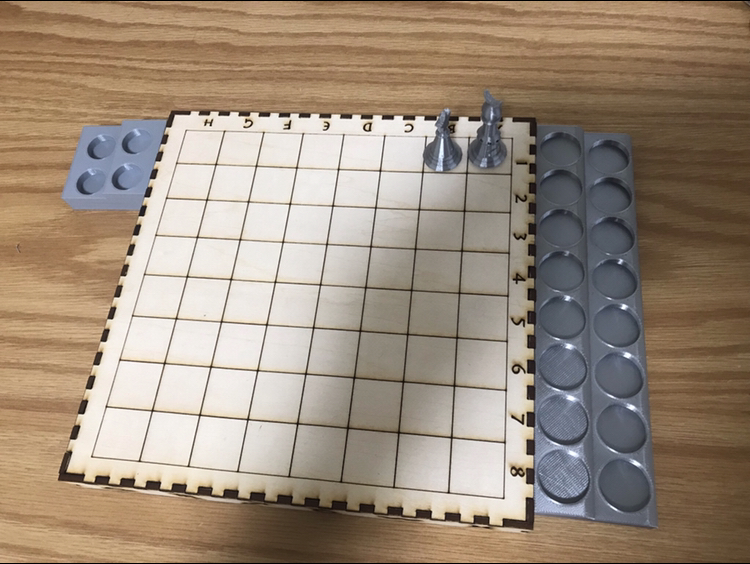
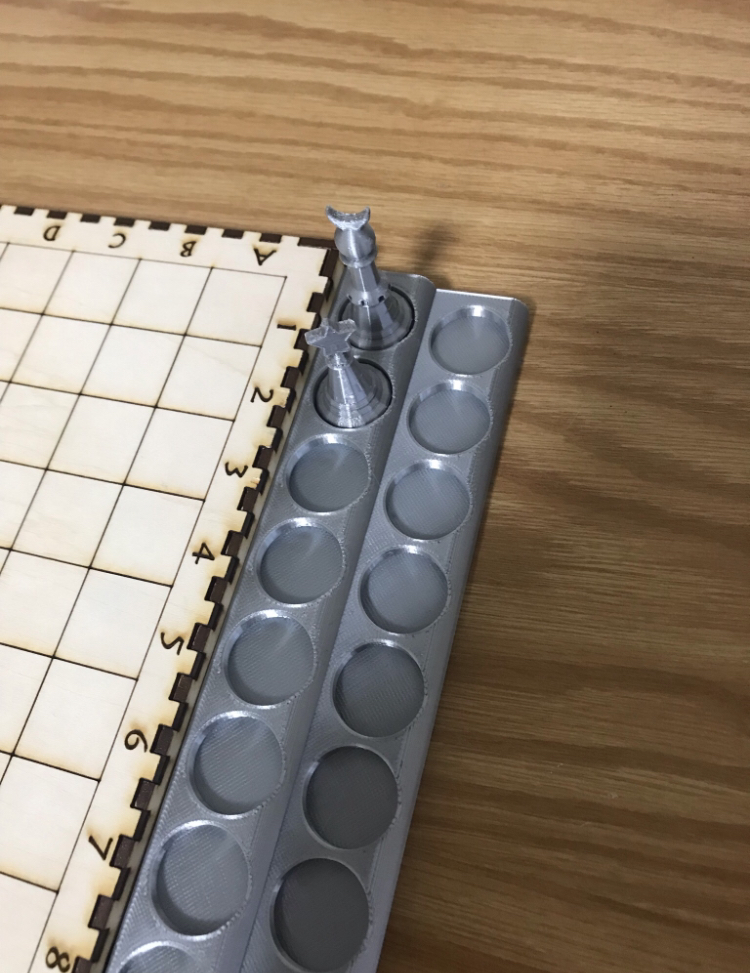
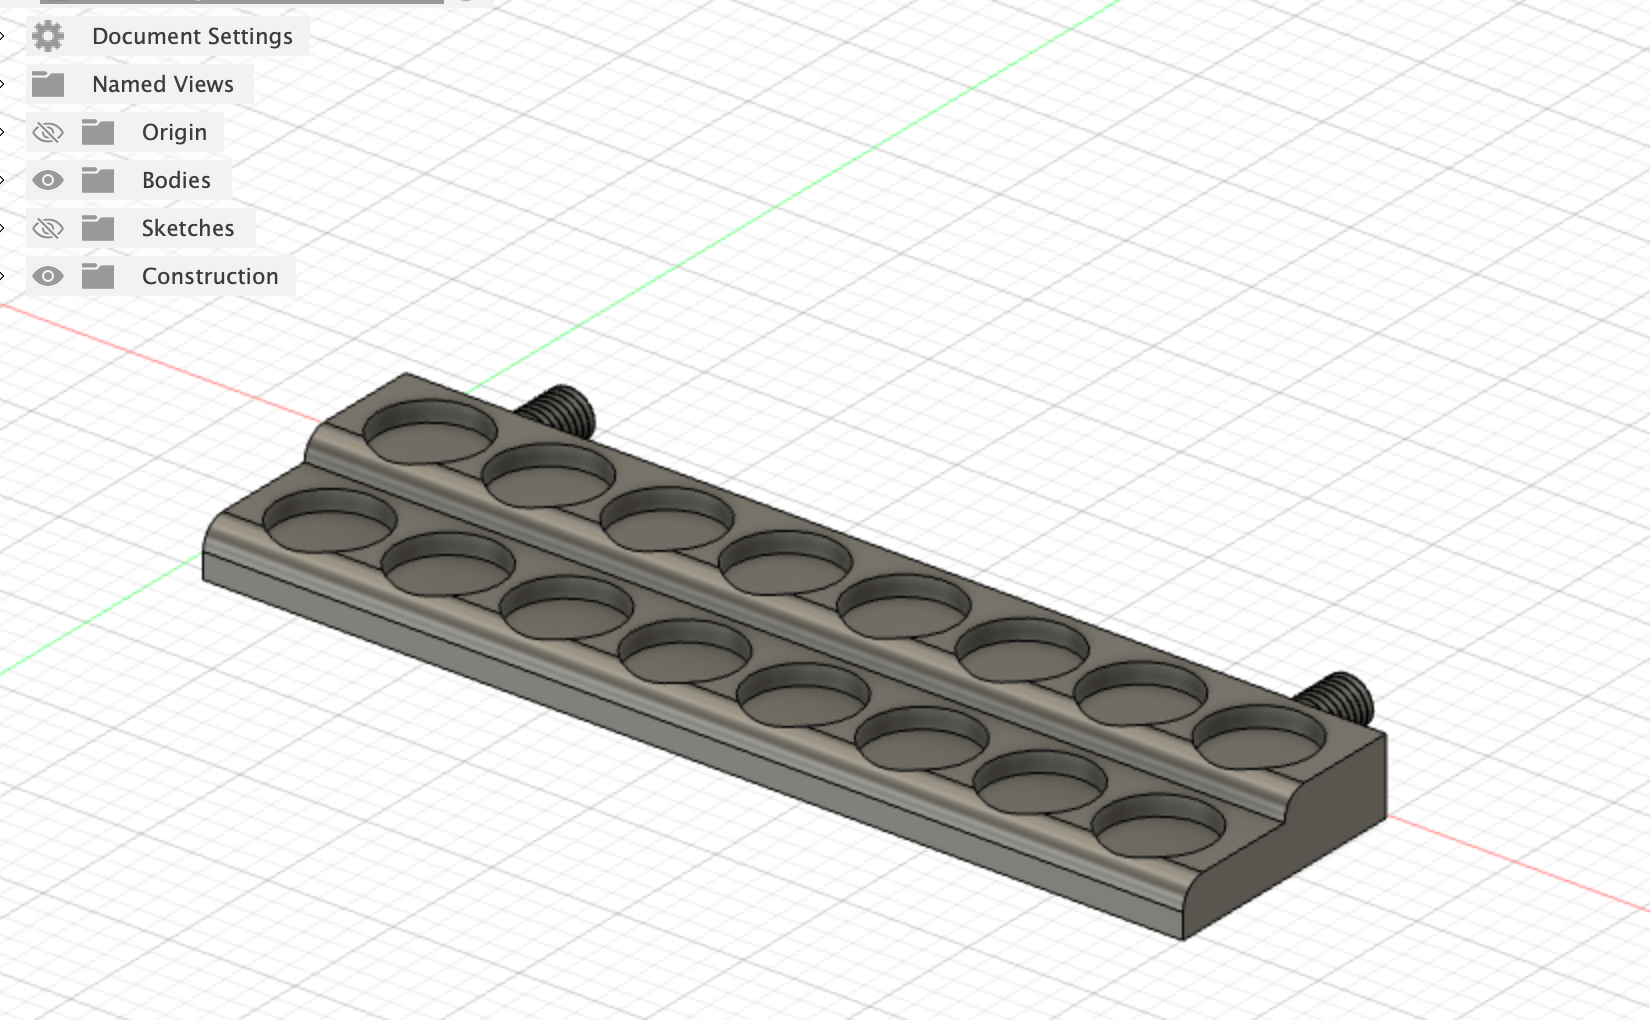
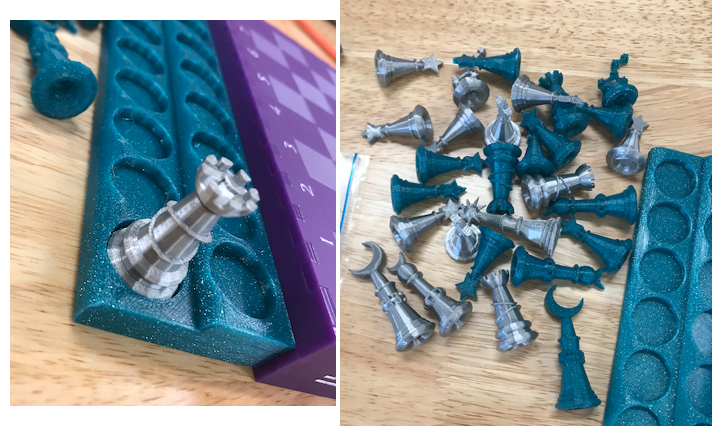
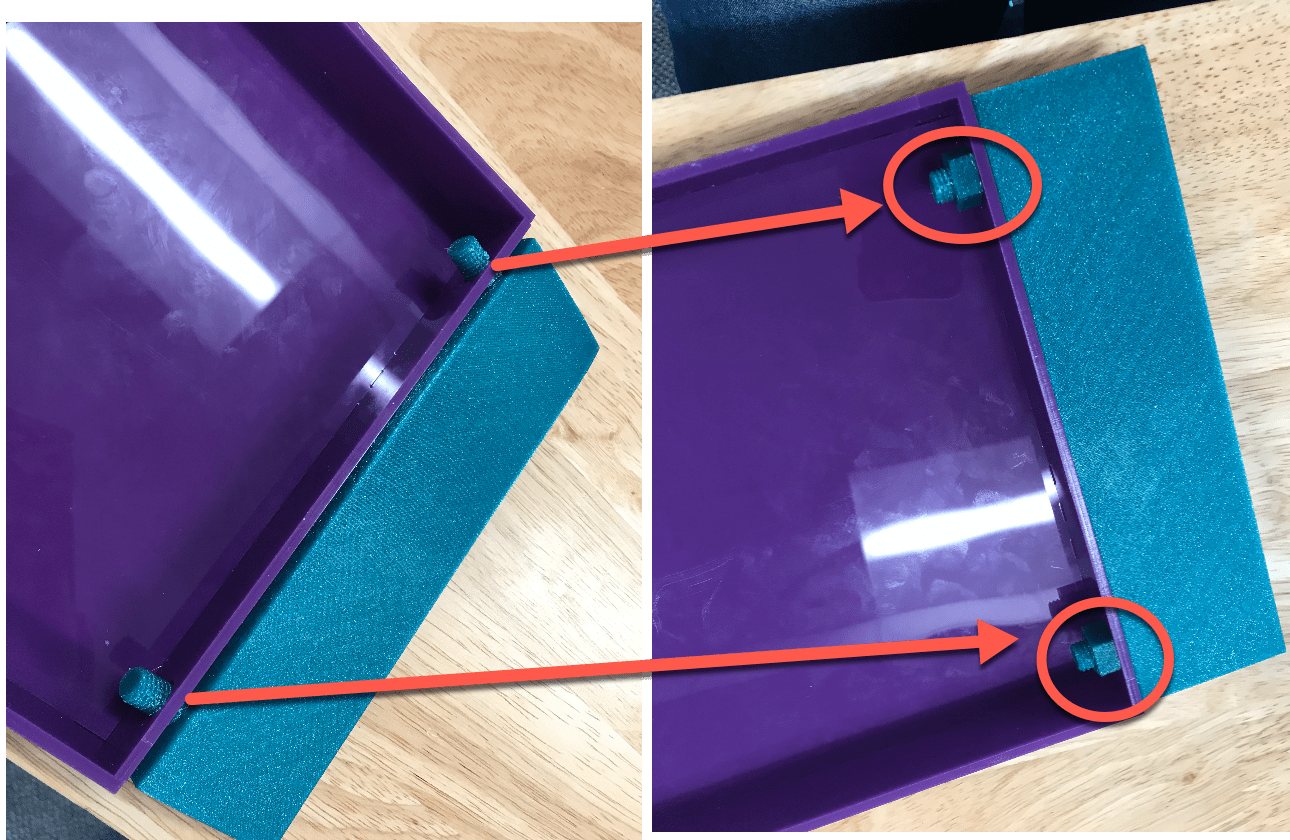
Since I had some issues with the screws, I have a full sized piece holder that shows how nicely the pieces fit into the slots, and a smaller version to show
how the holders will be attached to the board.
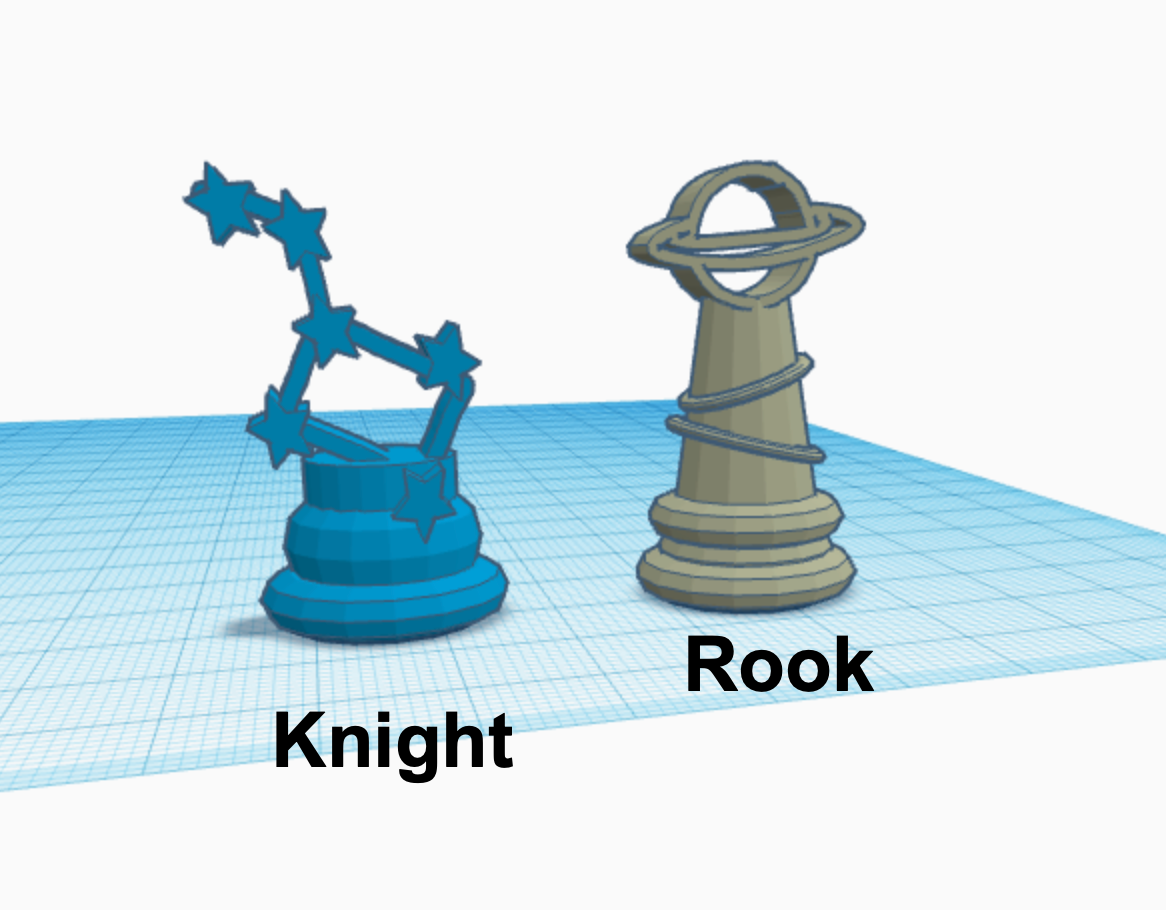
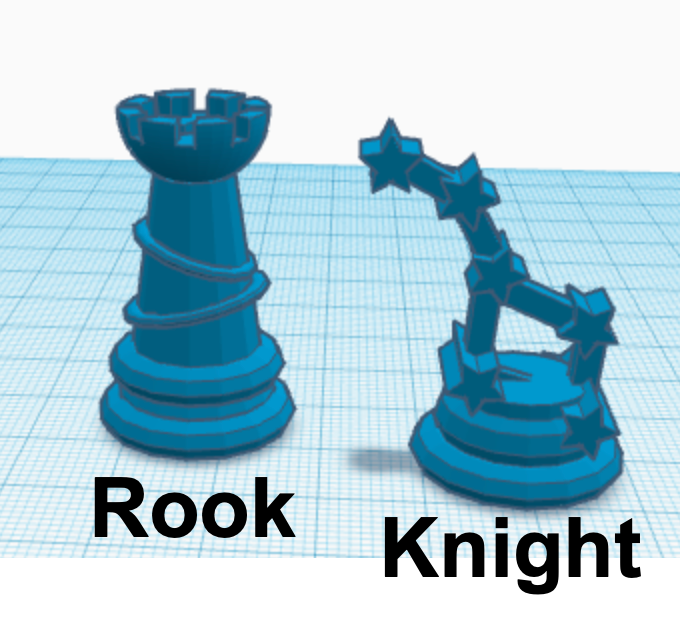
I completed all of the designs for my pieces, and changed the design of the rook.
I also slightly changed the design of my piece holder, by filleting the edges
Next week, I will print out the rest of the pieces using silver and sparkly blue PLA as well as laser cut the board into purple opaque acrylic!

After recieving my order of PLA and acrylic, I was ready to start fabricating my final chess board!
I cut the acrylic board using the Glowforge laser cutter. THe only tweaks I made from my previous design were increasing the width of the material to 3.45mm and increasing the heigh of the sides a bit to make the board taller. The engraving of the checkerboard took an hour of painstaking waiting, but the result was worth it!
The assembly of the board was particularly tricky. It took a lot of trial and error (and smacking on the table) to get the teeth of each side to fit into each other. But, with Bella's help, we final got the board together!
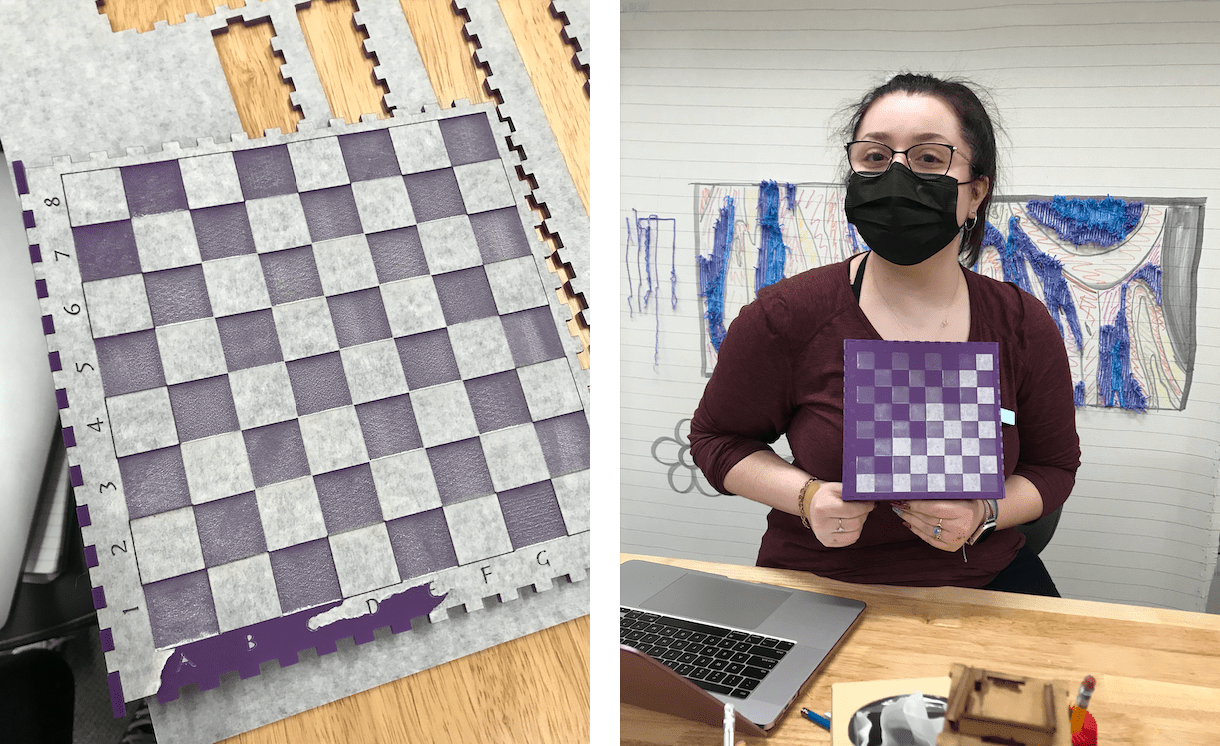
Since the acrylic board was completely opaque, the engravings were not as visible as I had hoped. To solve this, I painted the letters, numbers and zodiac signs with white paint to make them pop!


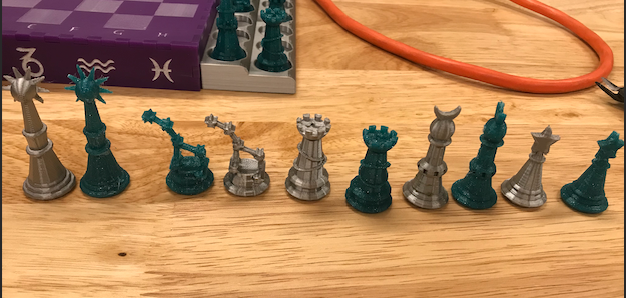
I stuck with the designs of most of my pieces, except for the rook and (after losing my original design) the knight.
It took me two and a half weeks to print all 32 pieces. Only the knight and the king required supports, and other than the intial design of the pawn, the printing went very smoothly! I did find that the blue sparkly PLA was far more stringy than the silver, which made removing the supports and cleaning up the excess strands trickier.

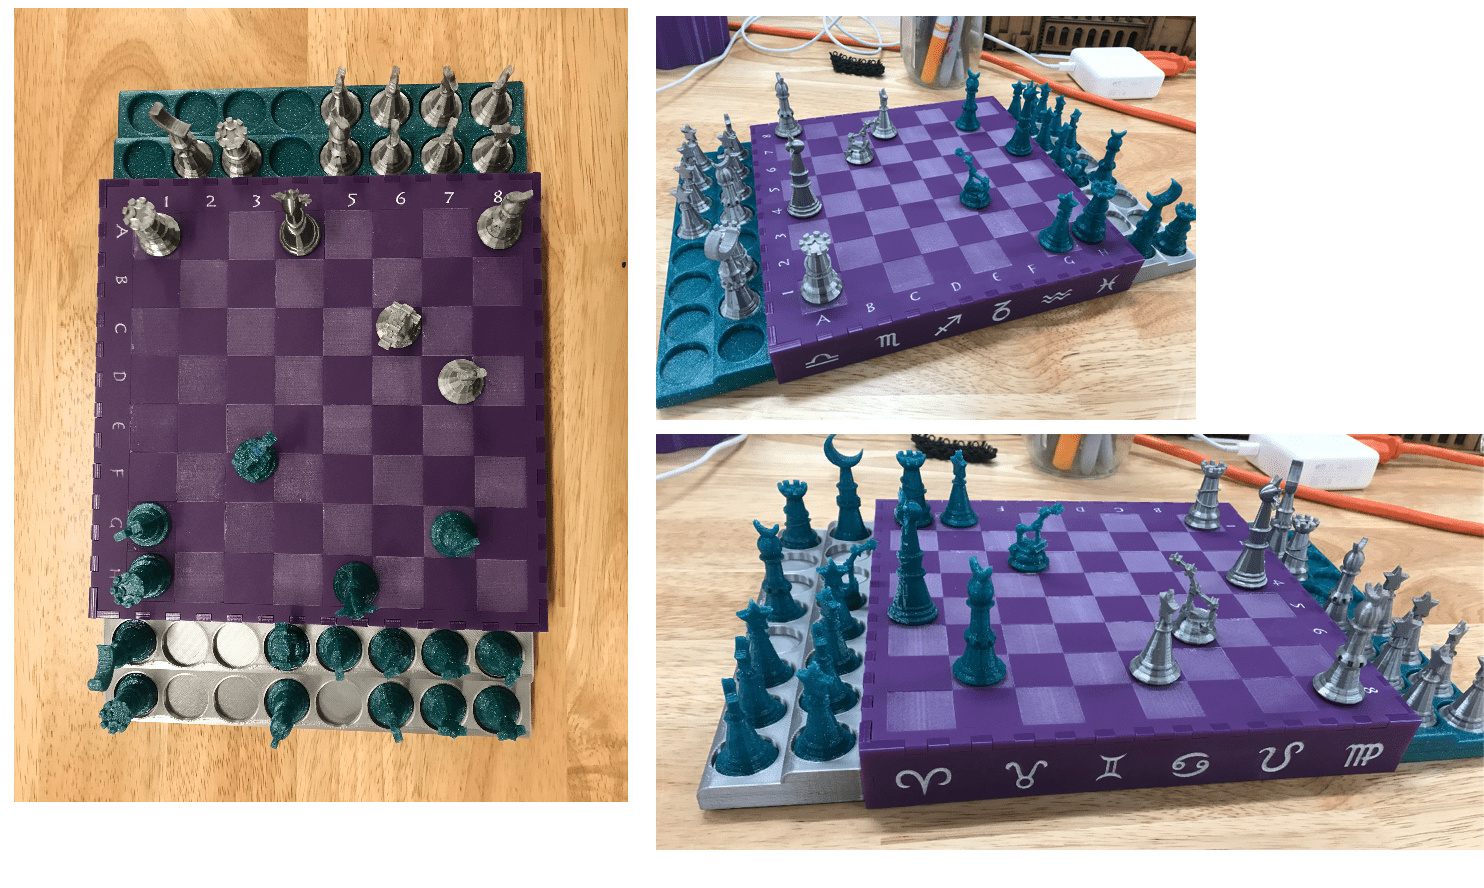
They fit wonderfully into the piece holder, and look great!
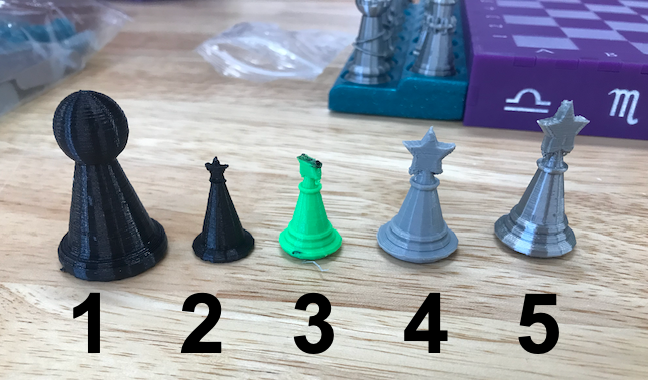
Here are the five iterations of the pawn, and a look at all the pieces!
After lots of trial and error, with my threaded peices, I was finally able to get the piece holders properly attached to the board and could put everything together! Below are some images of my holder and (many) screw iterations and prototypes!
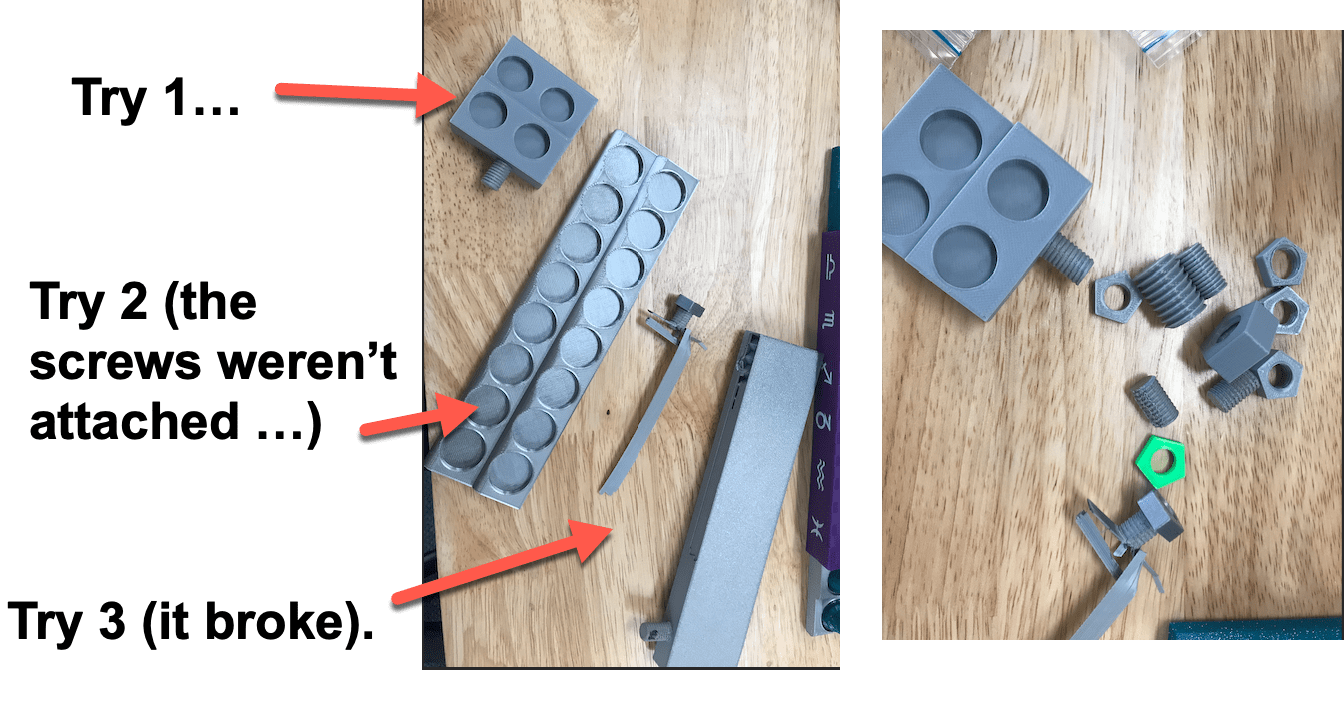
The screws fit perfectly into the holes and securing them was super easy!
After a month of planning, prototyping and fabricating, my chess board was finally complete!
This course is by far one of my favorites I've taken here at Wheaton. I learned so much and was so amazed and proud of the things
I was able to create! I was so glad to be able to spend the last few weeks putting all that I learned into practice. This chess board came out so much better than I had originally intended, and I cannot wait to put it to use!
I want to thank the whole Fab Lab team for being so kind and helpful!