
This week, we used the Glowforge Laser cutter to make a box from a 12x19in thin slab of birch wood!
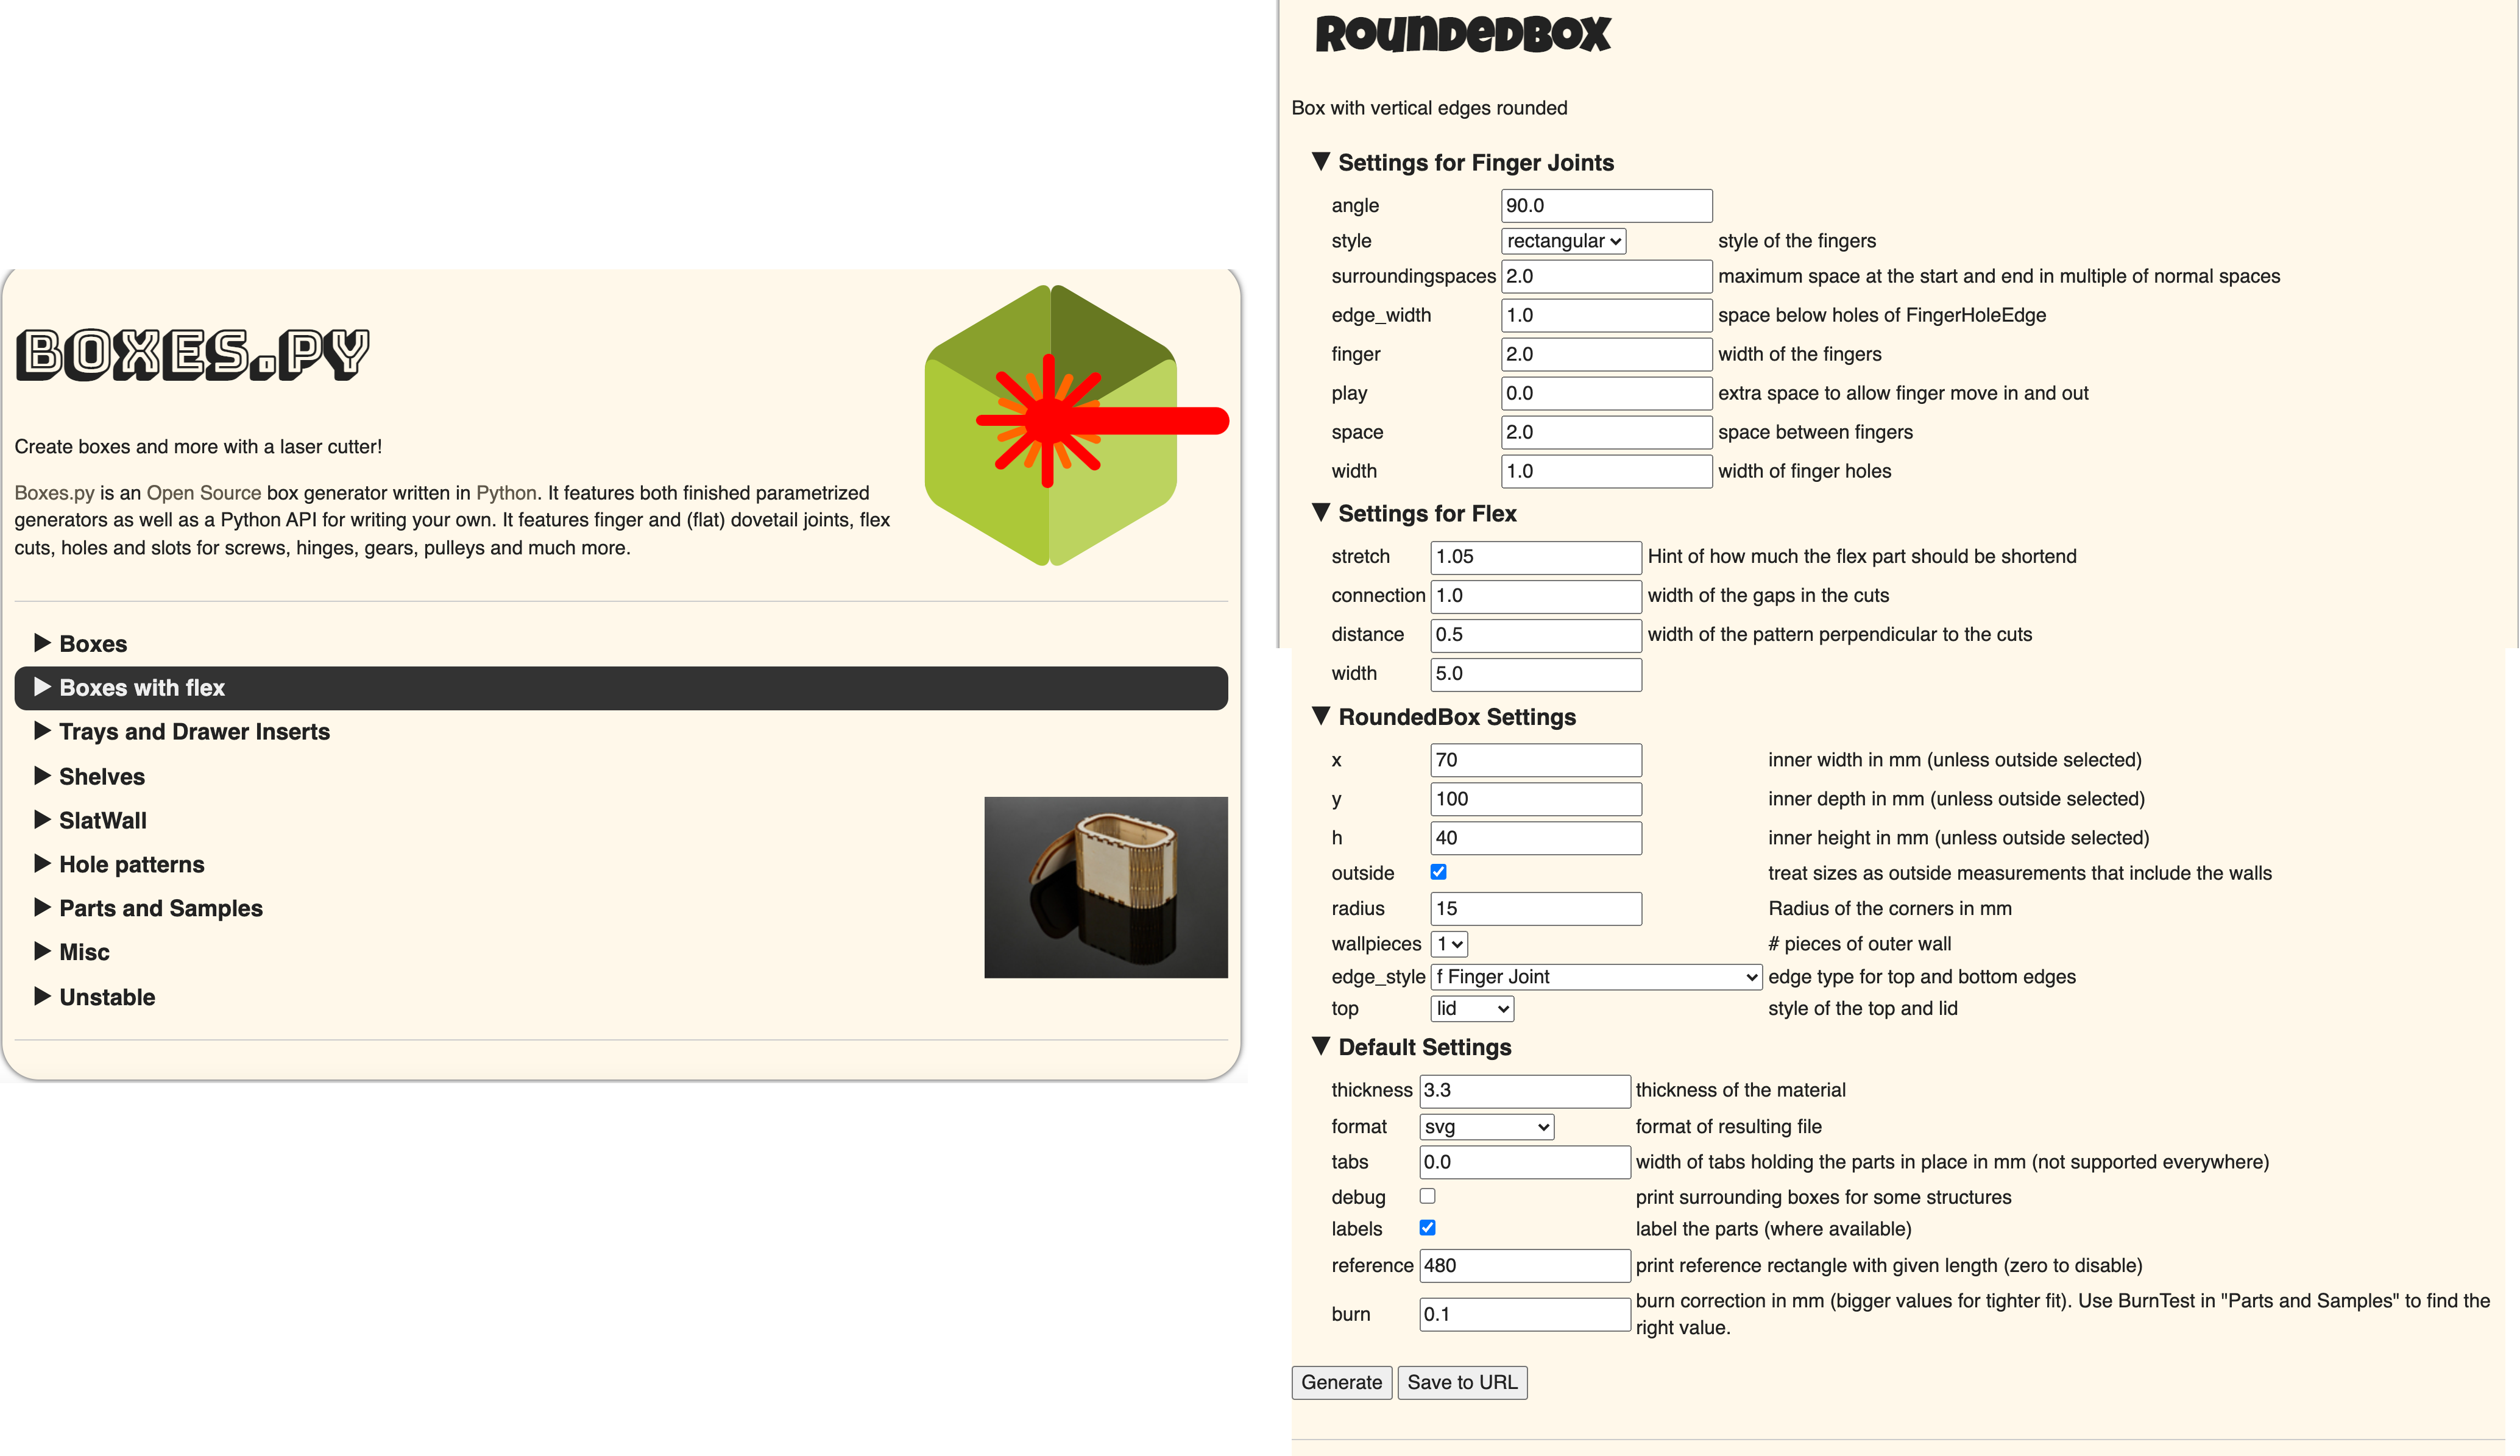
I used an online generator to create my box design. The site gave me plenty of options and customizable features. I chose the basic Rounded Edge box with parametric kerfing on the corners to allow the material to bend, and just adjusted the size. I used the settings shown in the screenshot below to generate my design.
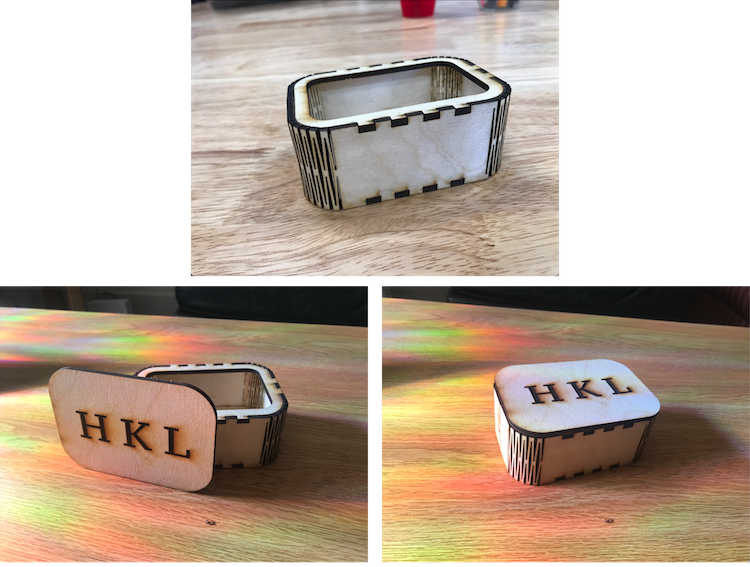
After generating my design in the web browser, I saved it as an svg to my machine then opened it in Adobe Illustrator. I added my initials to the lid, then created outlines from the text so the path would be recognized.


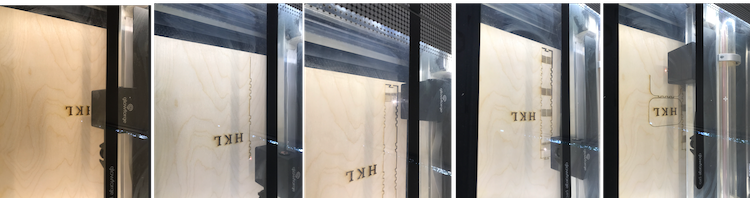
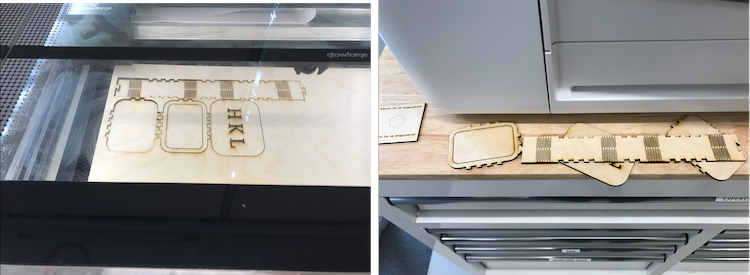
After recieving my training earlier in the week, I was able to use the GlowForge laser cutter in the Fabrication Lab. First, I uploadded my svg design to the browser based GlowForge application. Next I placed my 9x12in wood board into the Glowforge chamber. Last, I turned on the air filter, and sent my design to the cutter. For the next 10 minutes, I carefully watched the machine to ensure there were no fires.

Once the laser cutter had completed, I removed the pieces of my box and began to fit them together. It was definitely a tight fit, but this made it so that I didn't need to use any glue besides for the lid. The building process was super satisfying!
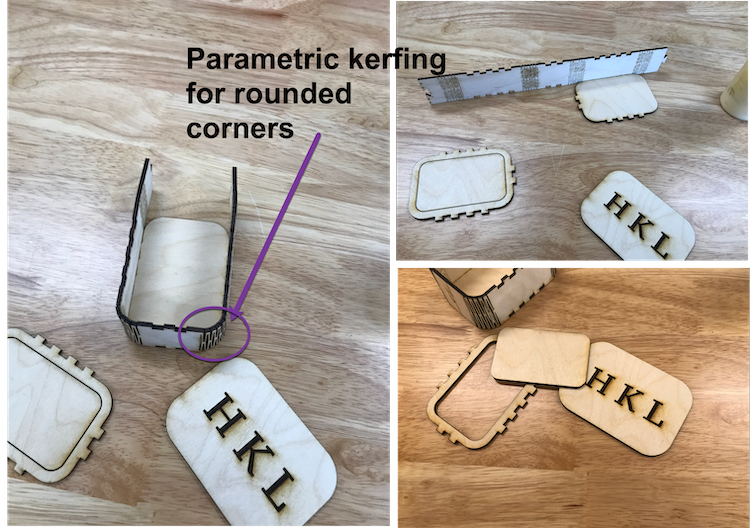
Every week I am more and more amazed to see what these machines can do! The GlowForge was no exception. Watching the machine cut the wood was definitely nerve-racking as there is a high risk of fire, but luckily nothing burst into flames! Assembling the box was so satisfying, and the parametric kerfing was a super cool feature. I am looking forward to doing additional projects on this machine!